Overview
In this procedure, we're going to increase the complexity of the Open Work Order report we created in the Create-a-Simple-Open-Work-Order-Report procedure. We'll look at
- Adding Custom Columns
- Adding Parameters
- Ordering the Data
1. Custom Columns
1. Let's say we want to introduce a column in the report that shows days overdue. Click the Add Column icon in the Fields section:

2. In the popup window, you can use some of the built in functions such as:
- SUM() - Will add the values in that group together (if numeric)
- AVG() - Will calculate an average of the grouped values (if numeric)
- MIN() - Will return the lowest value in alpha-numeric order
- MAX() - Will return the highest value in alpha-numeric order
- COUNT() - Will return the number of records that are grouped in that row

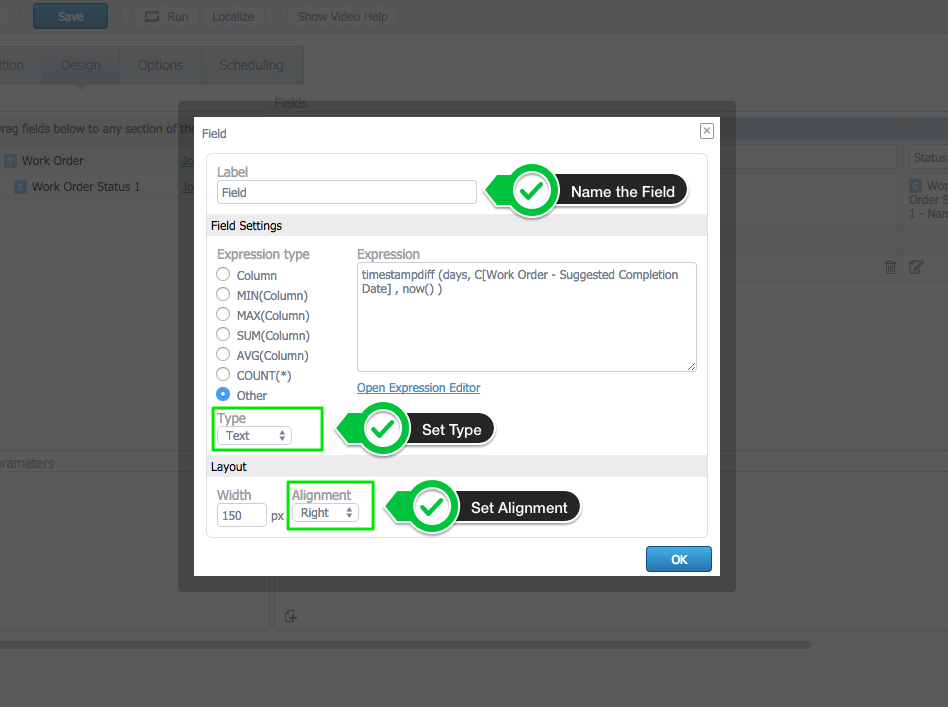
3. In this case, the custom column requires a different SQL function. Select Other, and click Open Expression Editor

4. For example, lets say we want to see the days overdue on a work orders report. We need to create a column for Days Old that shows the difference in days between the suggested completion date of the work order, and the present time. The code looks like this:
timestampdiff (day, C[Work Order 1 - Suggested Completion Date] , now() ) or timestampdiff (day, C[Work Order - Suggested Completion Date] , current_timestamp )

5. Click OK to save.
6. In the pop up window, you can choose a Label for the custom field otherwise it will show up as "Field" in the report. Set the field Type, Width, and Alignment if necessary. In this case, we will see a number so we'll set to align right. Click OK to save.
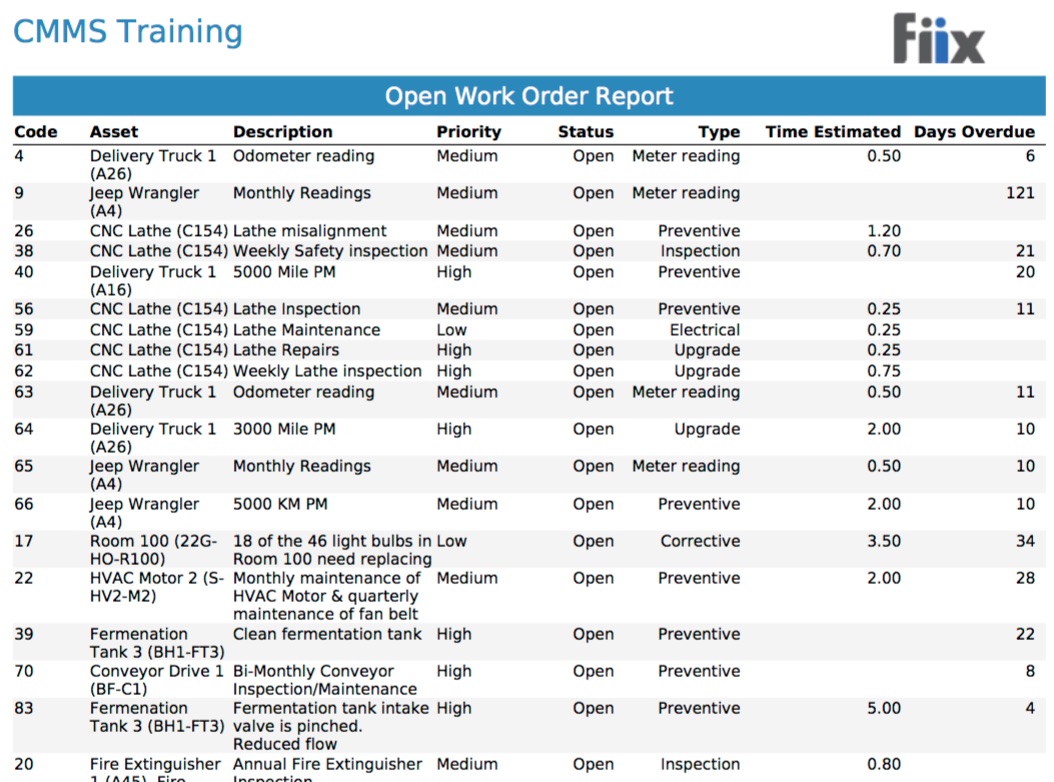
The report looks like this:
2. Adding Parameters
In a report, parameters are used to enable the user to custom filter the data in the report each time the report is run. For example, lets say you want to run a work order report for a certain priority type between two dates, however, those dates can change each time the report is run. You need to create three parameters for priority, from date and to date.
7. To add a parameter, click New in the Run Parameters section.

8. You can then customize your parameter for your needs. In this example, a “From Date” parameter has been created of Date Type. The type means the date input window will be presented to the user when running the report.

9. For the priority parameter, we can choose a picker so the user doesn't have to type:

Once you have created your parameters, they won’t do anything unless you create conditions for the parameters in your report. You need to return to the filter section, and create a filter for the parameters. The filter should refer to the value of the parameter at run time, and change the data or appearance of the report.
10. For the above example:

11. The Advanced filter for this scenario would look like the following:

Here's the code:
(C[Work Order 1 - Priority id] = P[Priority])
and (C[Work Order 1 - Date Created] between P[From Date] and P[To Date])
and (C[Work Order Status 1 - Name] like '%Open%')
3. Order By
The ORDER BY keyword sorts the records in ascending order by default. To sort the records in a descending order, you can use the DESC keyword. This is built in functionality in our reports writer so you don’t need to write the code.
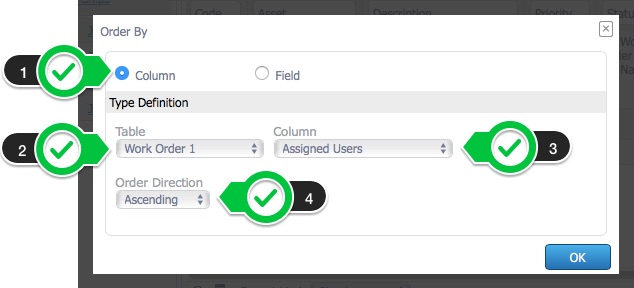
1. Click New in the Order window to add an ordering condition:

2. You can sort by any column or field, ascending or descending. In this example, the days late column is sorted so the report orders the work orders by latest first:

3. In this example, we've created a filter for assigned users. Assigned users do not feature on the report but we can still order the data so the report groups orders work orders by assigned user.
4. Repeat the process as many times as you like for more complex reports.