Before you begin
Plans: Basic, Professional, and Enterprise
Overview
This article demonstrates how to create a scheduled report. Scheduled reports are automatically emailed to CMMS users email inbox, at intervals defined by the report schedule.
Note: Inactive users can also receive scheduled reports to their email inbox. This feature is available to accounts with access to the 3rd Party Notifications feature.
Steps:
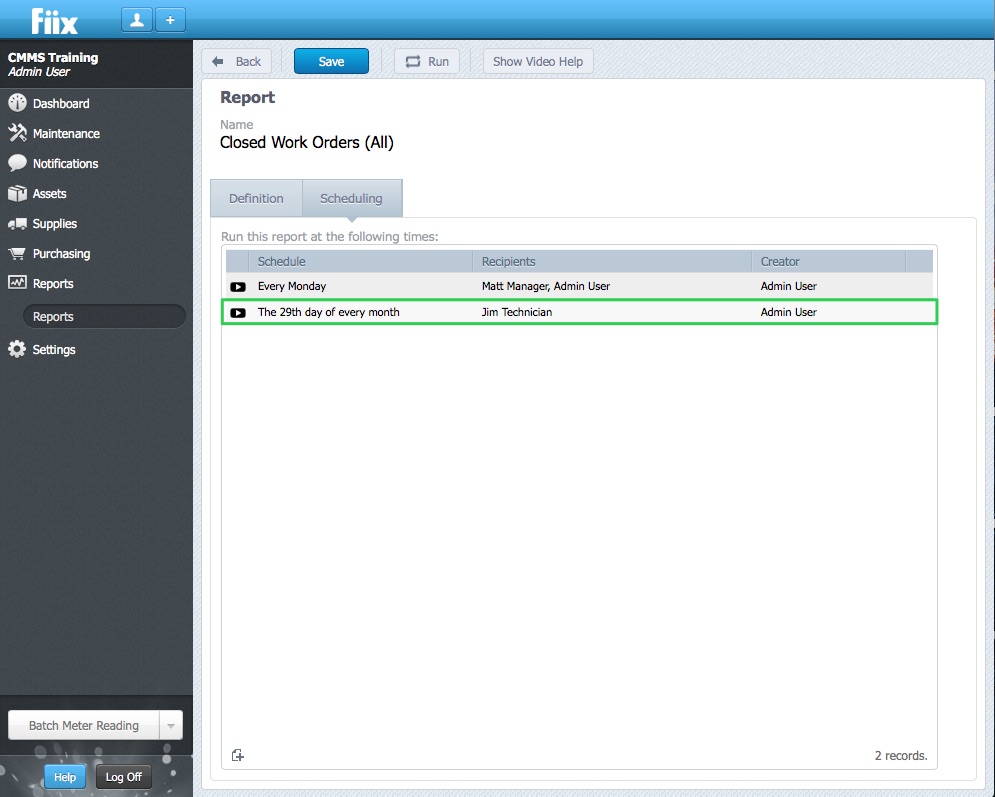
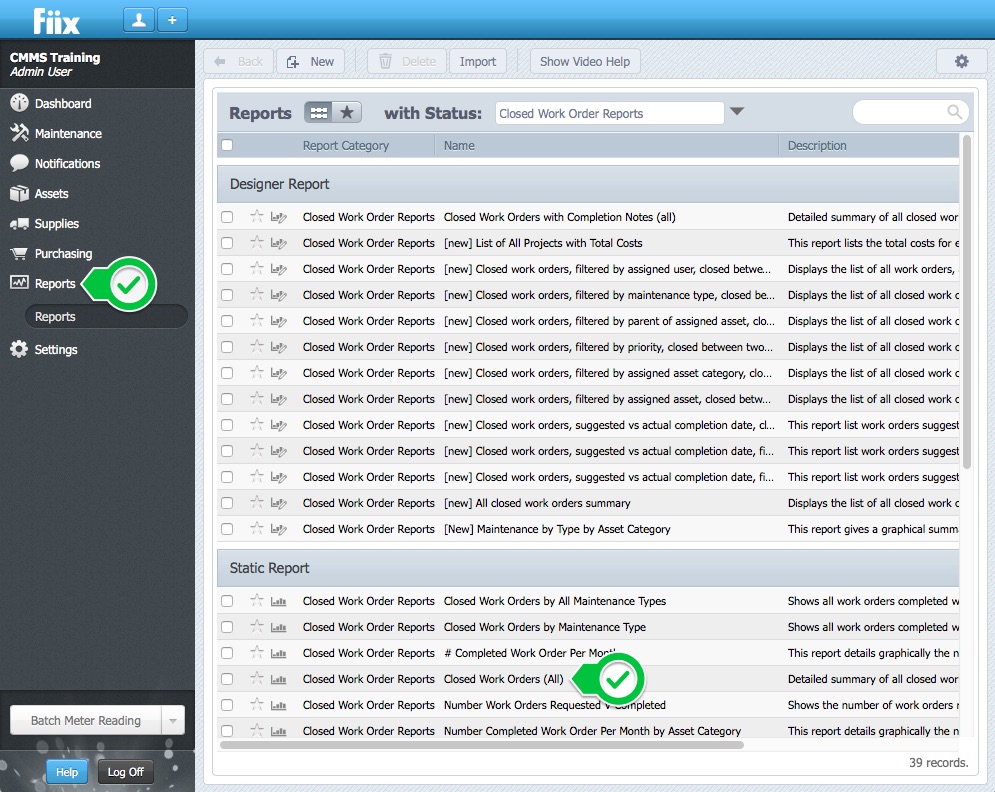
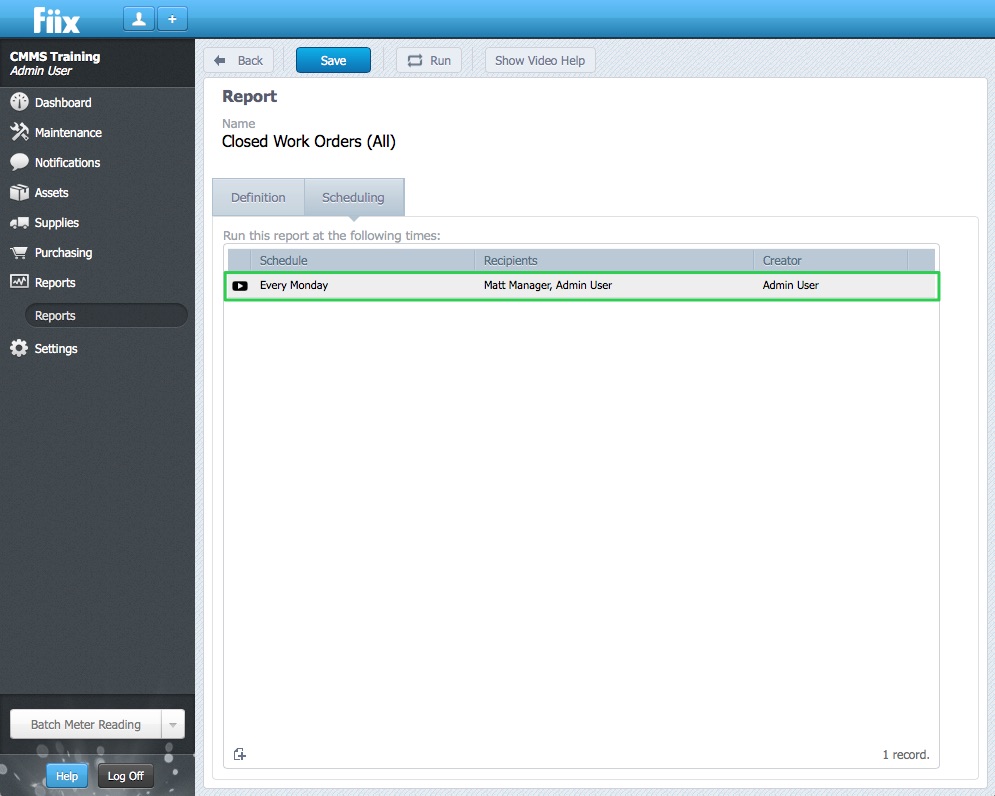
1. To create a scheduled report, click Reports, and select a report
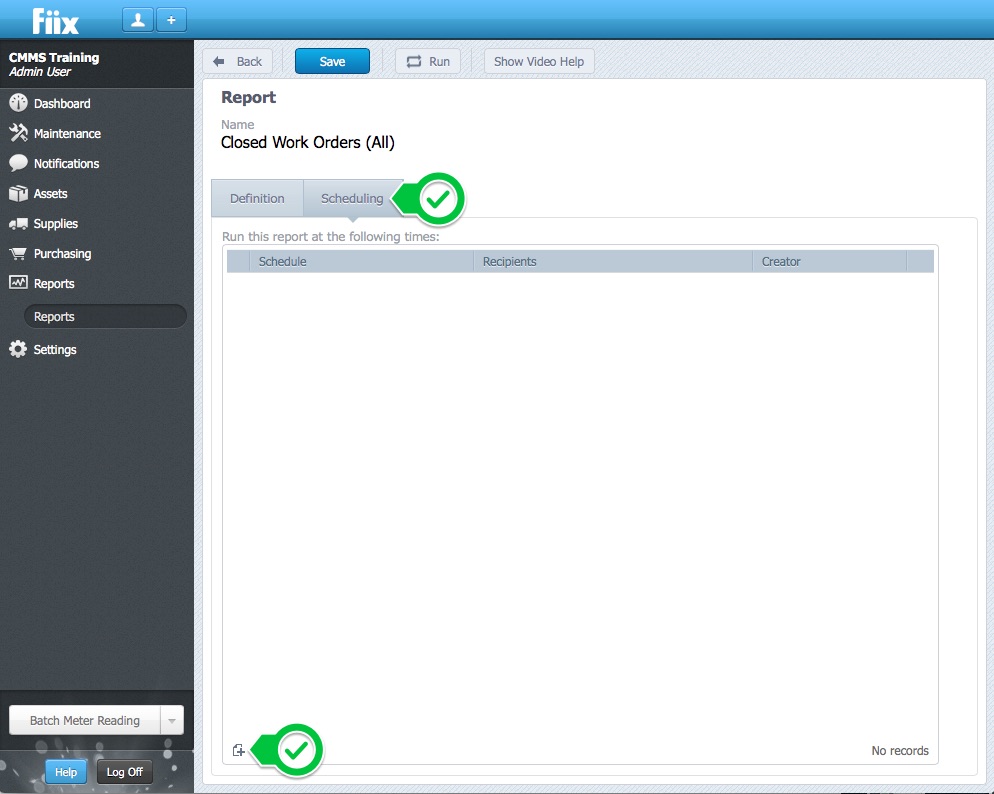
2. Click Scheduling, and New
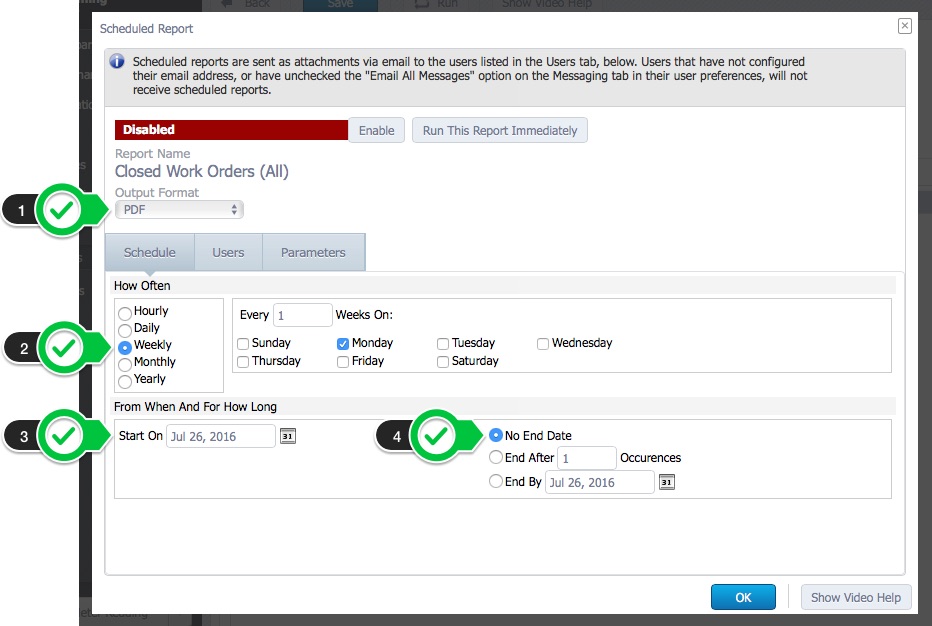
3. The Schedule tab is selected by default. This tab is used to define the report schedule, and select how the report format will be rendered.
Select a report Output Format from the dropdown menu, and select a setting from the How Often section. Choose a Start On date to define when the report schedule will begin its cycle. Finally, select an end date. The end date options are No End Date, End After x Occurences, or End By a date.
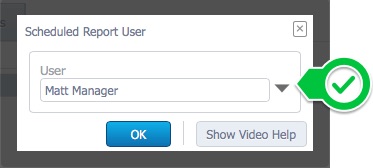
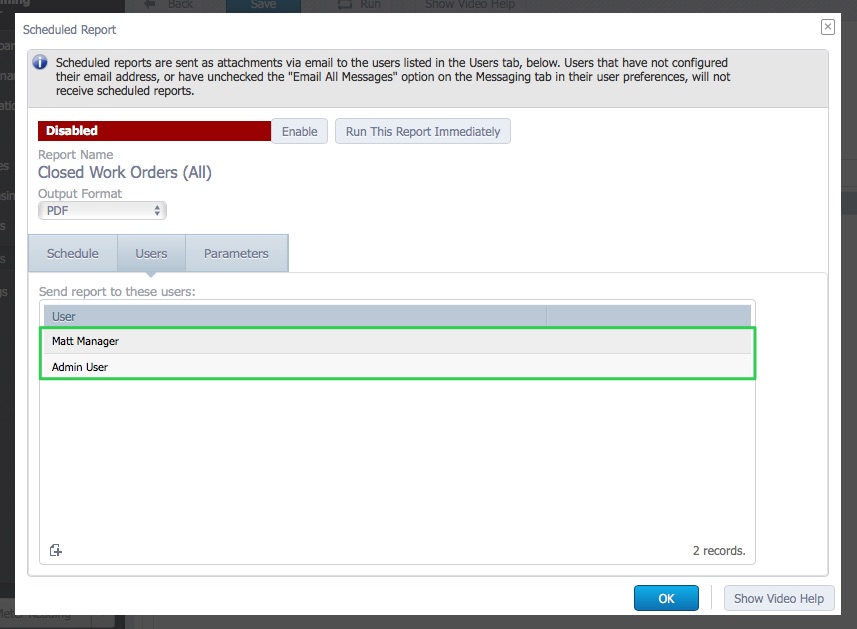
4. To assign the report to a user, click Users, and New

5. Select an active, or inactive user from the dropdown menu, and click OK
6. Repeat step 5 until all of the users are assigned to the schedule report
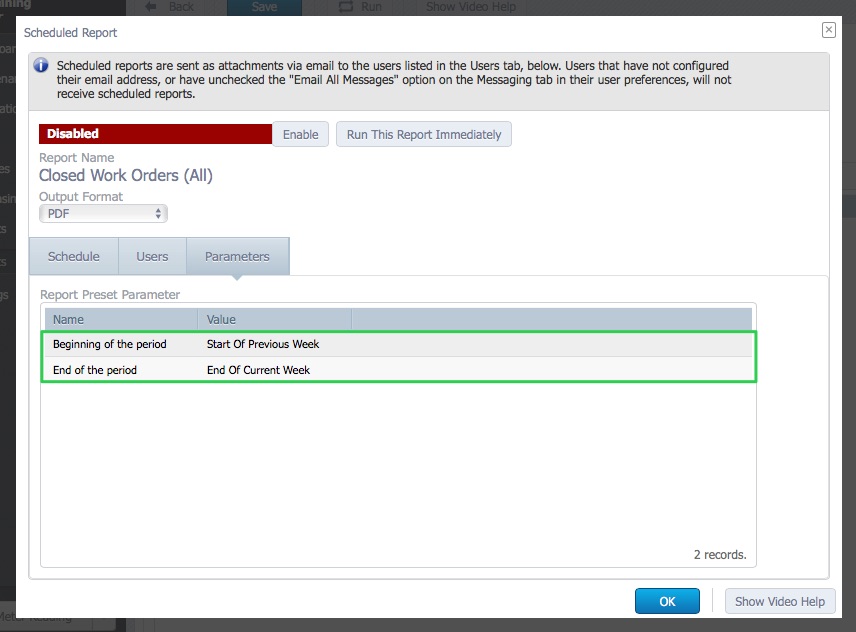
7. Click Parameters to configure the report output. Click the Report Preset Parameter names to edit the values
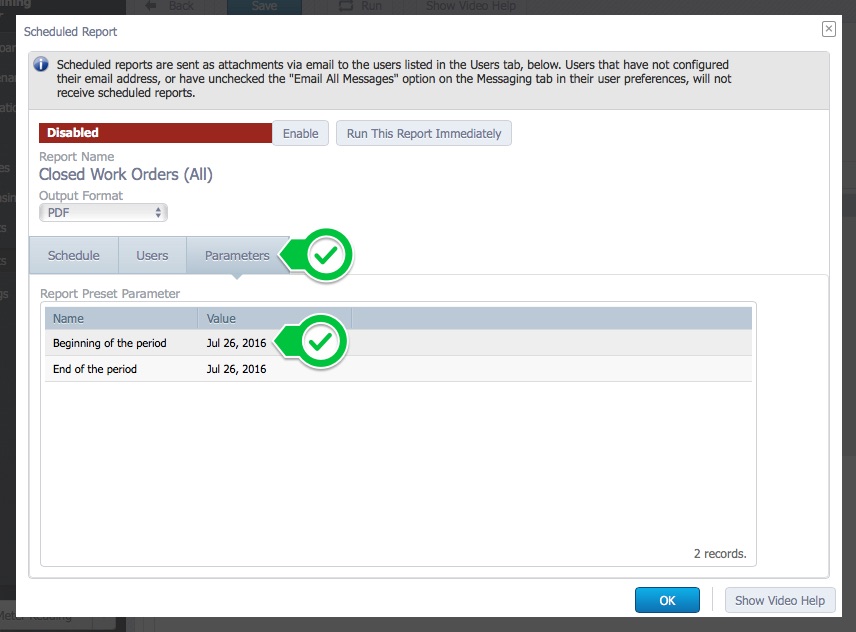
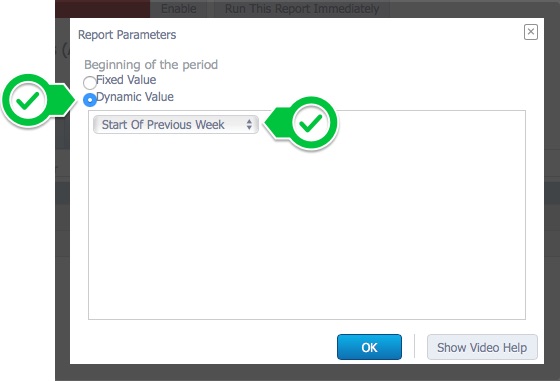
8. To enter a value that does not change, select Fixed Value, select a value, and click OK. To enter a value that does change, select Dynamic Value, a value from the dropdown menu, and click OK.
9. Repeat step 8 for the other Report Preset Parameter.
10. Click Enable, to activate the scheduling, and OK to save
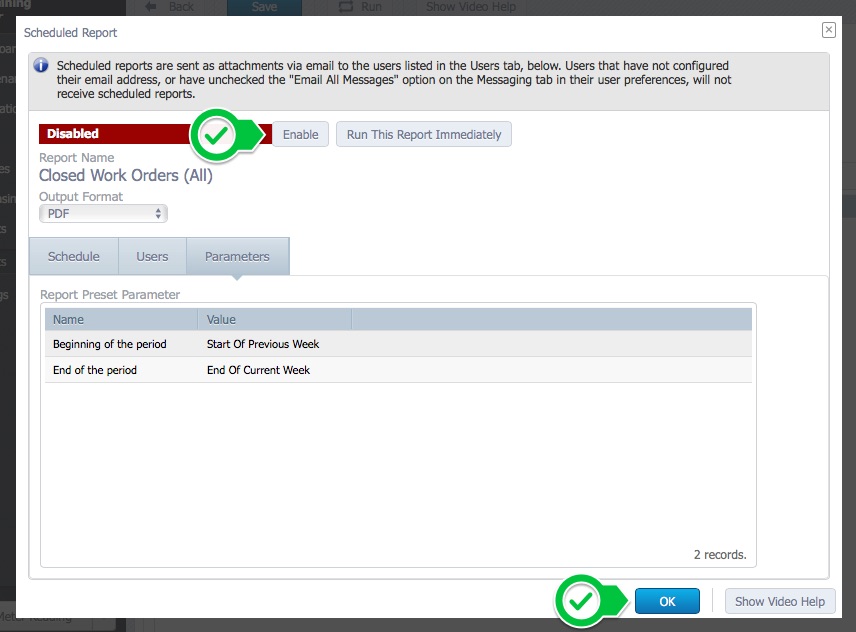
11. The report schedule is now active
12. Follow steps 2-11 to add another schedule