Before you begin
Audience: Admins
Related: Scheduled maintenance import template (one-click download), Edit scheduled maintenance
Import tips:
- Records that contain special characters (commas, quotation marks, etc.) can result in corrupted data, and can even cause imports to fail. We suggest doing a test import with only 2 or 3 records to ensure your formatting is correct. To learn more about special characters in import files, see Troubleshooting Imports.
When importing, any columns that you leave blank will result in blank records, as they are not auto-populated by the CMMS. To prevent unexpected issues, we suggest removing any columns you don’t need to update.
None of the field headings (like SM code or Asset code) are required fields. You can leave a column blank for any scheduled maintenance if information is not available. The data can be entered manually later.
Scheduled maintenance activities can be imported to the CMMS using CSV file types.
Overview for importing scheduled maintenance:
- Create a spreadsheet or use the template and save as a CSV file.
- Upload the CSV file to the CMMS using the import tool.
- Manually set the triggers for each scheduled maintenance.
- Manually set the scheduled maintenance to active.
In this article:
- Import basic scheduled maintenance
- Import scheduled maintenance with multiple tasks
- Import scheduled maintenance for single asset with task group
- Multi-asset scheduled maintenance import
Import basic scheduled maintenance
Create and upload basic scheduled maintenance using import:
- Create a CSV file in your spreadsheet software (Excel, OpenOffice) with the following headings (or download the template at the beginning of this article):
| Field heading | Description | Example |
|---|---|---|
| SM Code | The scheduled maintenance code | SM44 |
| Asset Code | The code (or name) of the asset for which the scheduled maintenance should apply. These are stored in the asset records in your CMMS. | A98 |
| SM Description | The general description for the Scheduled Maintenance | Weekly inspection |
| Task Description | The task to be done | Inspect all parts |
| Date Created | The date that the scheduled maintenance was created (must be in format Mon ##, 2026, HR:MN:SC AM | Aug 09, 2026 10:30:00 AM |
| SM Status | The status for the scheduled maintenance. Options include "Open", "Closed" and "Assigned" | Open |
| Priority | The priority for the scheduled maintenance. Options include "Highest", "High", "Medium", "Low", and "Lowest" | Lowest |
| Maintenance Type | The type of maintenance. Options include the maintenance types specified in your CMMS. | Inspection |
- Fill in the details for each scheduled maintenance field:

- Save the file as a CSV.
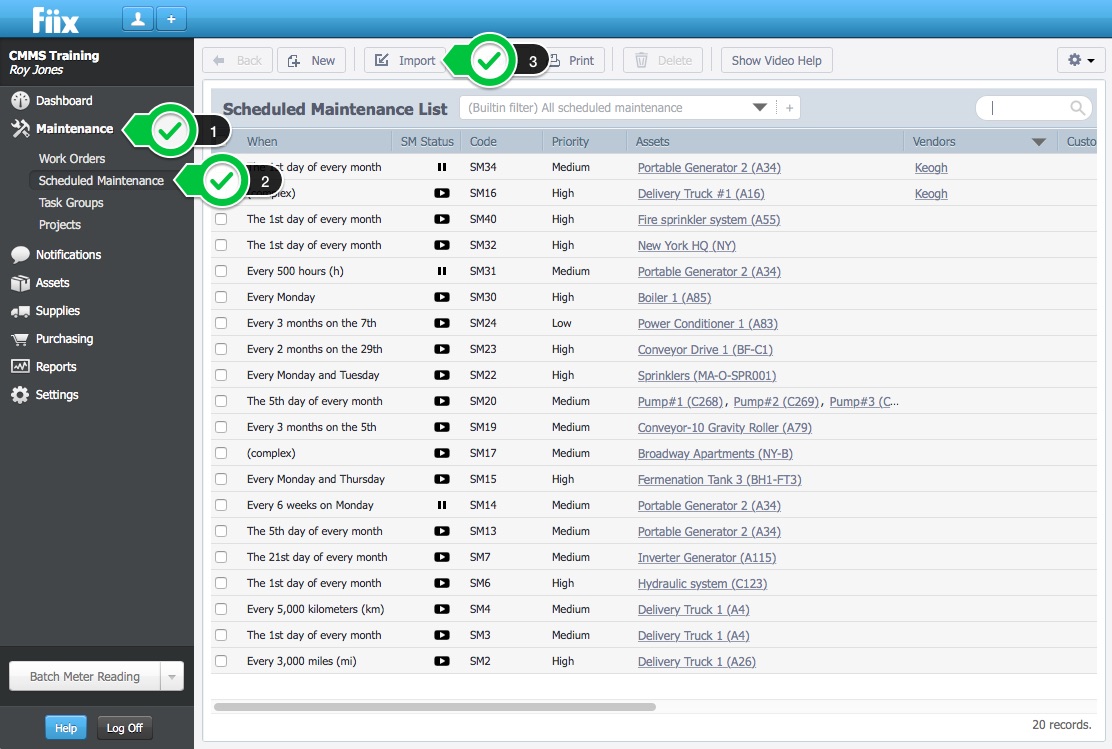
- To upload the CSV file using the import tool, click Scheduled Maintenance then Import:
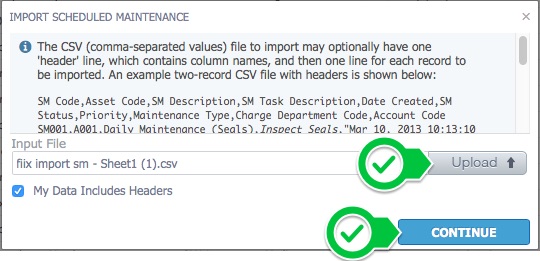
- Click Upload and choose the CSV file from your device. Then click Continue:
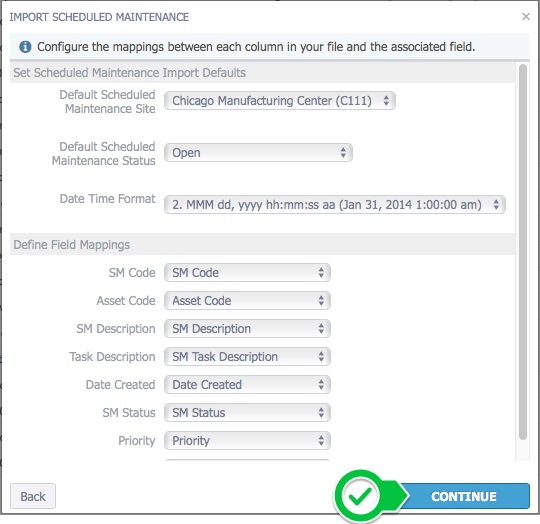
6. The system will ask you to complete the import by filling in:
- Site - With the multi-site feature enabled, you will need to choose the site that the Scheduled Maintenance belongs to. You cannot import a Scheduled Maintenance that includes two assets in two different sites.
- Default Maintenance Status - Choose your Status, Requested, open etc.
- Date/Time Format - There are nine formats available to you.
-
Define Field Mappings - Match these headings with those in your CSV file.
7. In the Review pop-up, you can confirm the import by clicking Import or click Back to return to adjust your items: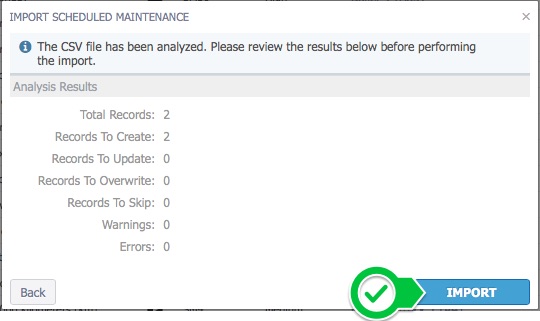
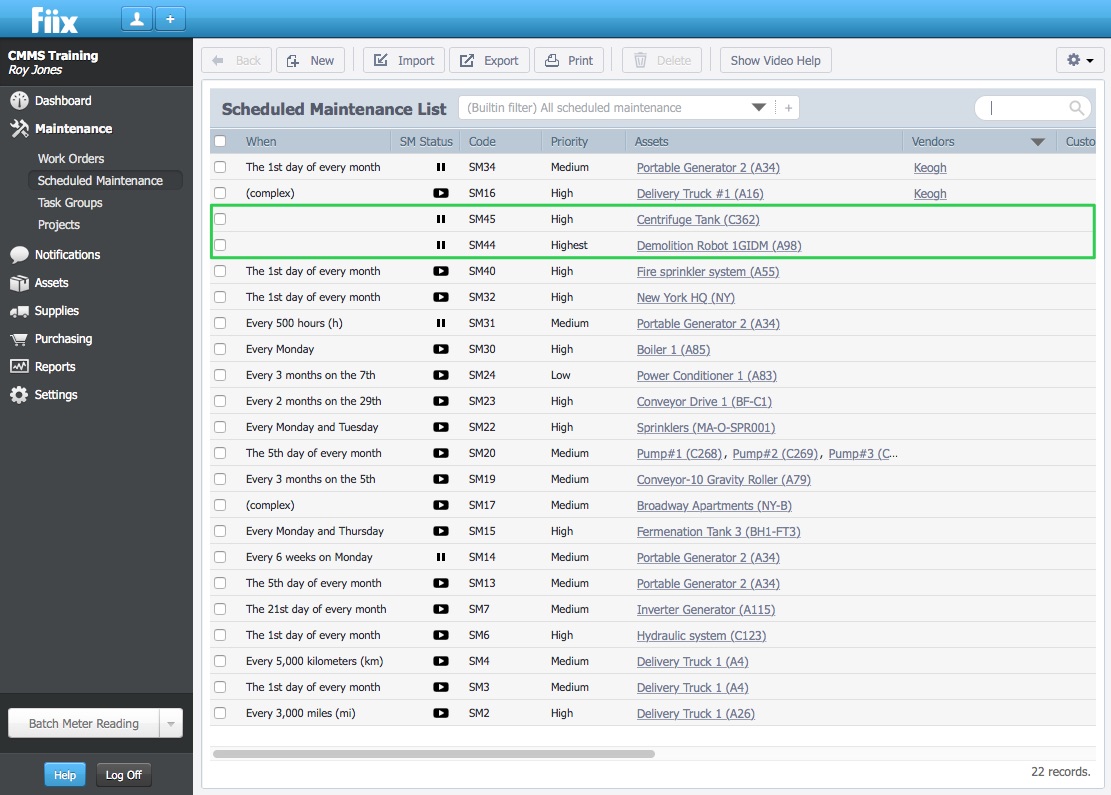
8. The system will confirm your import. Click Done, and your Scheduled Maintenances will now be displayed with any existing Scheduled Maintenances: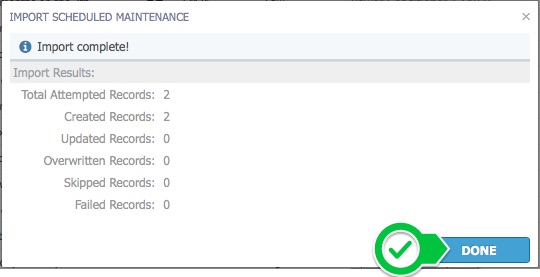
9. To edit your scheduling trigger, see About scheduled maintenance triggers.
Import a Scheduled Maintenance with Multiple Tasks
To import a scheduled maintenance with multiple tasks, create a csv. where all of the information is identical including the SM Code, Asset Code, SM Description, Date Created, SM Status, Priority, Maintenance Type, except for the Task Description.

Import scheduled maintenance for single asset with task group import
- Create a Task Group in your CMMS.
- Instead of a Task Description header, use Task Group
- Under the Task Group header, insert the name of the Task Group. In this example it is called Weekly PM
- Once you have your SV file in order, follow the steps outlined above.

Import multi-asset scheduled maintenance
To import a multi-asset scheduled maintenance, create a CSV file where all of the information is identical including the SM Code, SM Description, Task Group, Date Created, SM Status, Priority, Maintenance Type, except for the Asset Code.

Note:- The import has multiple error checking features:
- If you specify an asset that does not exist, it will create a new asset with that name
- Any data that is not provided can be filled in at a later date manually