Before you begin
Plans: All
Version: v5 (see Calendar for v6)
What's in the calendar?
1. Administrator vs. technician View
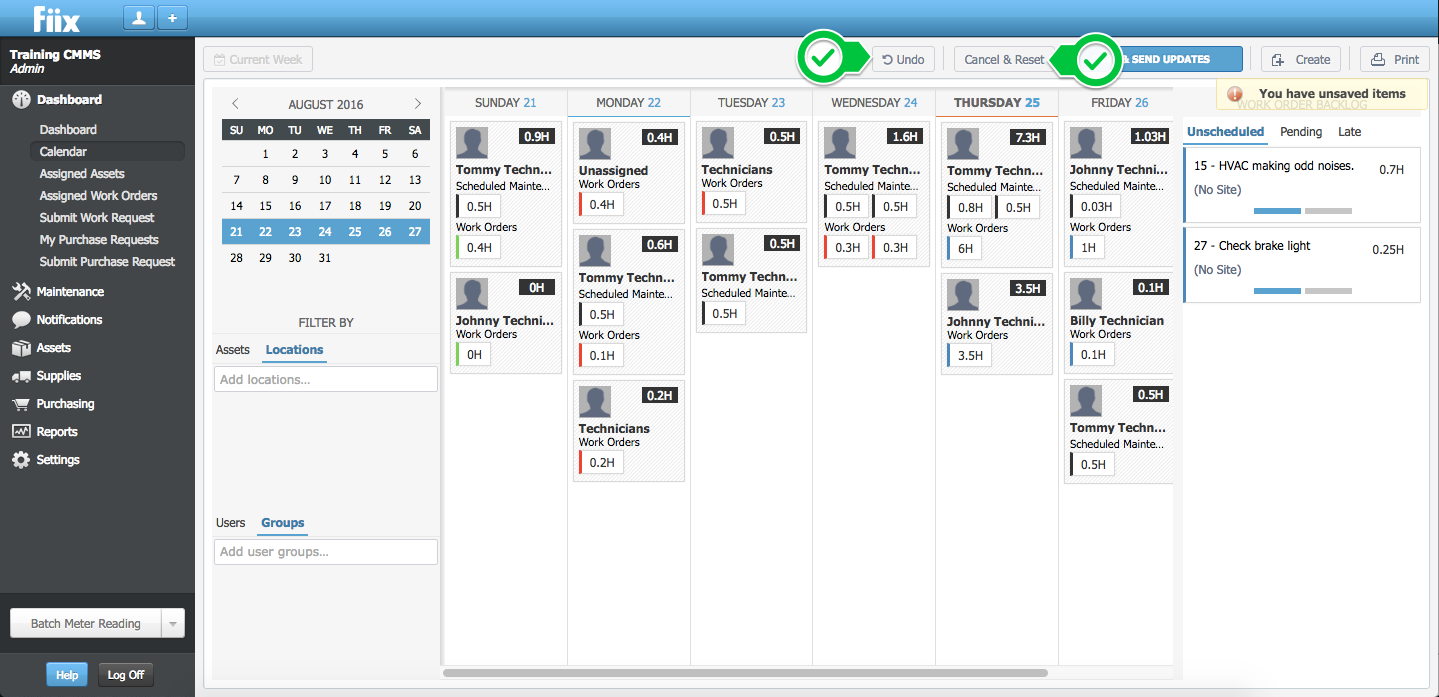
1. The administrator view of the calendar includes all outstanding work orders.

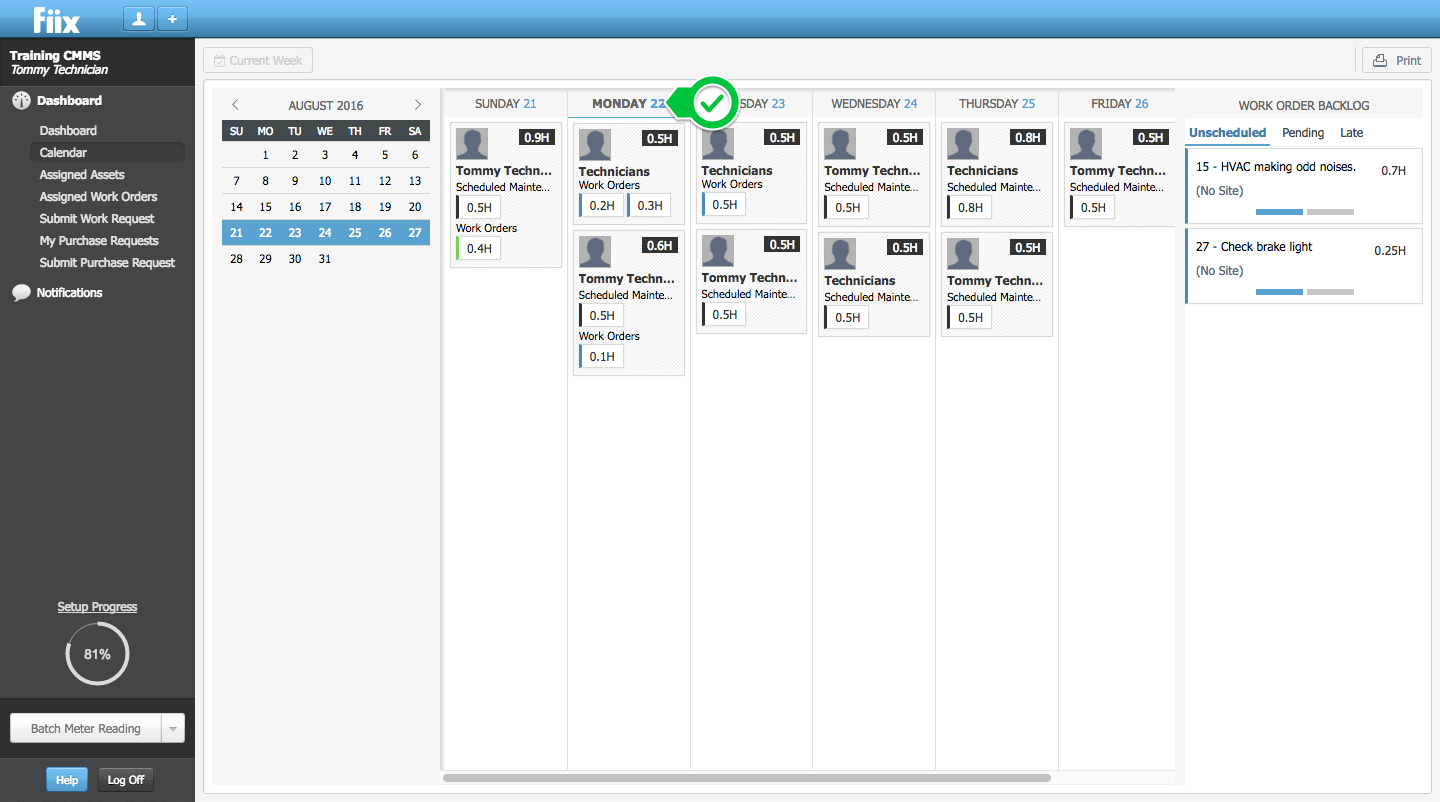
2. The technician view of the calendar identifies work orders assigned to the signed in technician. This would include both individually assigned work orders, and those belonging to the technician's group.

2. Week vs. day view
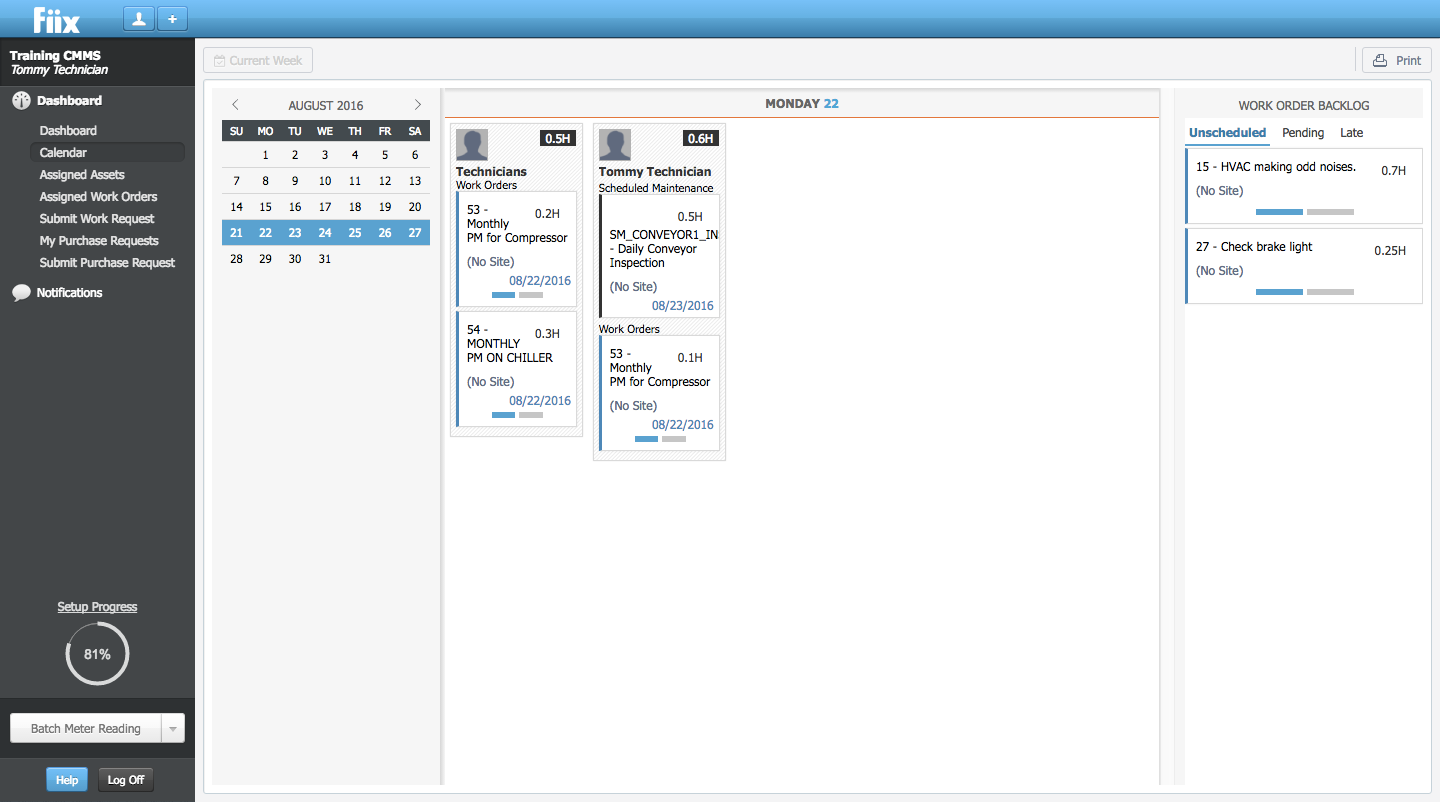
1. To switch into a day view of the calendar, click on the day of the week.
2. The day view offers additional details such as the type of work that needs to be completed.
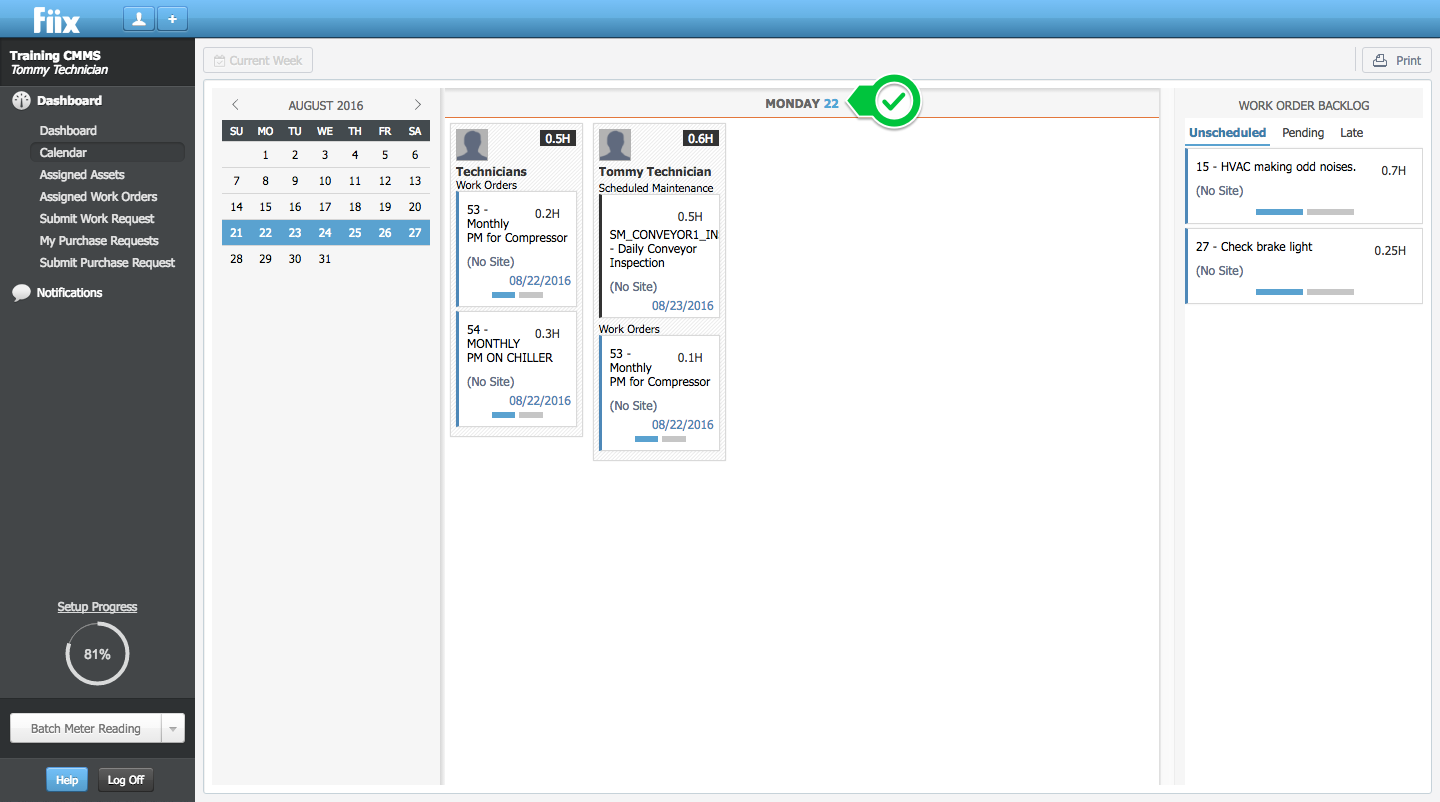
3. Click on the calendar day to toggle back into the week view.
3. How the work orders are organized
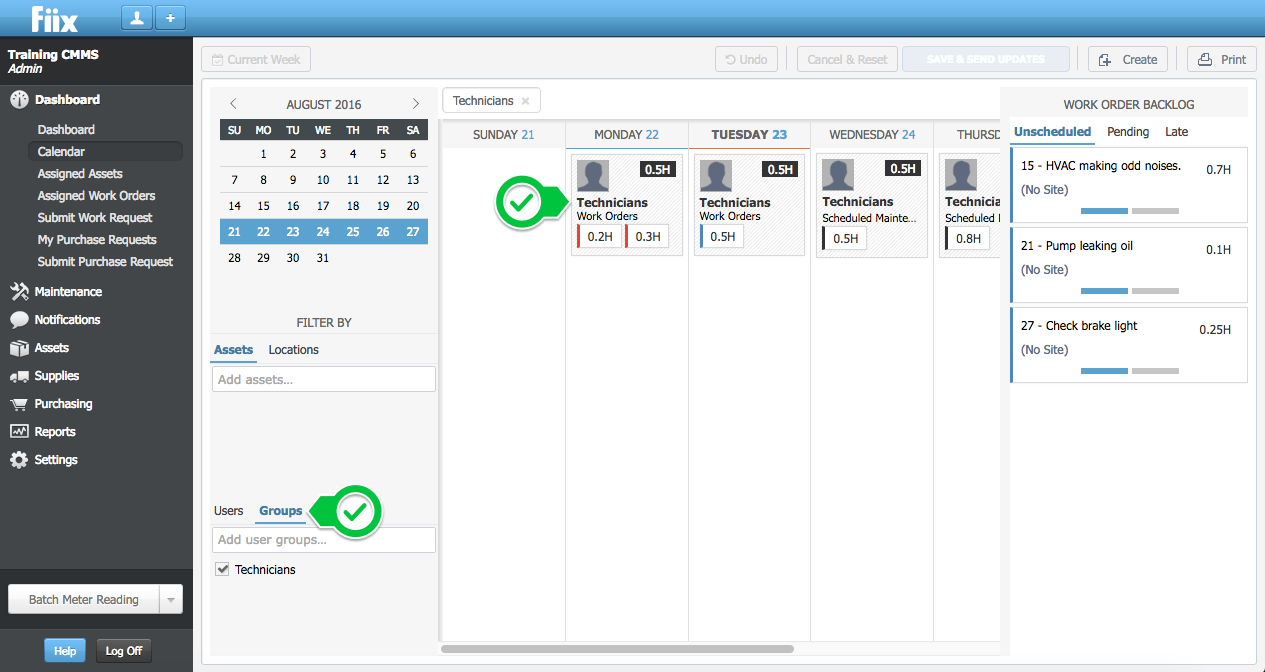
1. Grouping
Grouping allows you to view work orders specific to a user or user group.
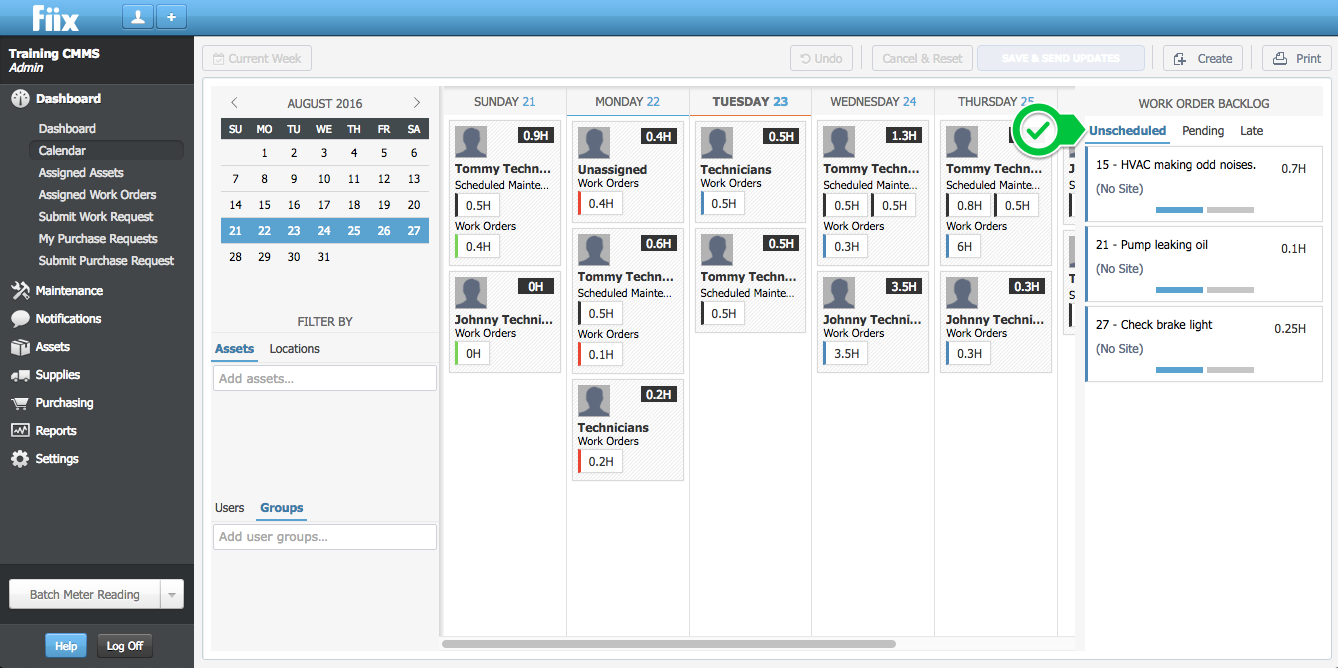
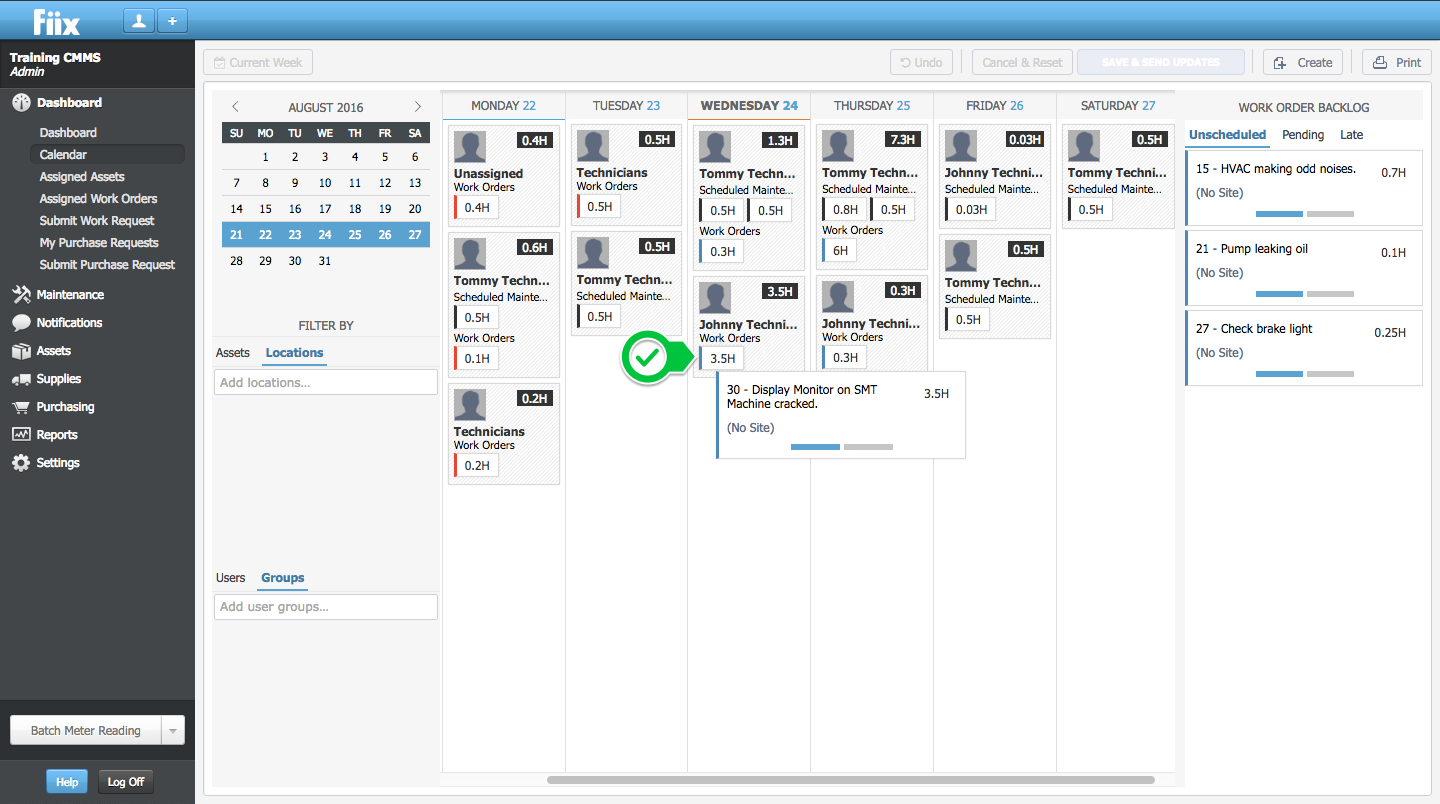
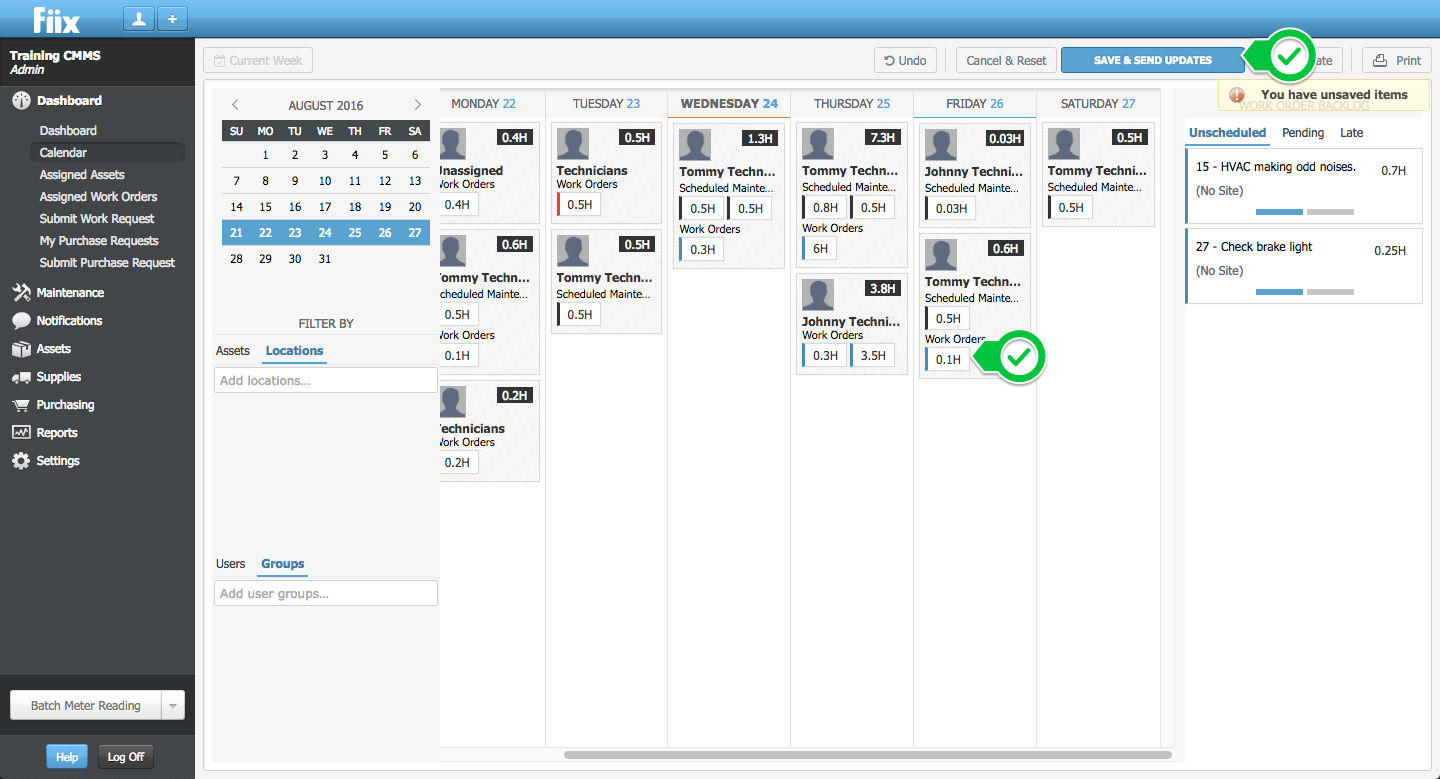
2. Total number of work hours
The total number of daily scheduled work hours by user are displayed in the upper right-hand corner of the technician's box.
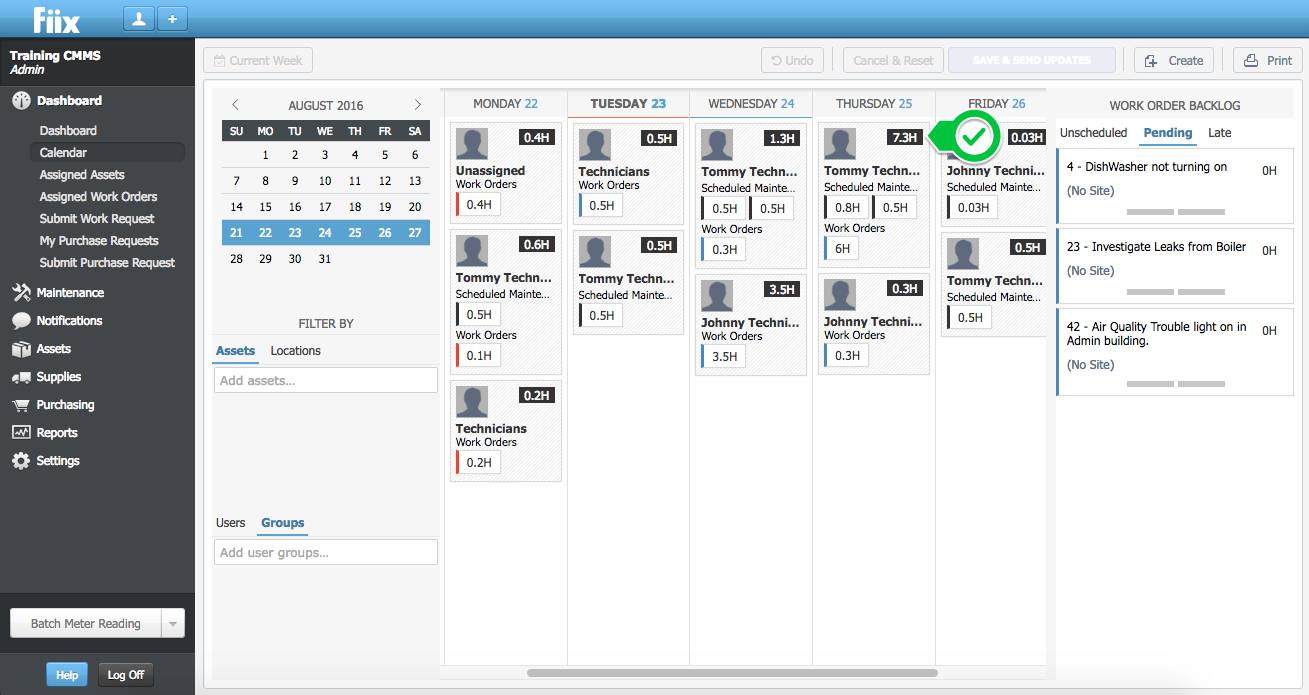
In this example, on August 25th, the user "Tommy Technician" has 7.3 total hours of work scheduled.
3. Hours per work order
The hours per work order are displayed in the bottom portion of the technician's daily scheduled work frame. Each box represents an individual work order.
In this example, on August 25th, the work day for "Tommy Technician" consists of one six-hour reactive work order and two scheduled maintenance work orders of 0.8 and 0.5 hours respectively.
4. Multiple task work orders
Work orders with multiple tasks assigned to multiple users will be assigned per user. For example, if a work order is assigned to two users, both users will have the same work orders assigned to them; however, the hours will reflect the respective tasks.
3. Scheduled vs reactive work orders
Scheduled maintenance work orders are listed under the scheduled maintenance header, while reactive work orders are listed under the work orders header.
4. Work order backlog status
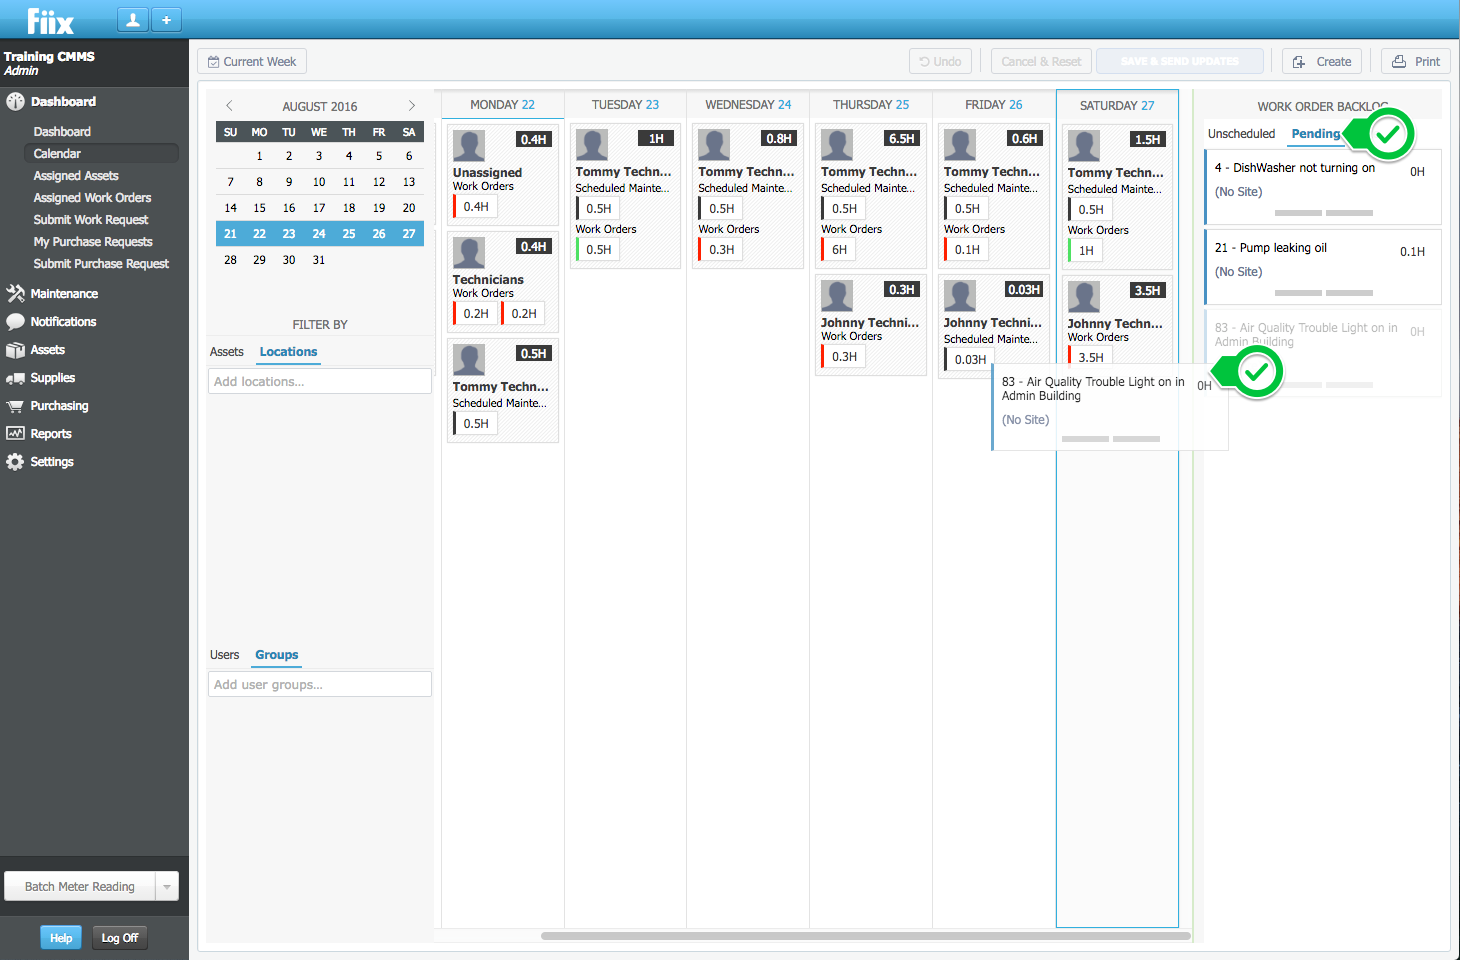
1. Unscheduled
Assigned work orders without a scheduled date are considered unscheduled in the work orders backlog menu.
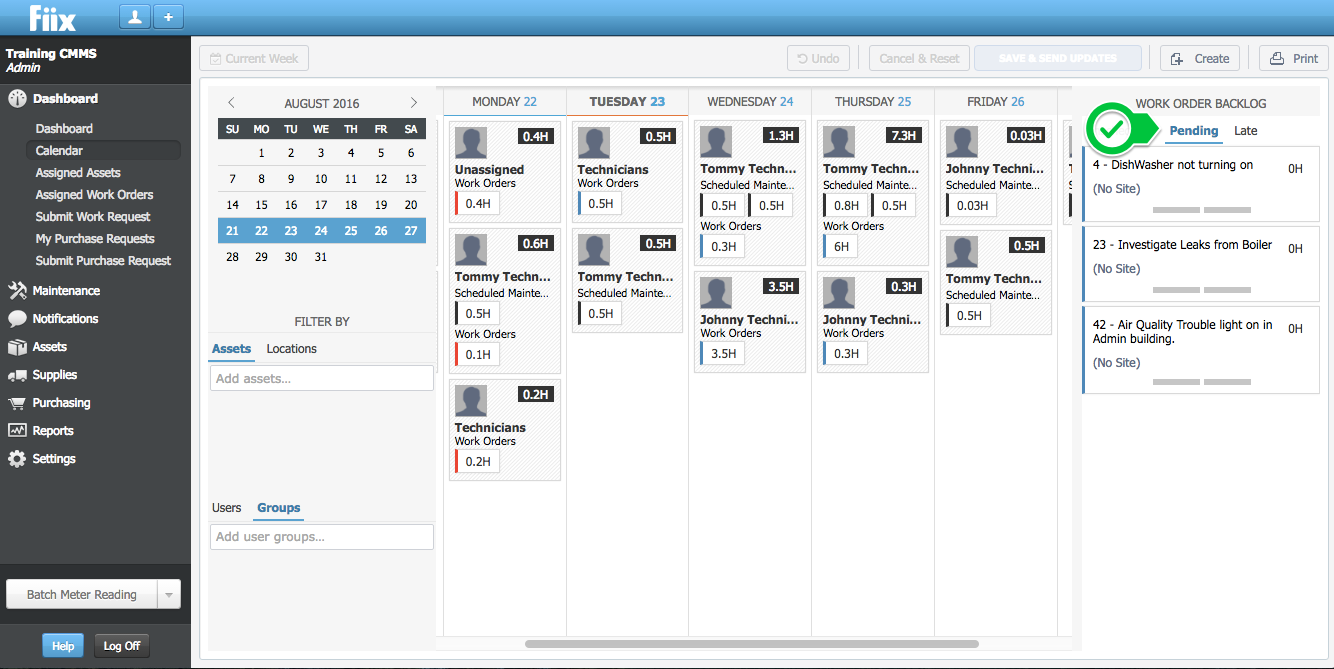
2. Pending
Work orders with a pending status are listed in the pending section.
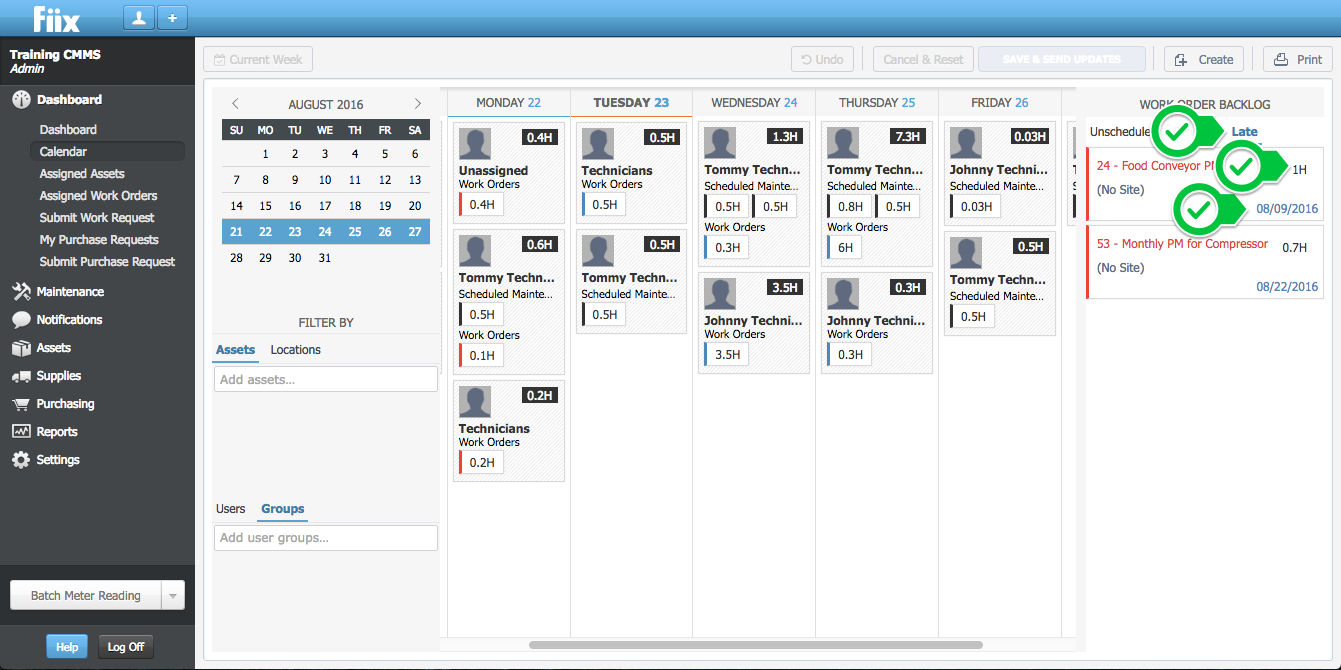
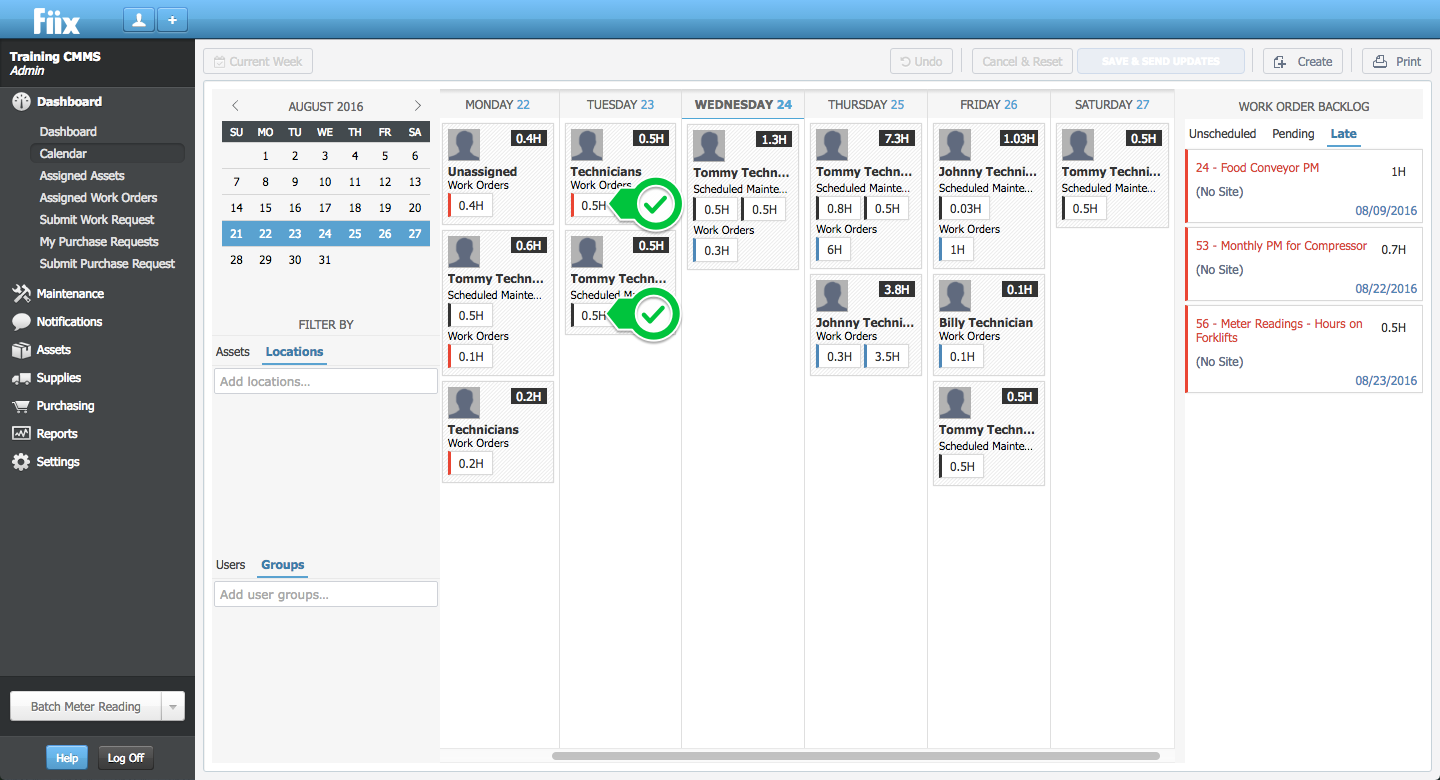
3. Late
Work orders past their required completion date are considered to be late. The time to complete and the originally anticipated completion date is displayed in each work order.
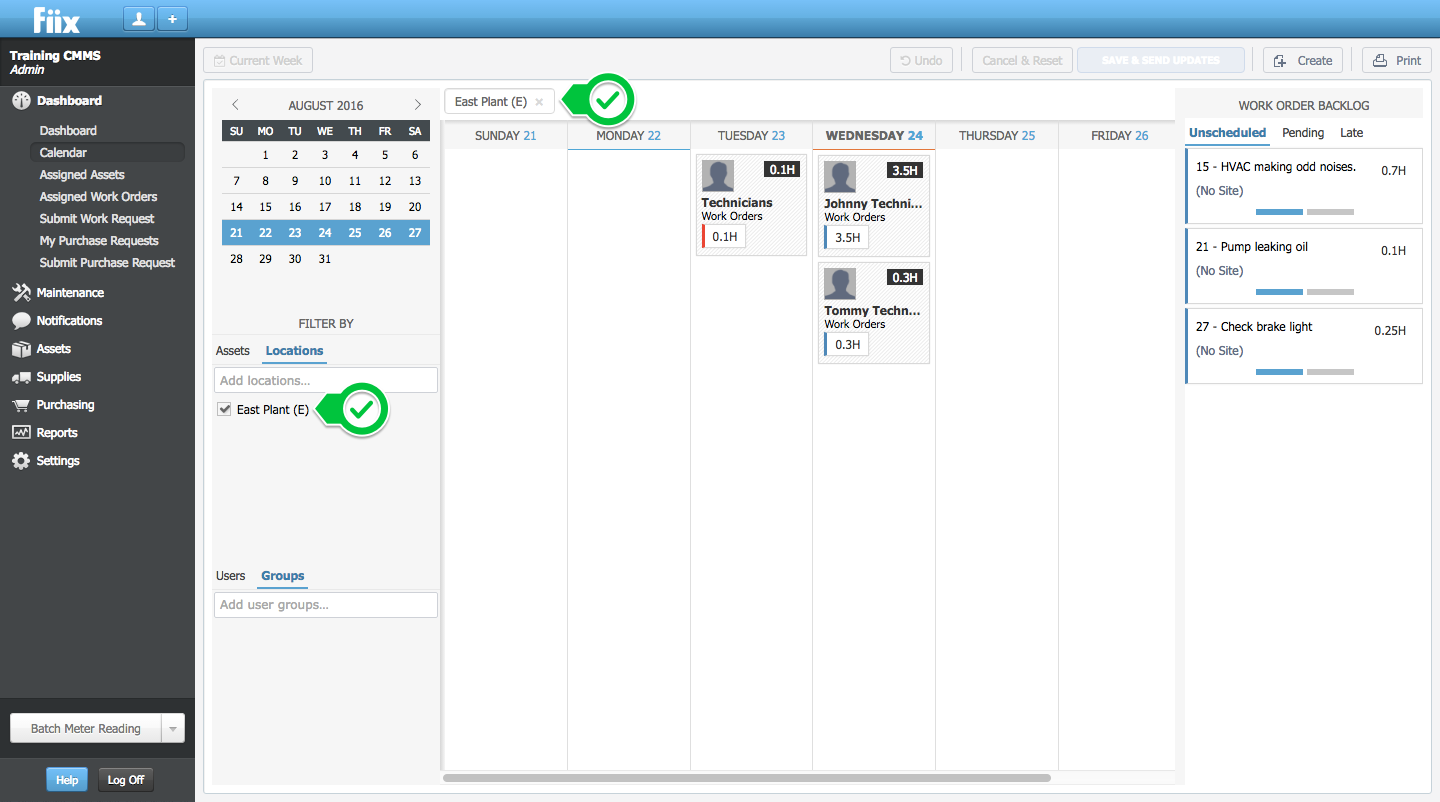
5. Filters
1. Applying a filter
You can apply filters to assets, locations, users, and groups. To do this, type the criteria into the search field, then select the desired filter.
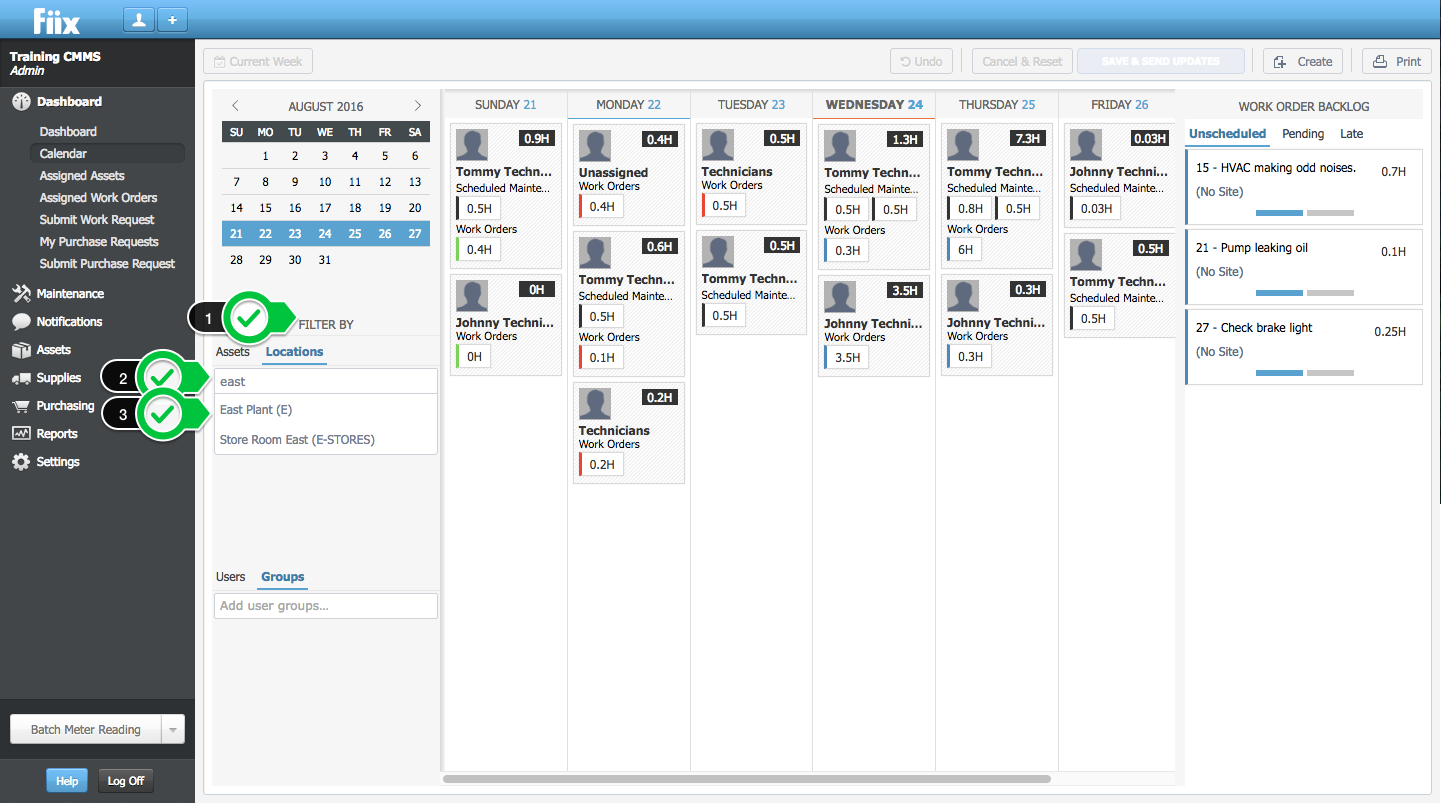
2. Once applied, the calendar displays only those work orders tied to the filter criteria. Repeat step 1 for additional filters.
3. To delete the filter, hover over the filter and select the "delete" icon. To go back to an unfiltered view of the calendar, select the filter(s) at the top of the calendar and click on the "X".

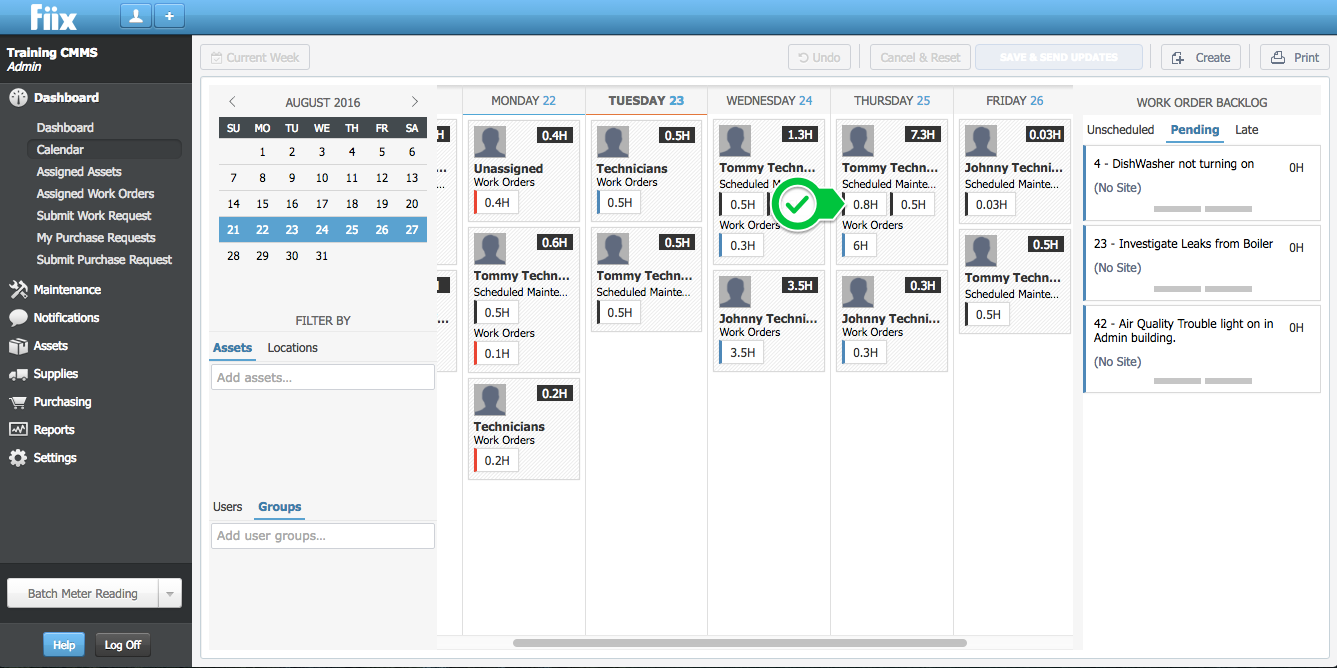
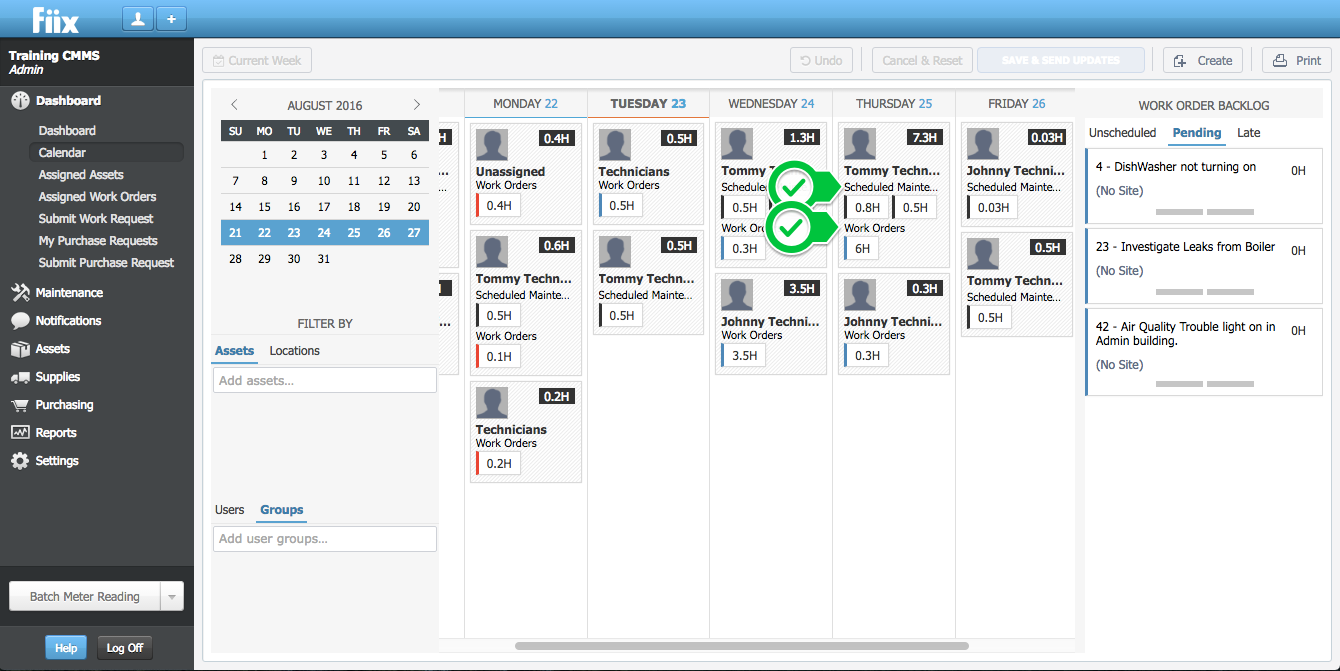
6. Calendar interaction - Drag/drop work orders within the calendar
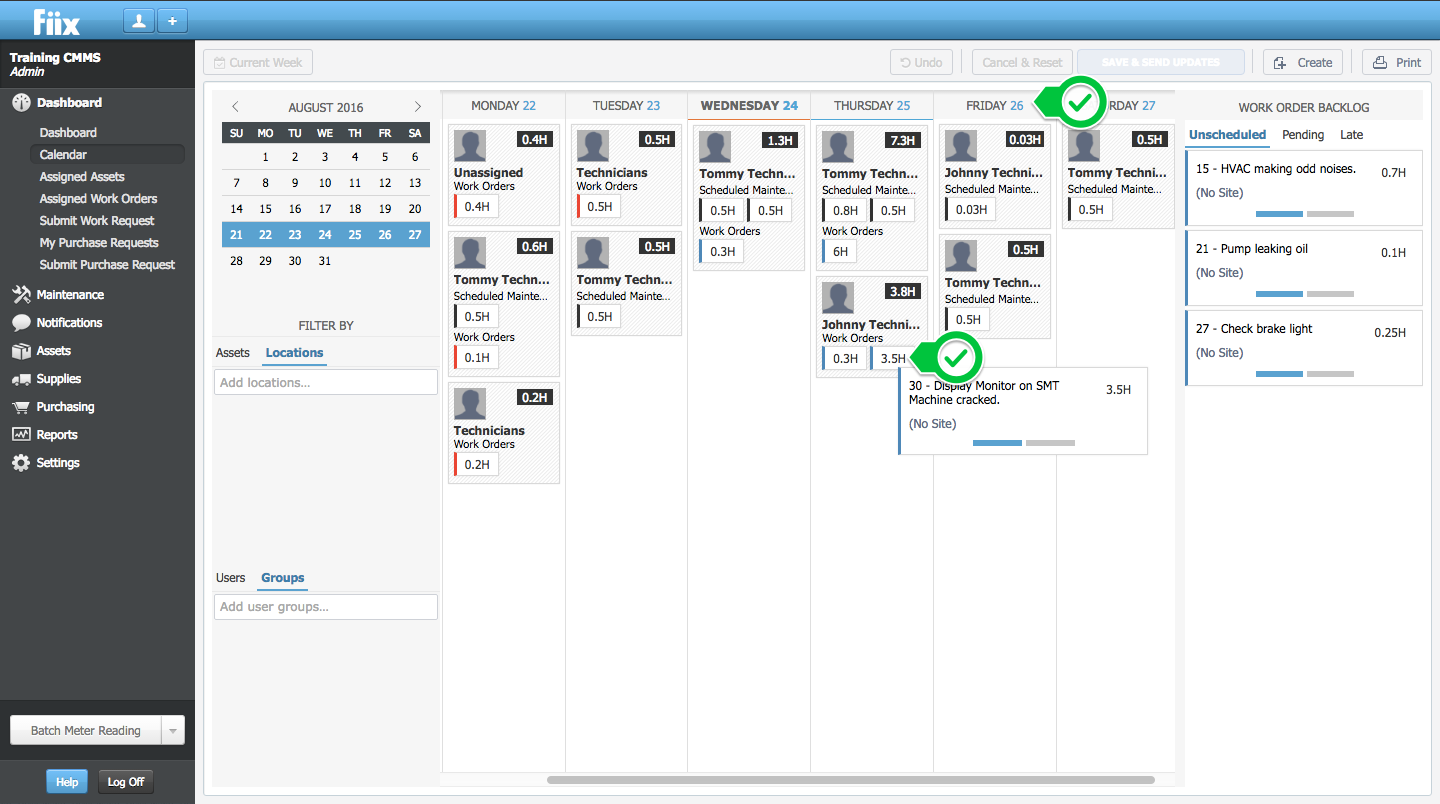
1. To move work orders within the calendar, select the work order and drag and drop it to its desired location. In the example below, we move WO#30, currently scheduled for "Tommy Technician" on August 24th, to "Tommy Technician" on August 25th.
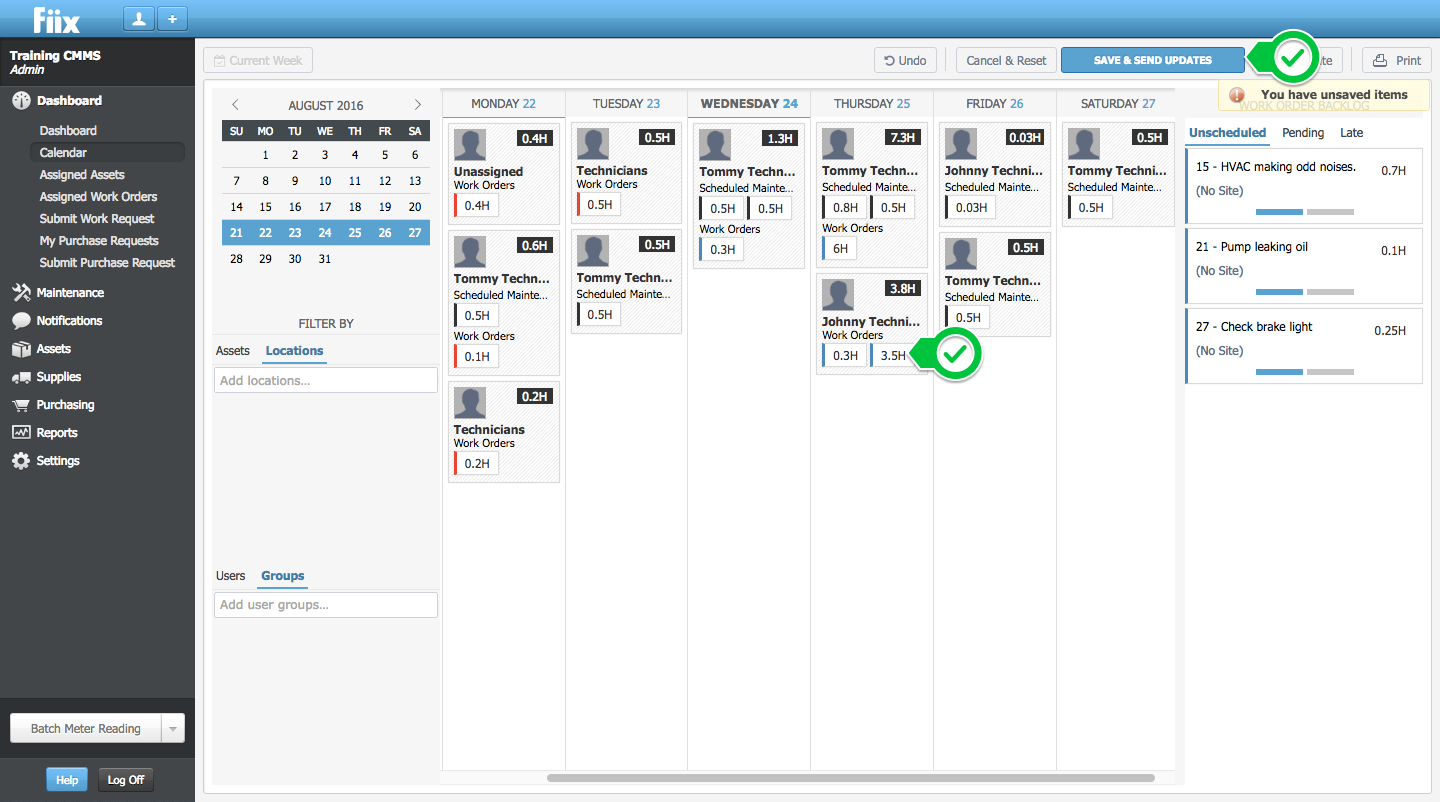
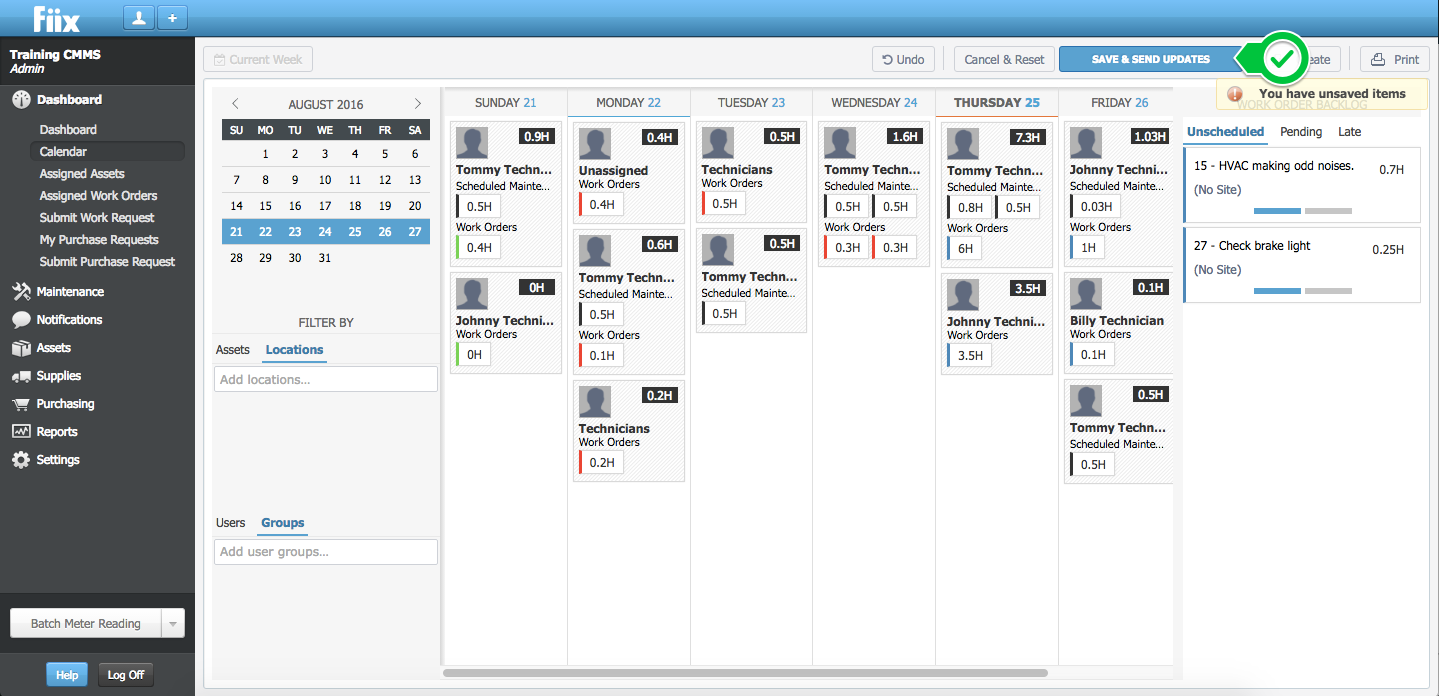
2. To save changes and send updates, click "Save & Send Updates".
3. To move work orders to new users/groups not listed in a calendar day, drag and drop the work order onto the top of the calendar date, or into the unused areas within the day column.
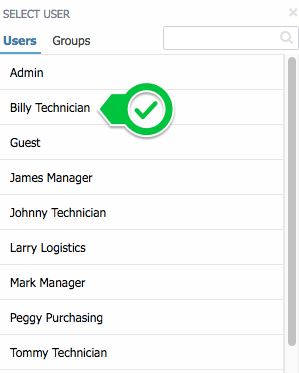
4. Select the desired user or group to assign the work order to within the pop-up window.
5. Click "Save & Send Updates" to apply changes.
7. Calendar interaction - Drag/drop work orders from backlog
1. Unscheduled work orders
1. To move work orders that are currently assigned to a user/user group but not scheduled yet, select the desired work order from the unscheduled tab.
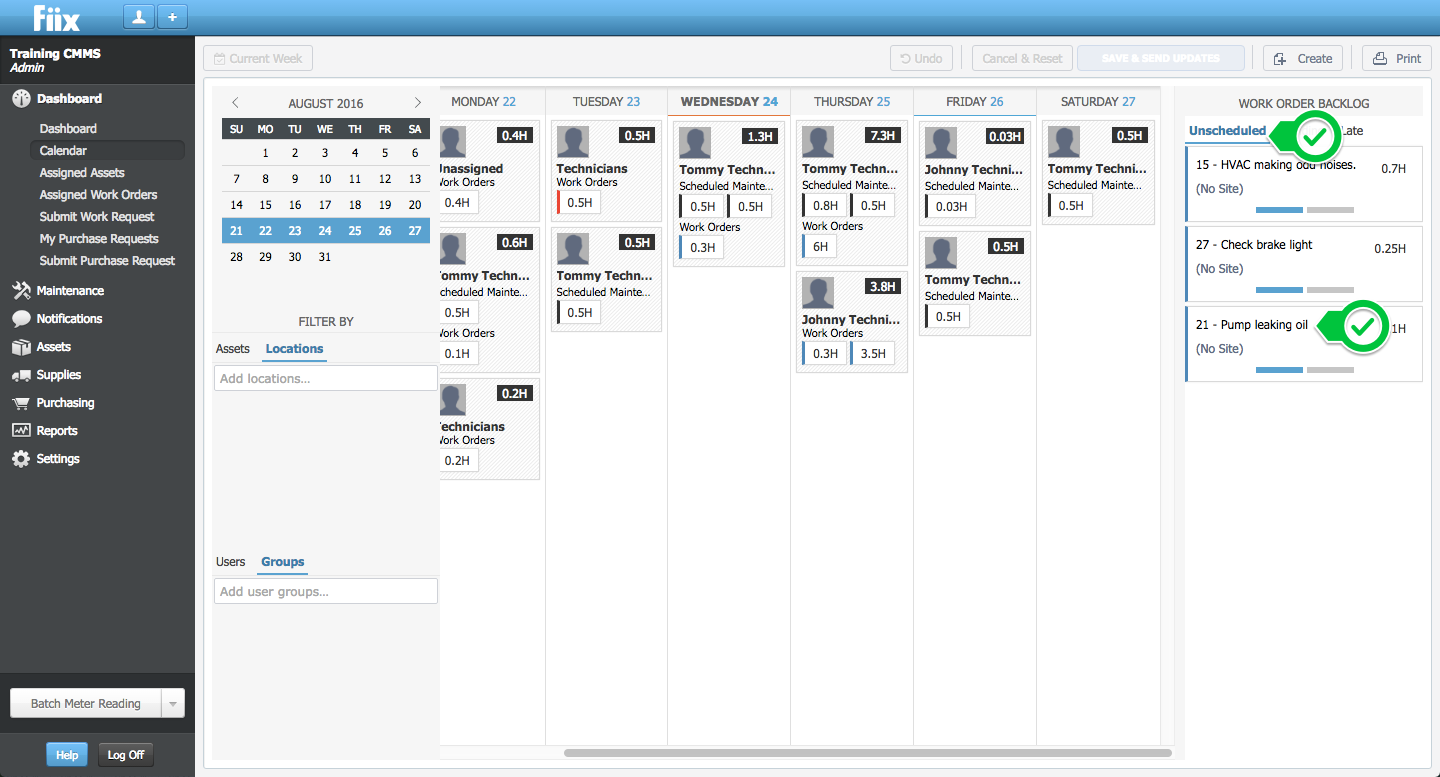
2. Drag and drop the unscheduled work order into the desired day in the calendar.
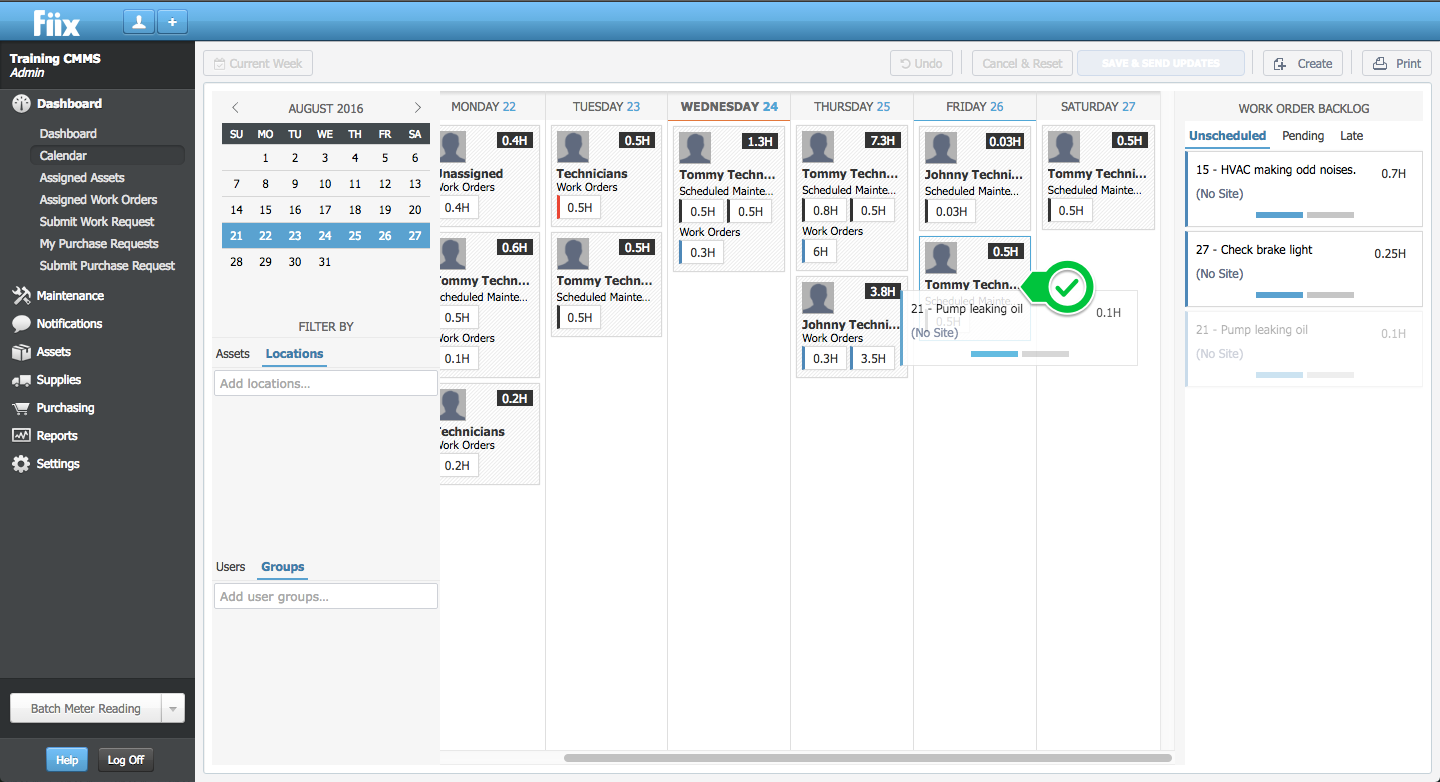
3. The unscheduled work order is now scheduled. Click "Save & Send Updates" to apply changes.
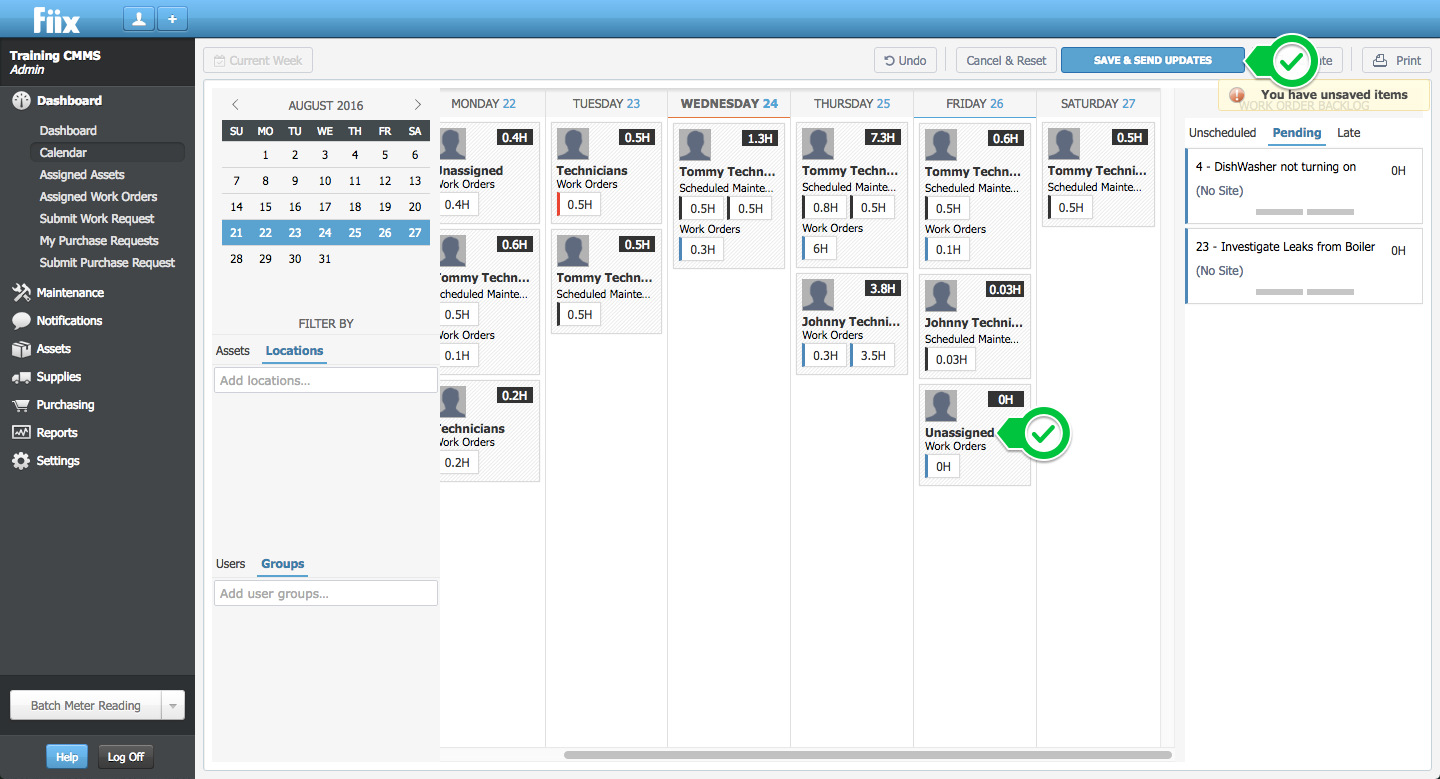
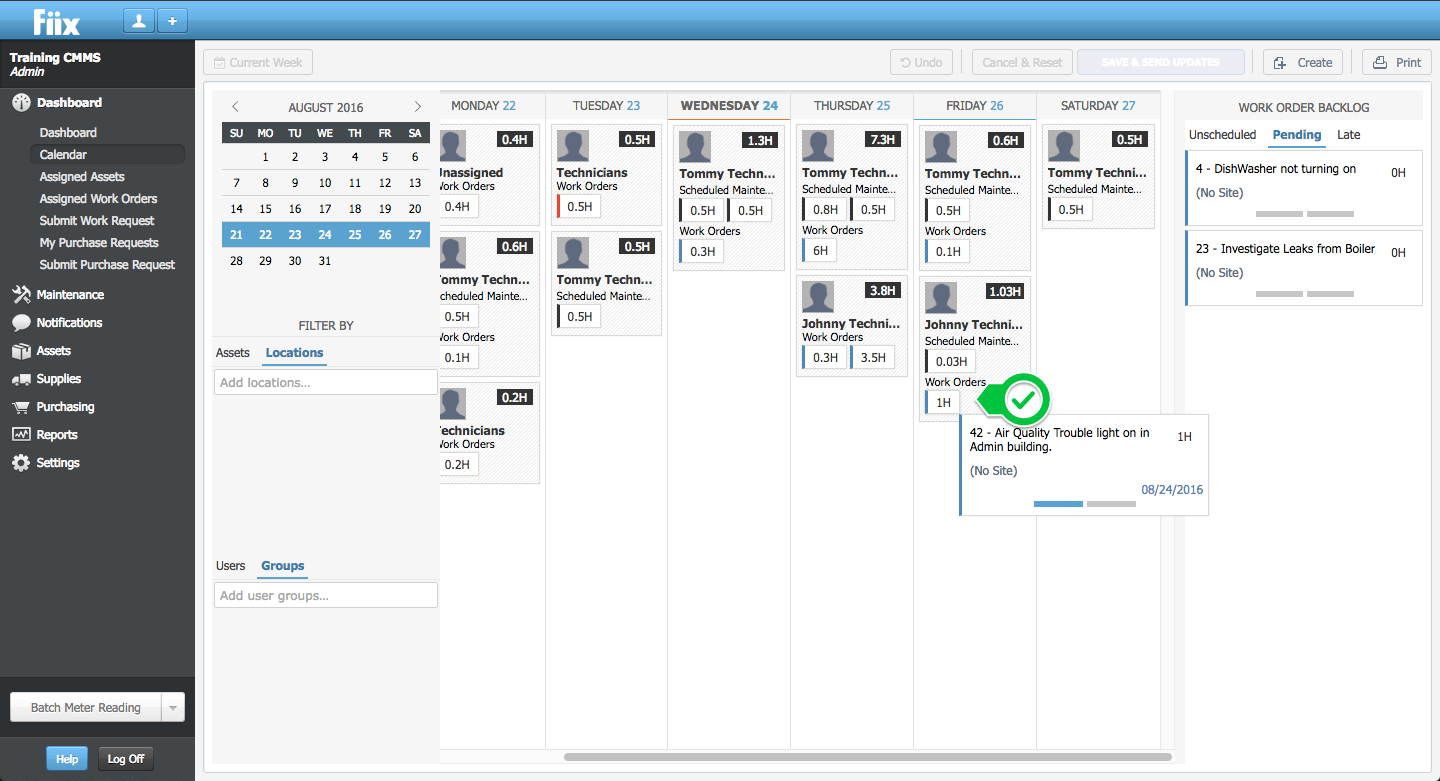
2. Pending work orders
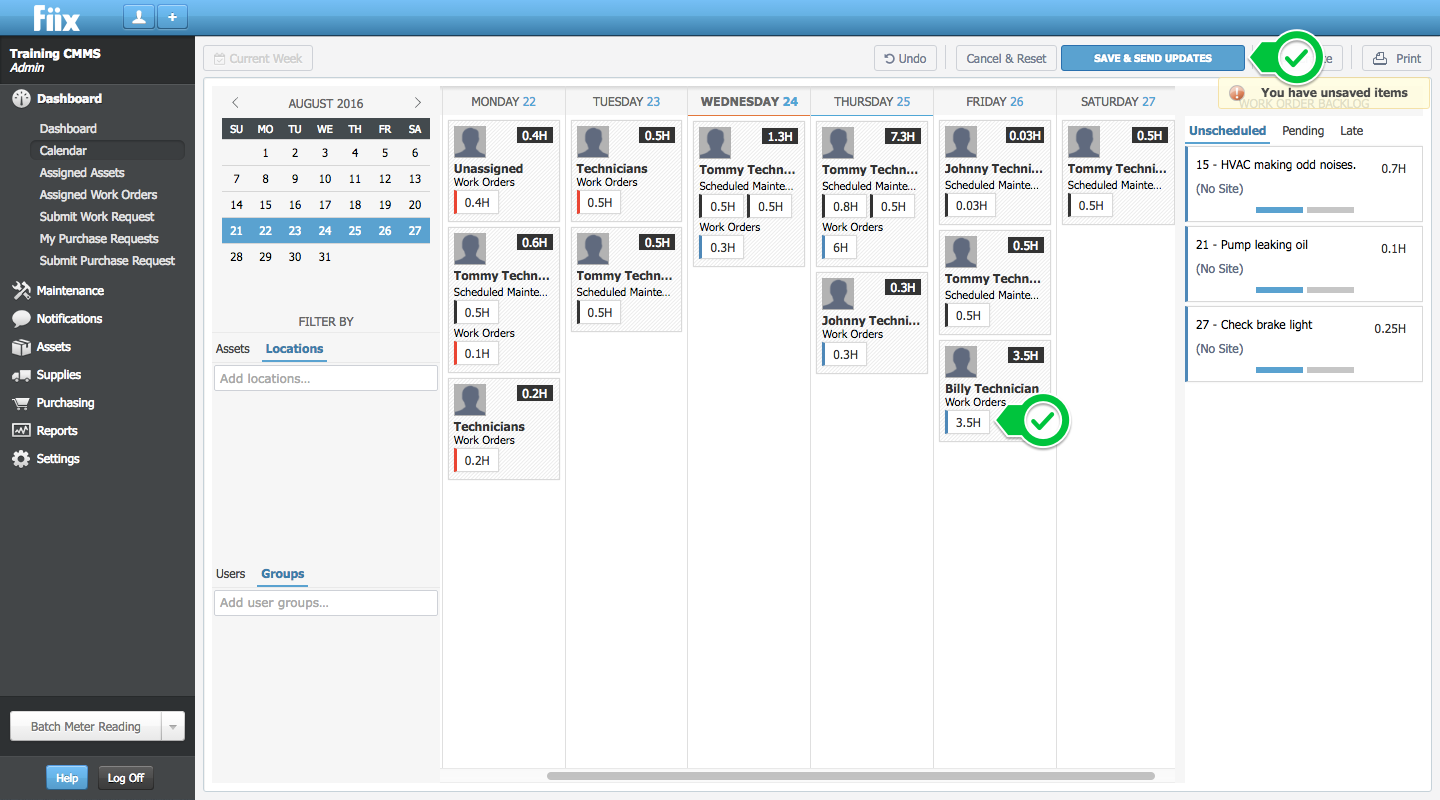
1. To move unassigned pending work orders into the calendar, select the desired work order from the pending tab and drag and drop it into the calendar.
2. The work order is now unassigned. Apply the change by clicking "Save & Send Updates".
3. To assign the work order, hover over the estimated work order time and click within to see the work order.
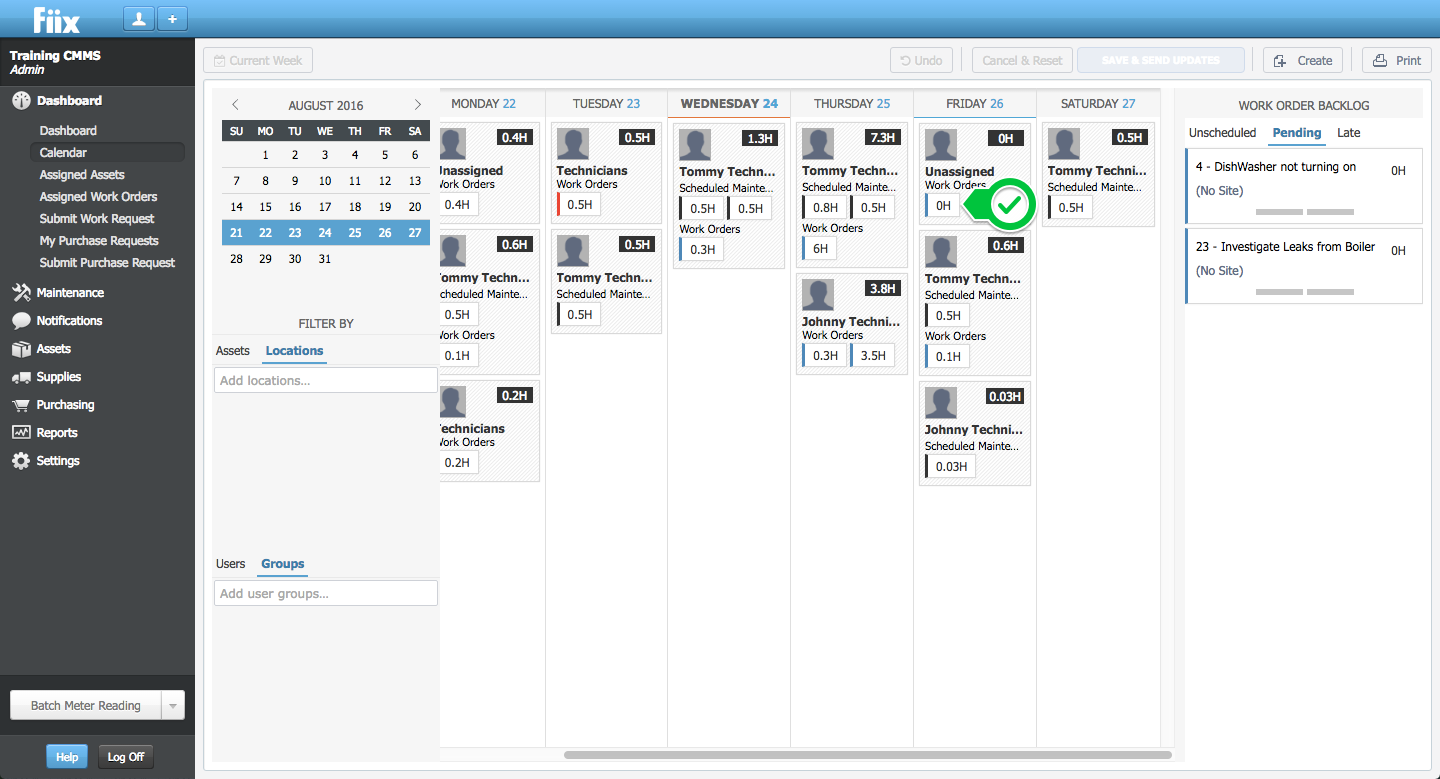
4. Assign a technician to the work order, fill in the estimated labor time, and click "OK" to save.
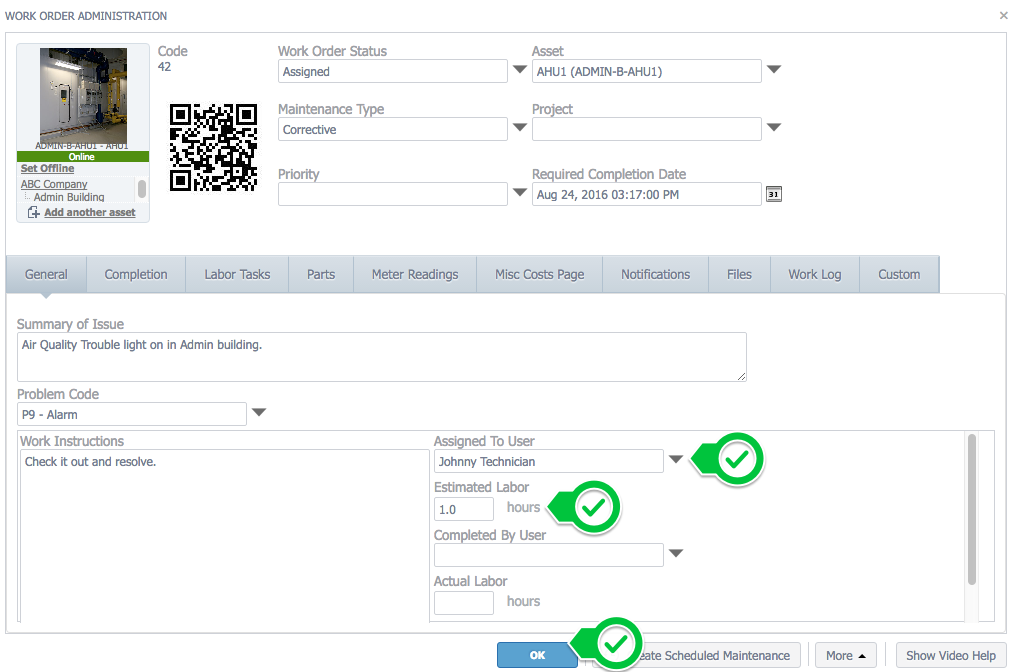
5. The work order is now assigned and scheduled.
6. Late work order drag and drop
Late work orders cannot be moved into the calendar through a drag and drop. The reason for this is that the work order may have multiple tasks attached to it, some of which are not late. In this case, the user needs to open the work order from the late panel, then inspect the dates for both the work order and related tasks, and adjust accordingly.
8. Accessing work order forms in the calendar
To access work orders within the calendar, hover over the scheduled time box and click it. The corresponding work orders form will be displayed.
9. Saving in the calendar
1. Save & send notification icon
Whenever changes are saved in the calendar, any notifications associated with the respective work orders are initiated.
2. Cancel & reset/undo
The "Cancel & Reset" button will take the calendar into the last saved state and "Undo" cancels the changes one step at a time.