Before you begin
Plans: Professional and Enterprise
Overview
This procedure demonstrates how to customize the purchasing lookup tables. The purchasing lookup tables can be modified to alter the purchasing workflow.
Certain aspects of the purchasing lookup tables are a bit more complex than those of the maintenance and costing lookup tables. Let's begin by outlining the different tables, and highlight which tables can be altered.
- RFQ Statuses - Not customizable
- Receipt Status - Not Customizable
- Purchase Order Status
- Purchase Order Additional Cost Type
- Billing Term
- Shipping Type
Purchase order status
The lookup table that needs the most attention, care and explanation is the Purchase Order Status table. The status's listed here can have a direct influence on how your purchasing module works, so caution is advised when making changes here.
1. To edit the purchase order status table, start by selecting Settings, CMMS Settings, and Lookup Tables
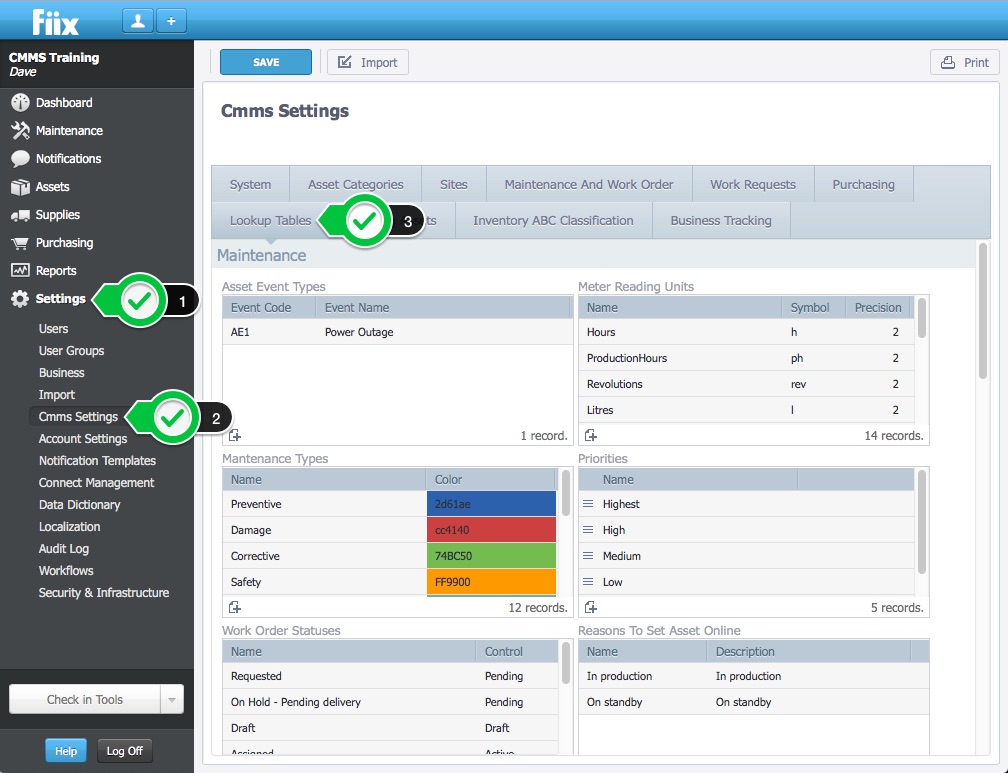
2. Select the the status that you want to edit
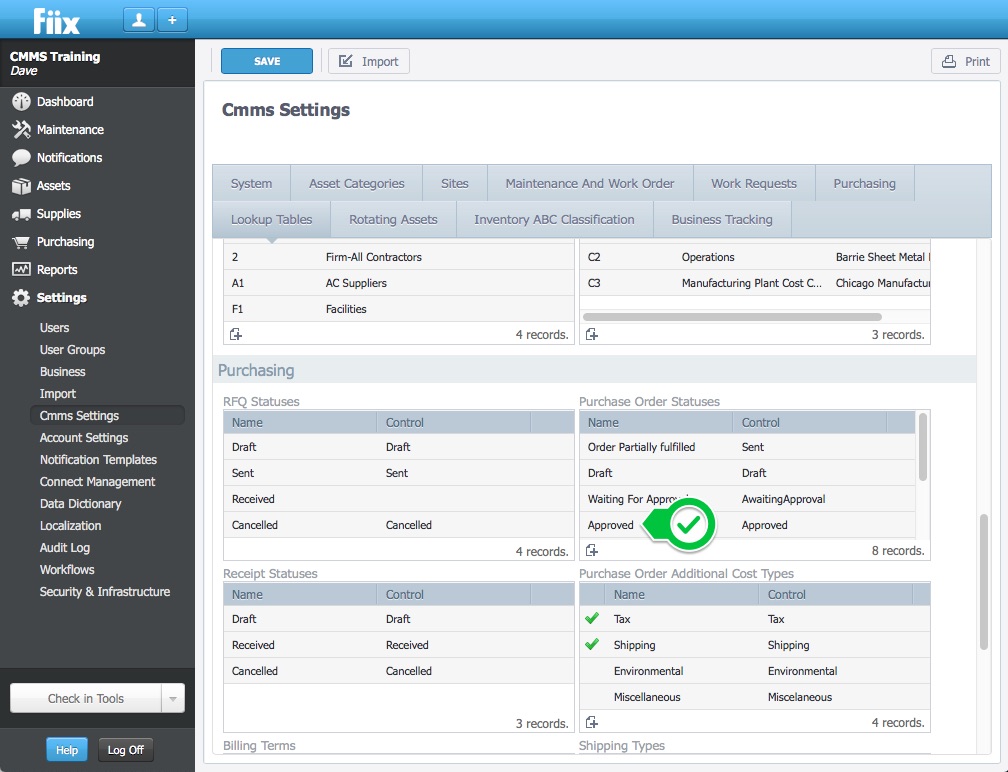
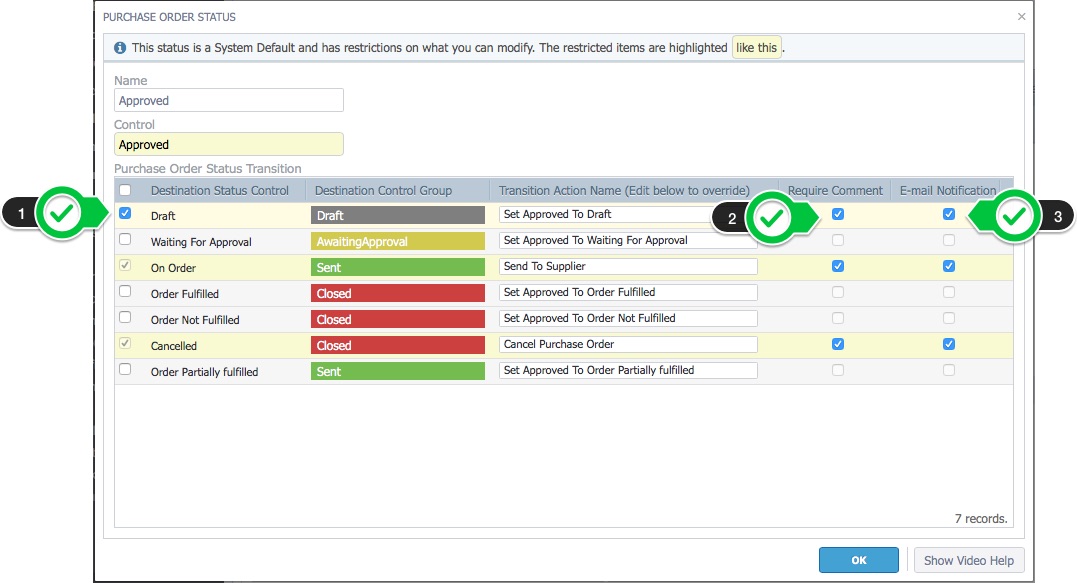
3. Lets take a look at the Approved status. The Destination Status Control defines where the purchase order status can transition to. The Require Comment field controls if a comment is required when changing the purchase order status. The E-mail Notification field controls if a notification email is sent to the users when the status changes.

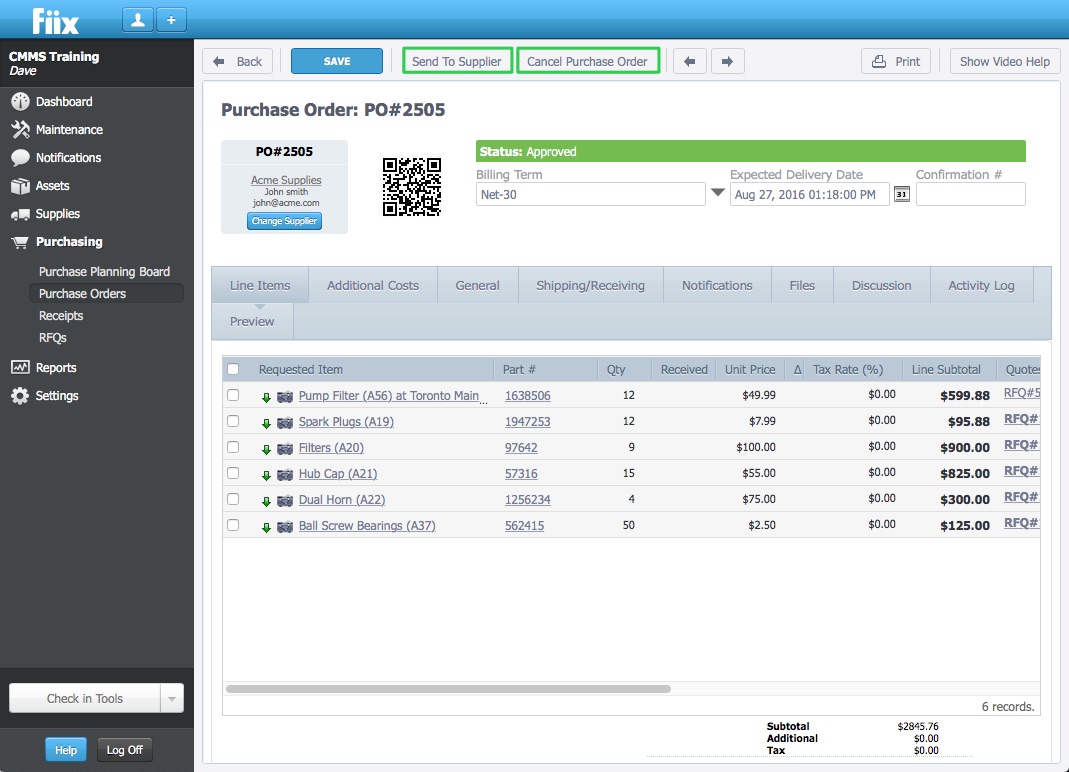
Below is a screenshot of a purchase order that has been Approved. Note the two options available, Send To Supplier, and Cancel Purchase Order. Now compare these two options with the settings checked off in the screenshot above. They coincide correctly.
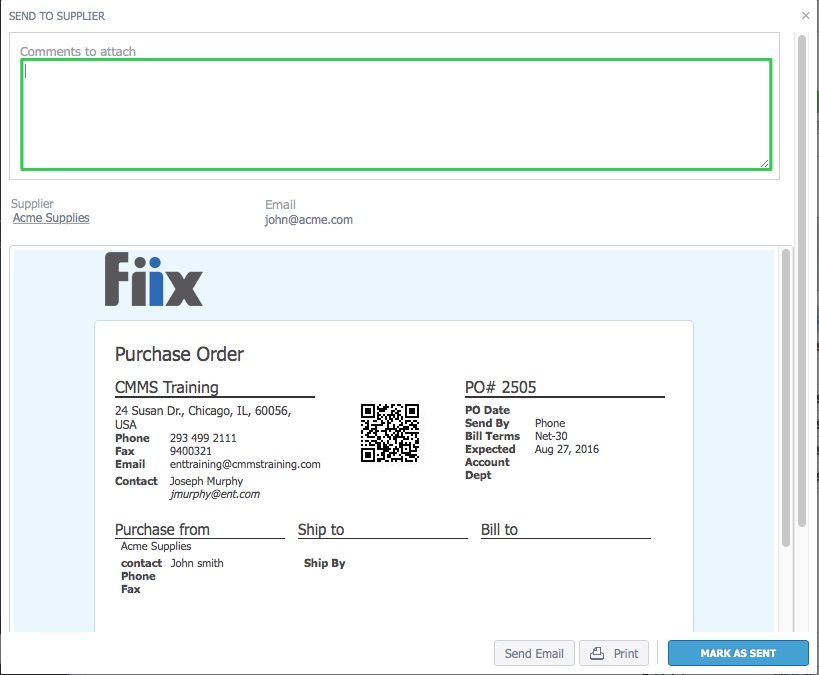
4. When the Require Comment option is selected, the Comments to attach field is mandatory
5. To change where a purchase order can transition in its status, select a Destination Status Control status. Enable the Require Comment (optional), and E-mail Notification (optional).
Create a new purchase order status
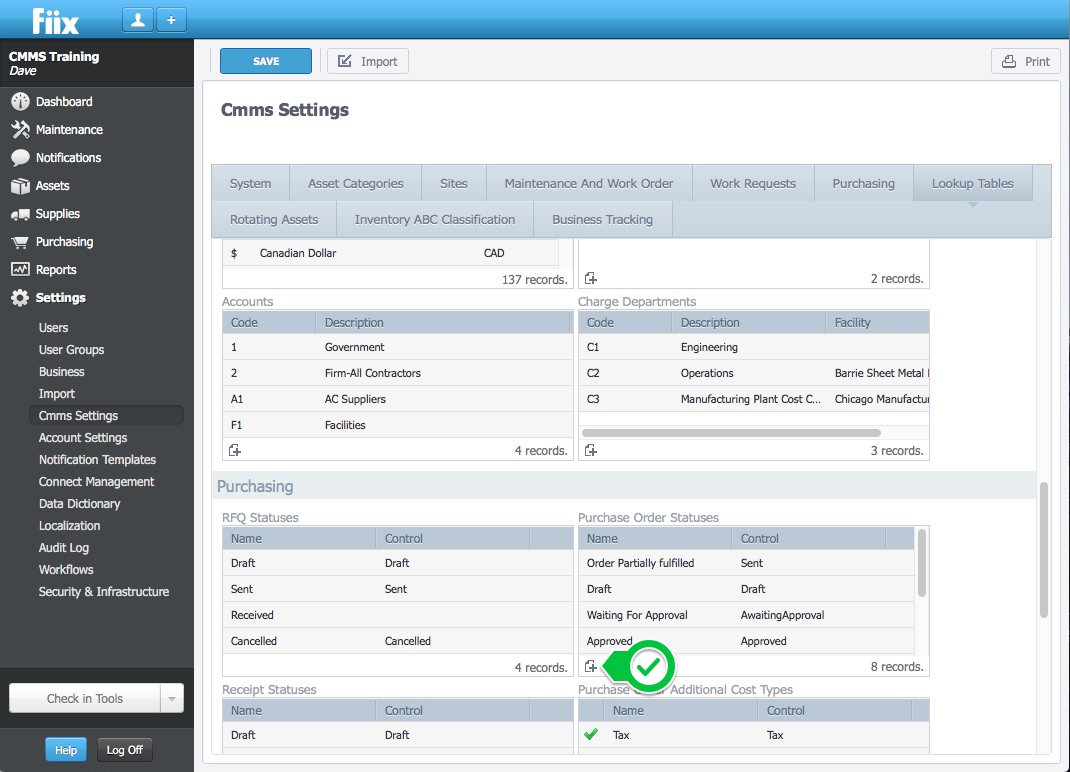
1. To create a new purchase order status click New
From here you will be met with the following pop up box where you can fill in all of the necessary details relating to your new status. You will need to define your destination status control in both of your new status, and in any existing status that you want to be able to send into your new status.
2. Fill in the details relating to your new status. Add a Name, select a Control, set its Destination Status Control, define if you Require a Comment, or want to send an E-mail Notification.
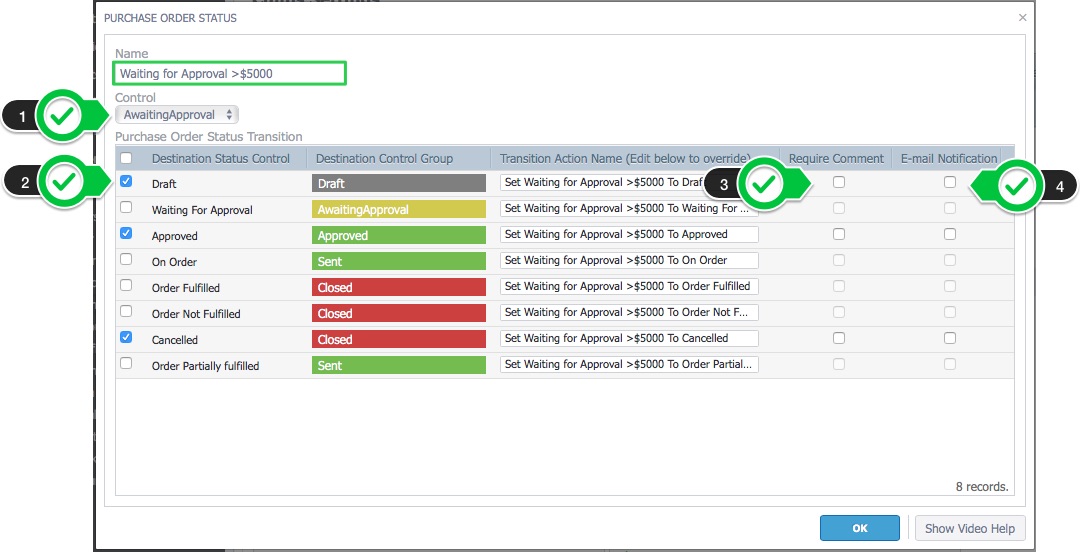
3. Click OK when satisfied. Your new status will now be displayed in your list of purchase order status's
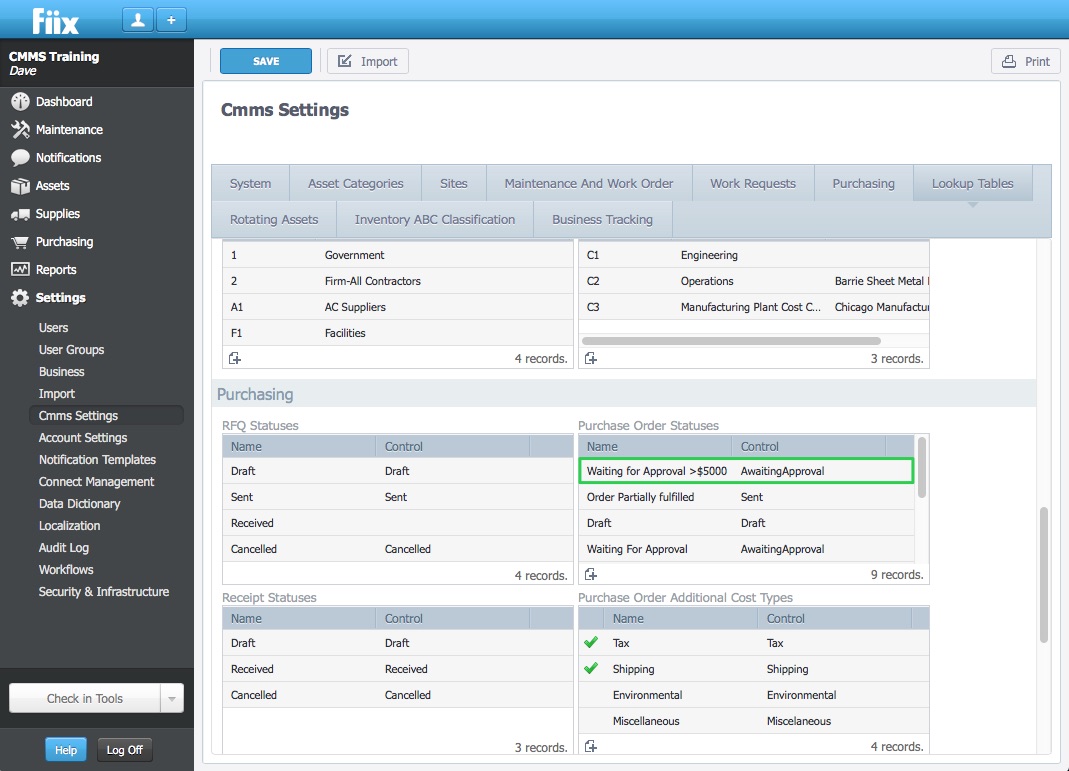
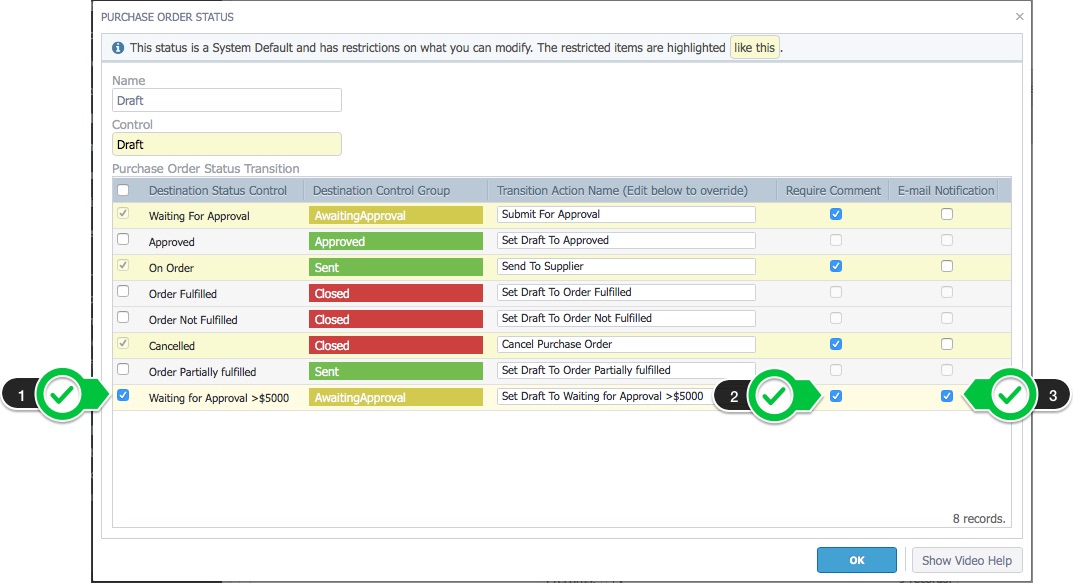
4. The next step is to define which status you want to flow INTO your new status. In this instance we only want purchase orders in the draft form to flow into this status. To do this, you will have to enter into and edit your draft status. Your new status will be available to you. Check off your status, in this case 'Waiting for Approval >$5,000'. Select if you require a comment and/or E-mail Notification. Once finished Click OK.
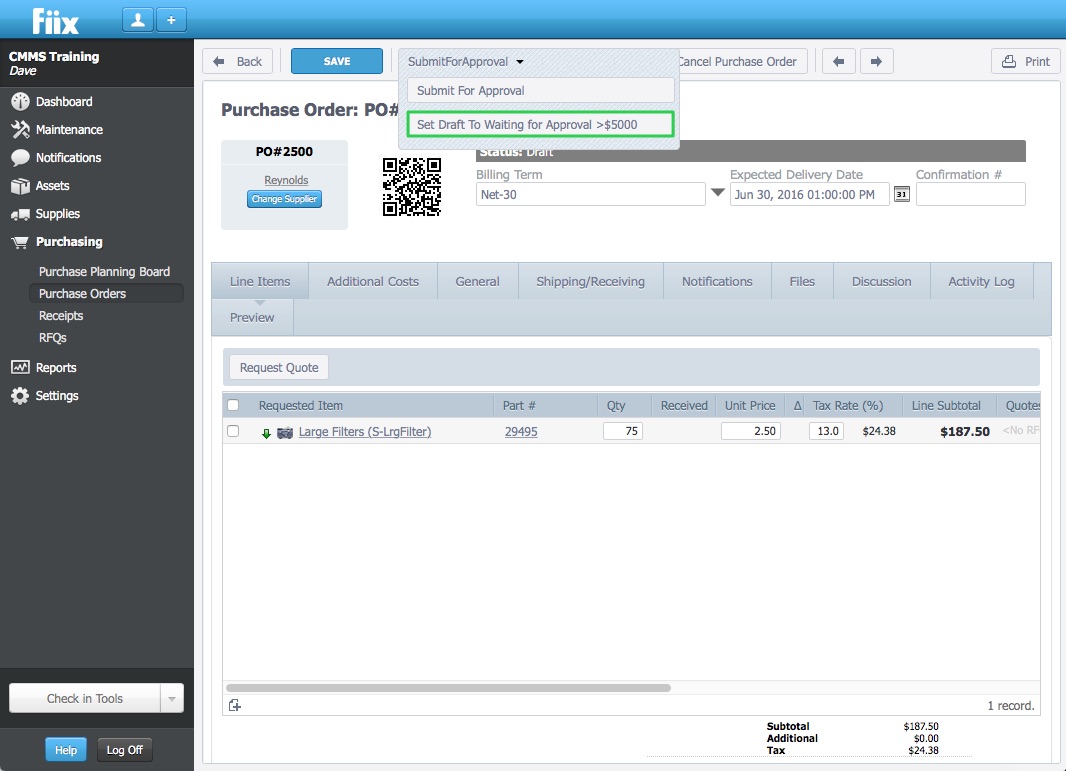
5. The next step is to verify your work. A test purchase order has been created to do this. The PO is in the draft state, and the Submit For Approval dropdown has been selected to verify that the new status exists.
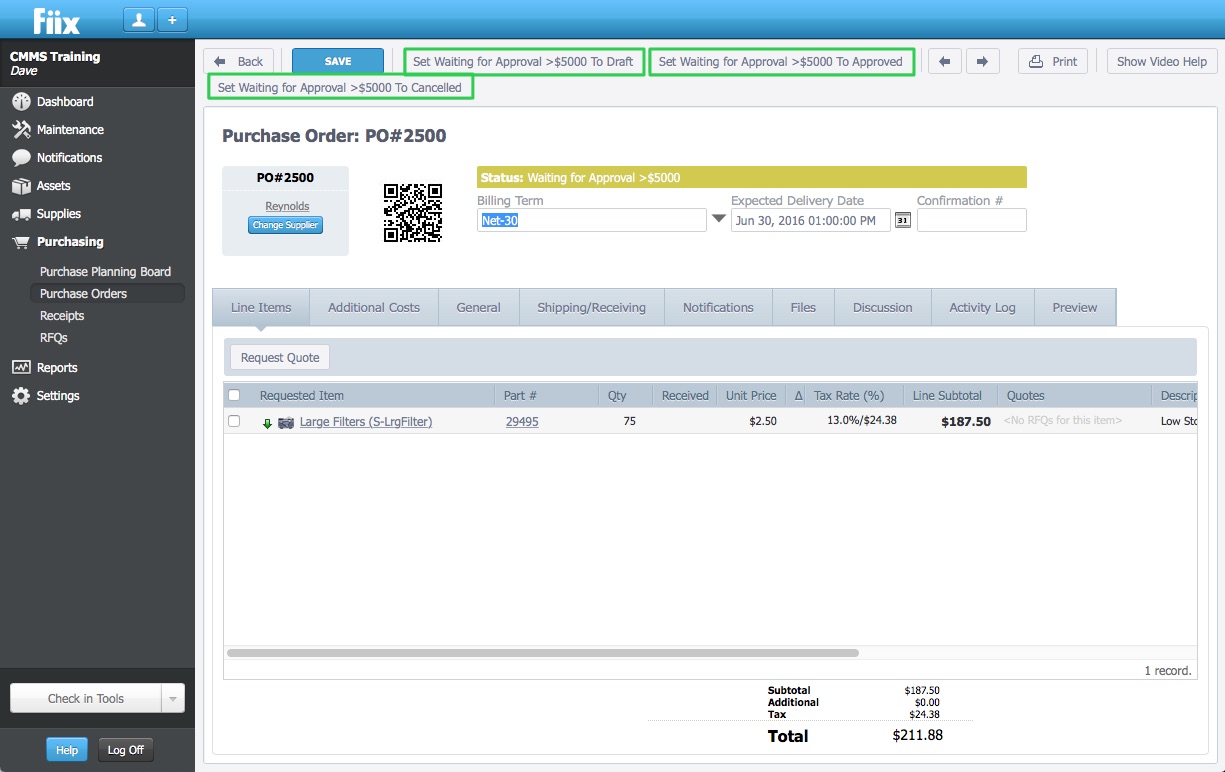
6. Now my PO is in the new Waiting for Approval >$5,000 status. Notice the three options that are available, set to Draft, Approved, and Cancelled. These three options match up with the options selected when creating the new status
7. You can create as many new purchase order status's as you please. You will need to take extreme care when doing this to ensure you have the necessary flow in place.