Before you begin
These pre-release notes offer a preview of an upcoming release. As a result, some details may change between now and the actual release date.
We are temporarily rolling back the new version of our scheduled maintenance import so that we can address some of its issues and limitations before re-enabling it.
During this time, you can still import scheduled maintenance using the previous version of the feature and its import template, as described below.
Notes
- Records that contain special characters (commas, quotation marks, etc.) can result in corrupted data, and can even cause imports to fail. We suggest doing a test import with only 2 or 3 records to ensure your formatting is correct. To learn more about special characters in import files, see Troubleshooting Imports.
When importing, any columns that you leave blank will result in blank records, as they are not auto-populated by the CMMS. To prevent unexpected issues, we suggest removing any columns you don’t need to update.
None of the field headings (like SM code or Asset code) are required fields. You can leave a column blank for any scheduled maintenance if information is not available. The data can be entered manually later.
To import scheduled maintenance:
- Download the import template (direct download link).
- In the template, fill in the details for the scheduled maintenance records you want to import.
- Save it as a CSV file.
- In the CMMS, go to Maintenance > Scheduled maintenance.
- Click Import:
- Click Upload.
- Select the CSV file you saved in step 3.
- Click Continue.
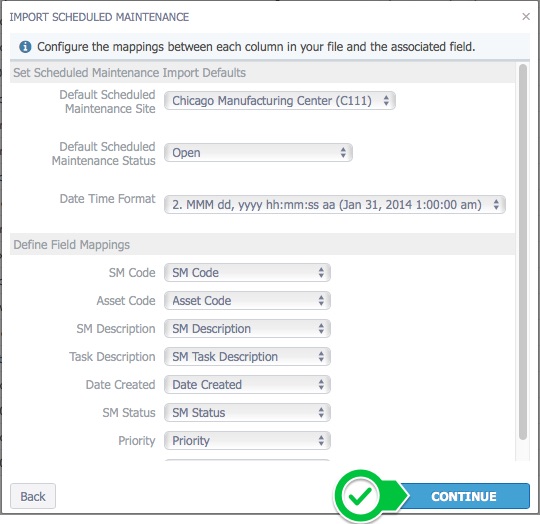
- When prompted, fill in the following information:
- Default scheduled maintenance site (only applies to multi-site tenants)
- Default maintenance status
- Date time format
- In the Define field mappings section, verify which headings from your CSV file match which fields in the CMMS.
- Click Continue:
- Click Import.