Overview
The rotating assets feature makes it easy to track assets that are swapped in and out of service such as tools, pumps, electronic control boards, engines or robot arms. Work order and move history stay with the asset throughout its lifetime as it is moved throughout the organization.
The rotating assets feature is available for the Enterprise and Professional tiers. This procedure will demonstrate how to use the rotating assets functionality to manage your tool crib.
Prerequisite
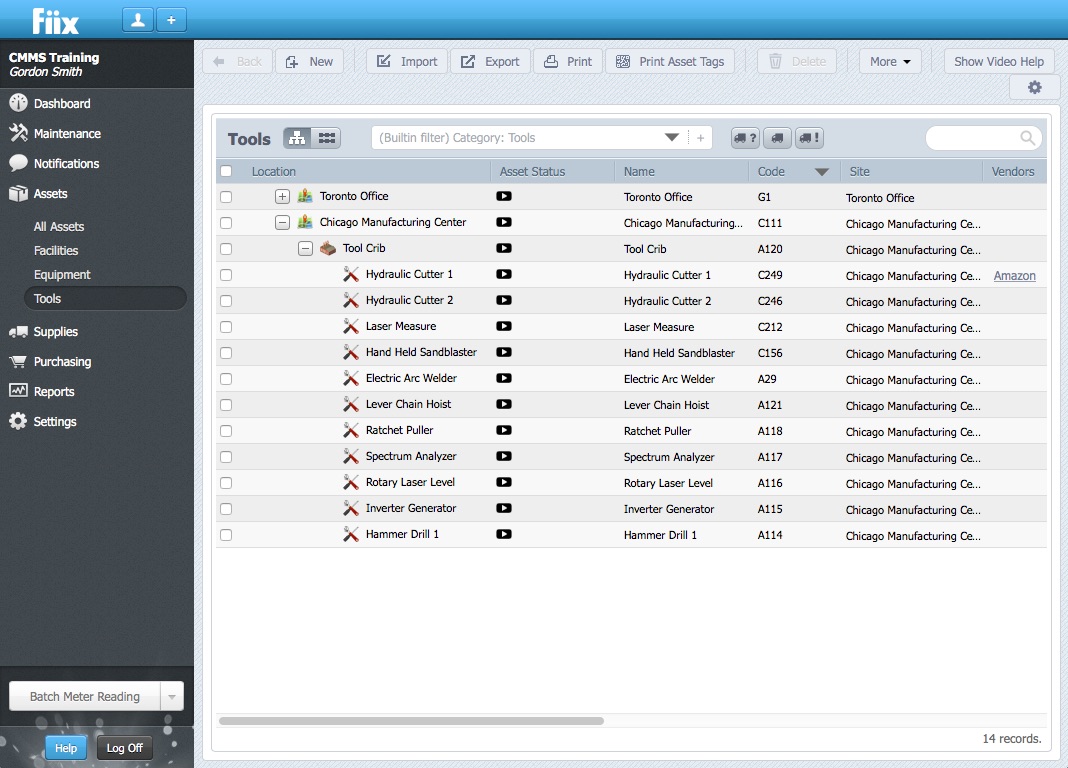
You must first build or import your asset hierarchy, including your tools. When complete, your hierarchy should look something like this:
Configure Rotating Assets Functionality to Manage your Tool Crib
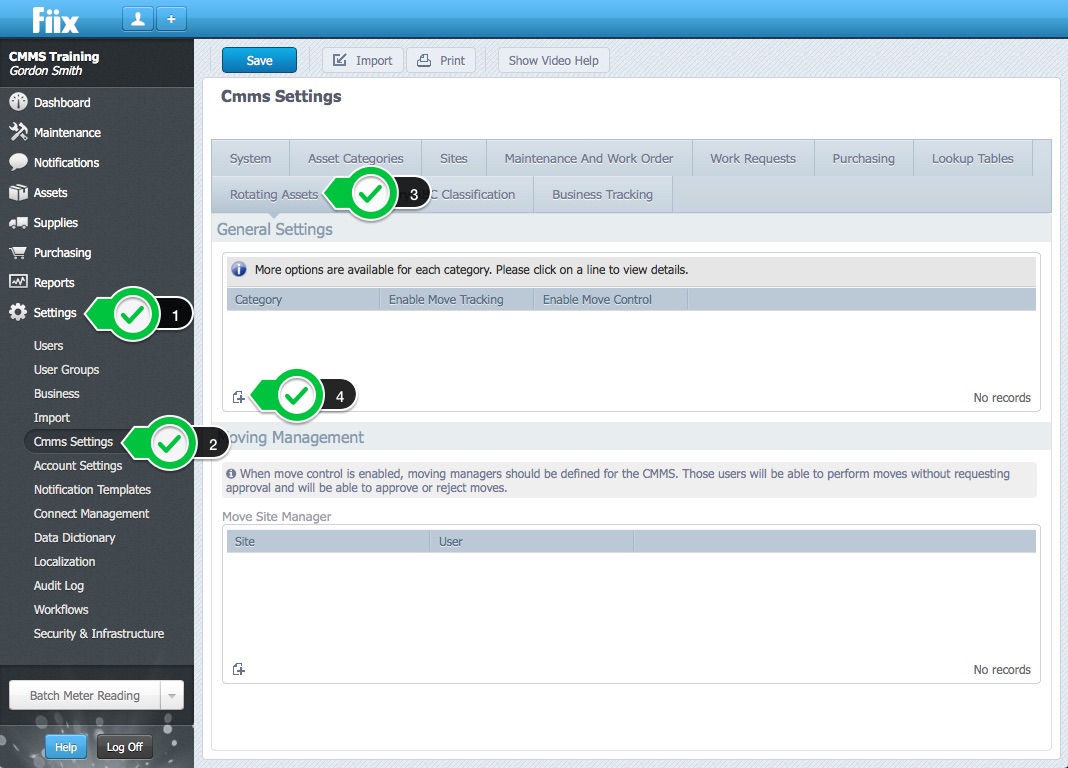
1. Click Settings, CMMS Settings, Rotating Assets, and New
2. Select the Tools Category from the dropdown menu
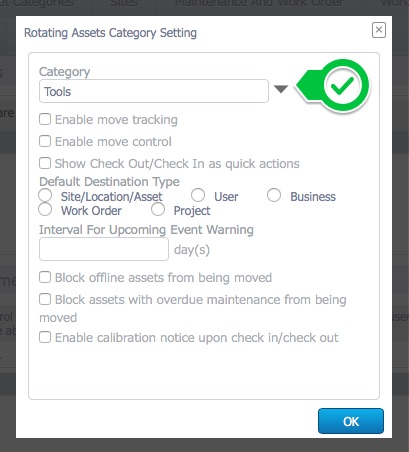
3. Next, you need to enable the main move settings. There are 3 types of move settings:
- No tracking or control - nothing happens when a tool is moved. Basically, this is any CMMS without rotating assets switched on.
- Move tracking - moves are tracked in the Activity Log in the asset.
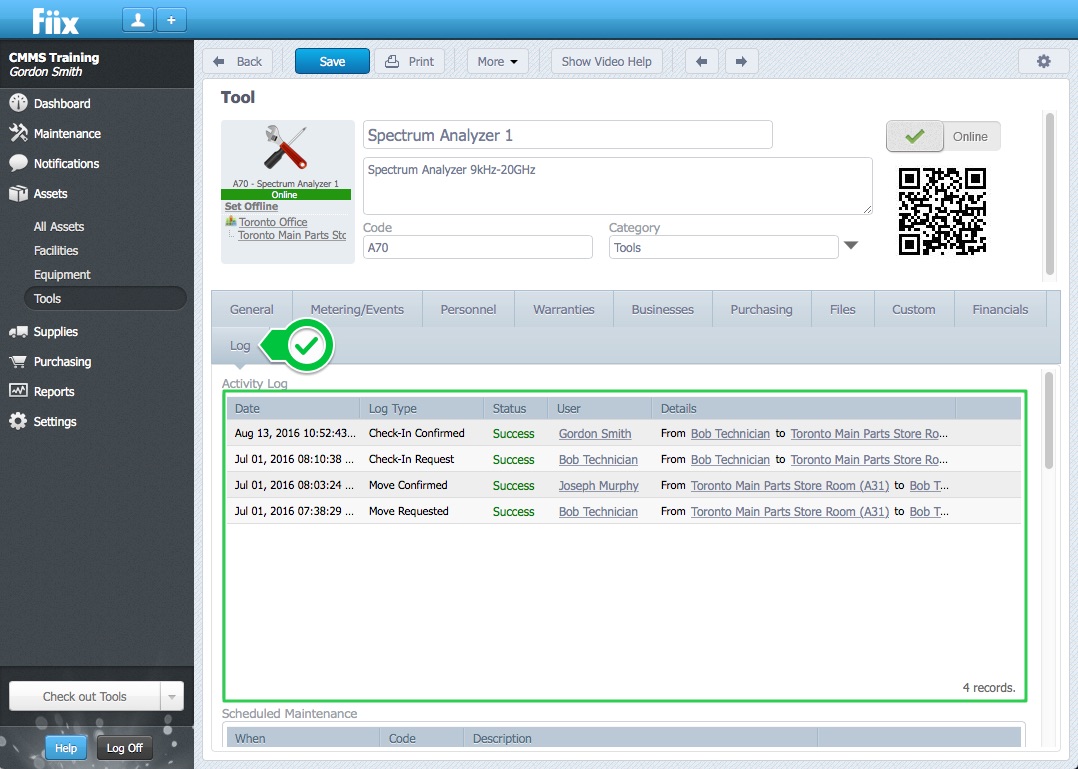
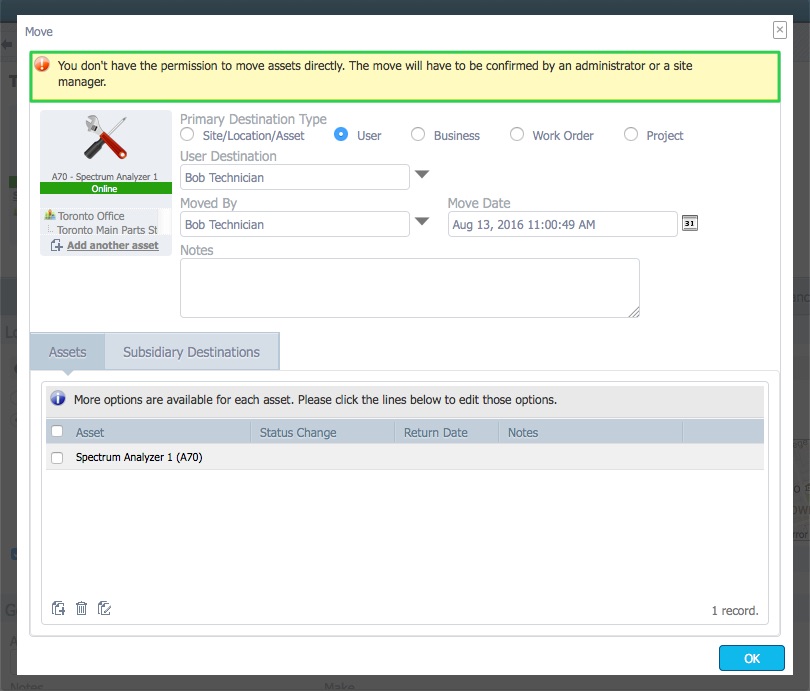
- Move control - asset moves controlled by move managers. When a move is initialed, the asset move pop up screen will appear for those who do not have permission to move assets directly.
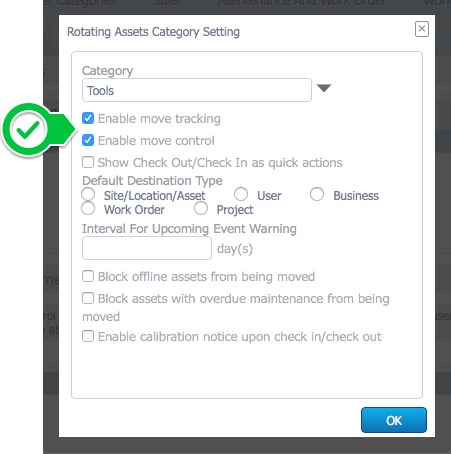
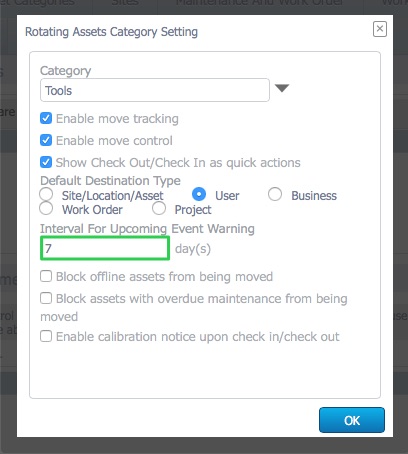
4. Check both of these checkboxes to enable both move tracking and move control for tools
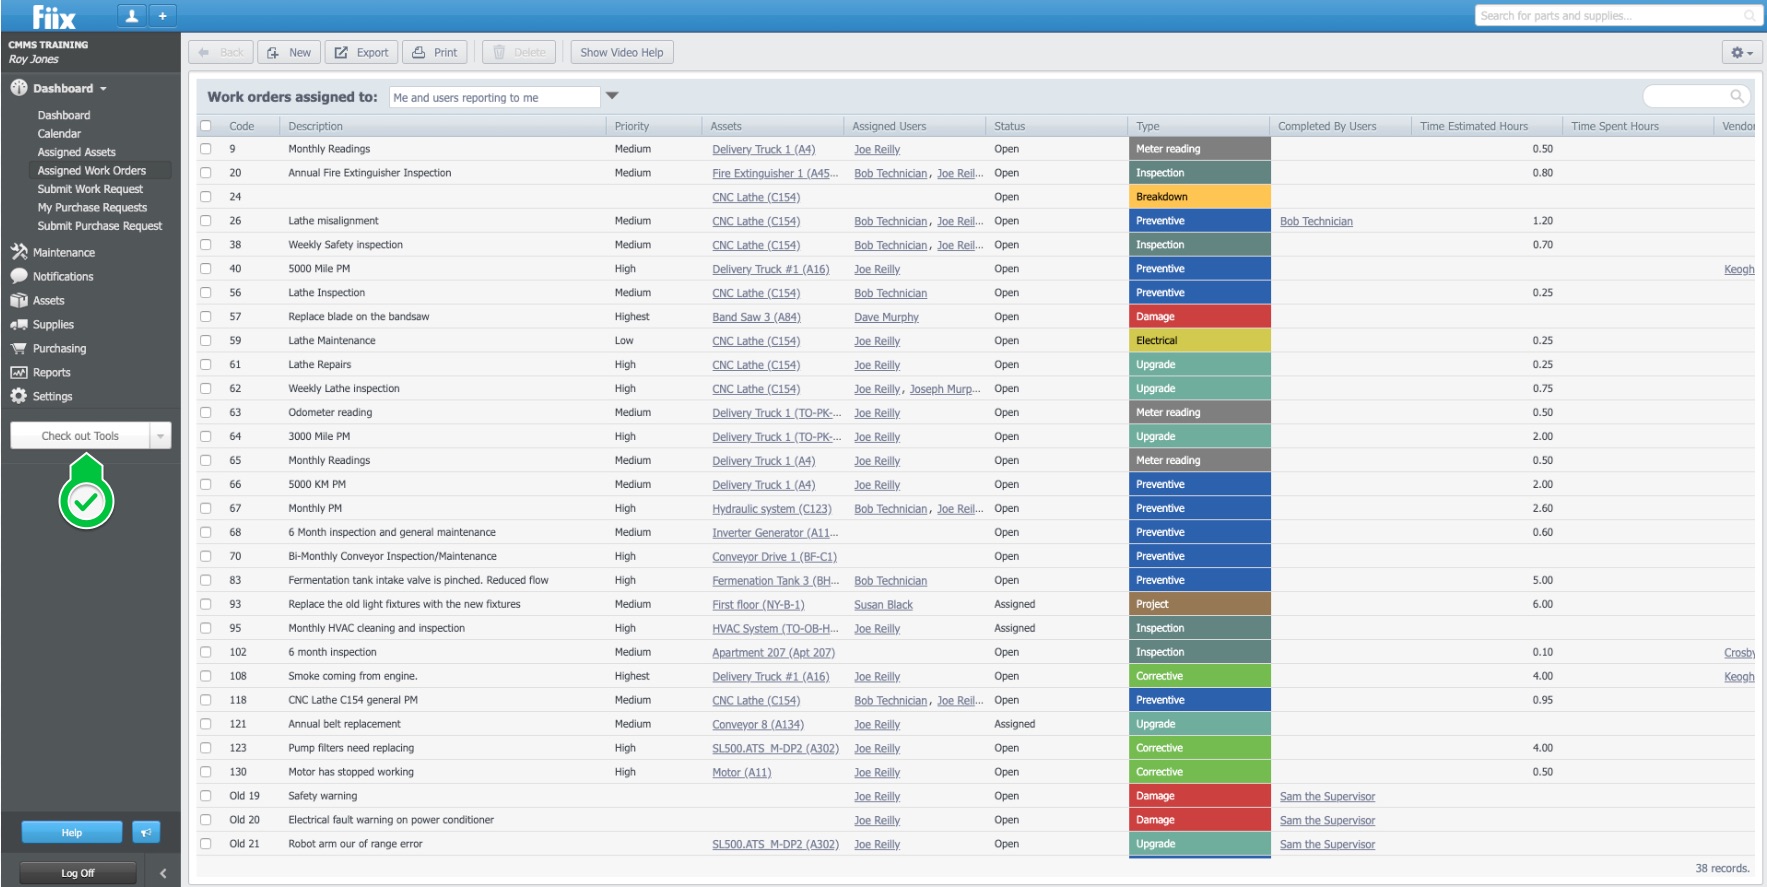
5. Enabling Show Check Out/Check In as quick actions will create a quick access button on the lower left-hand side of the CMMS
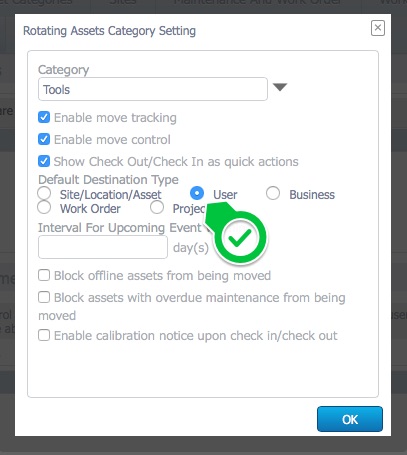
6. Next, set the default destination type to User. When a tool is moved, the pop up window will automatically default to User
7. Next, you can set the Interval warning for upcoming events. For example, if the warning is set to 7 days, and a tool is due a calibration in the 4 days, the system will display a pop up warning to the tool crib operator notifying them the tool has an upcoming calibration PM.
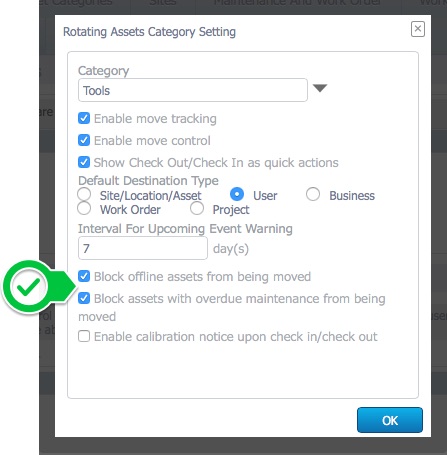
8. Next, it is possible to block moves for tools that have been logged offline, or those that have overdue PMs
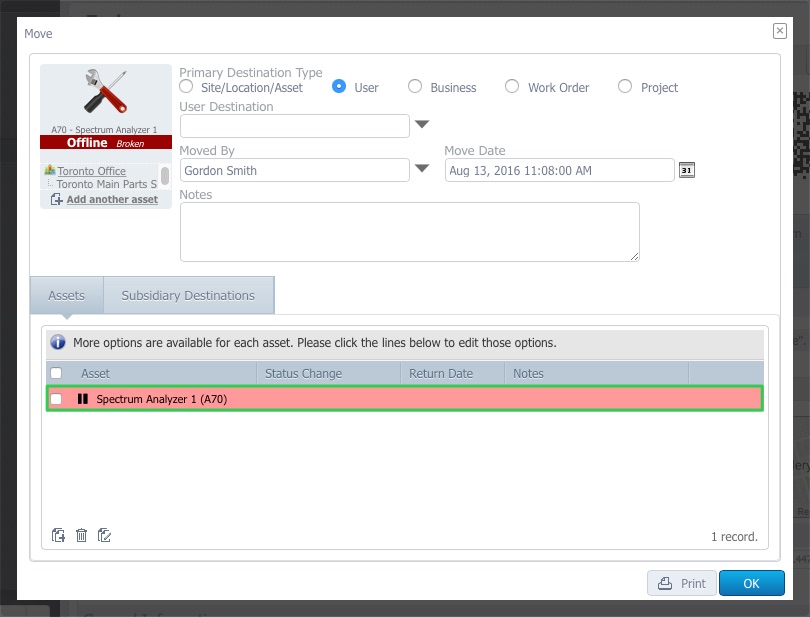
If these settings are turned on, when the move is attempted, the tool crib operator will see the following warnings and errors in the move window:
9. Finally, the Enable Calibration Notice Upon Check in/out setting gives you the ability to assign certain tools for calibration as they are moved in or out of the tool crib
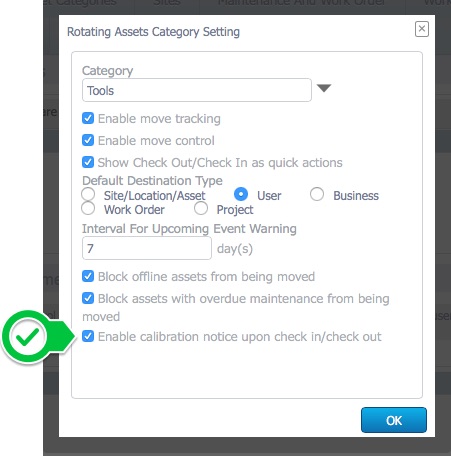
When this setting is checked on, a calibration area will appear on the asset category just set. System administrators have the ability to select certain tools for calibration as they are moved in or out of the tool crib.
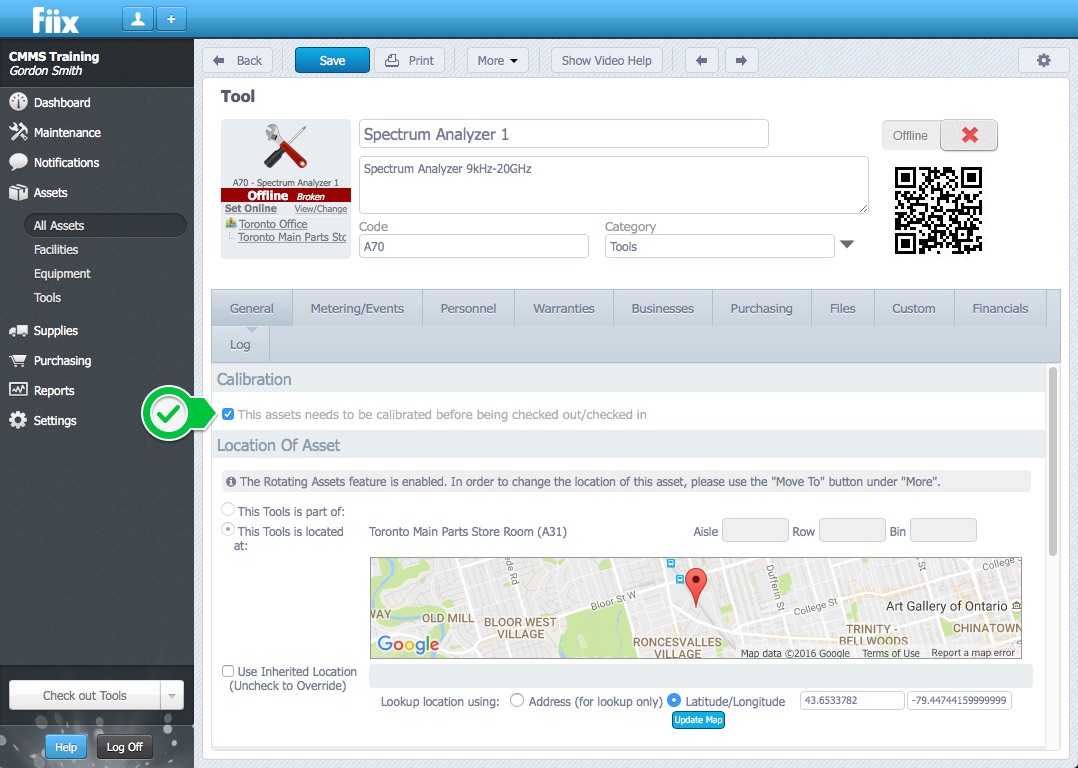
10. Click OK to save your settings. Your tools asset category has now been configured for a tool crib implementation.
Check out Tools from the Tool Crib
1. Click the Check out Tools fast button on the lower left hand side of the CMMS

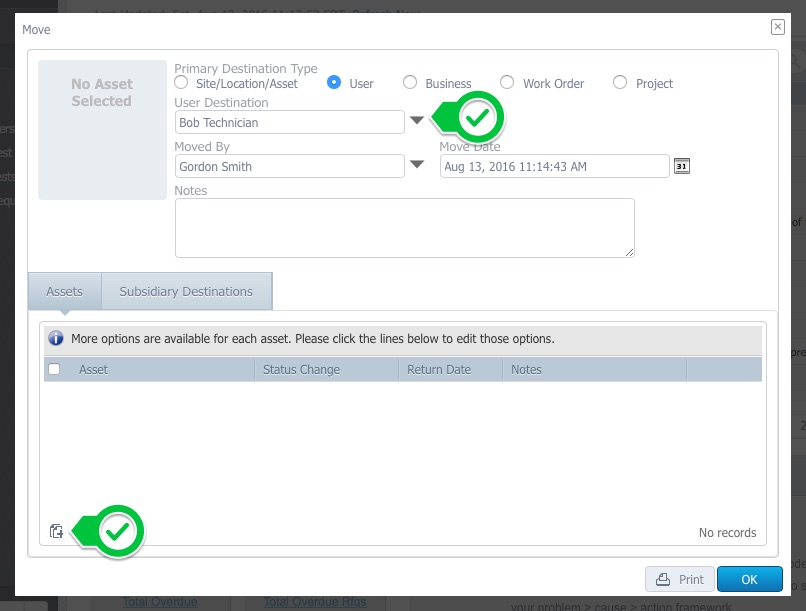
2. Select the the user from the User Destination dropdown menu, and click New to add an asset
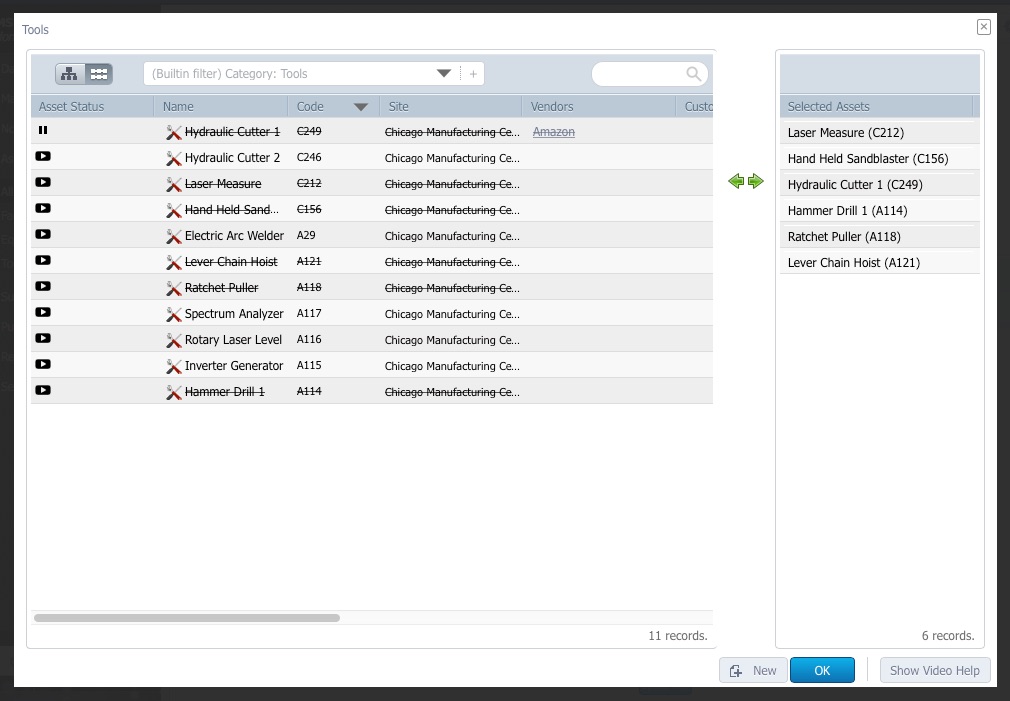
3. Select the tools to be moved out from the tool crib to the user. When selected, the tools jump to the move list on the right hand side of of the pane. Click OK when done.
4. The tools have now been added to the move. You'll notice the Hydraulic cutter is highlighted in red as it is offline. This means it cannot be moved out until it has been set to online.
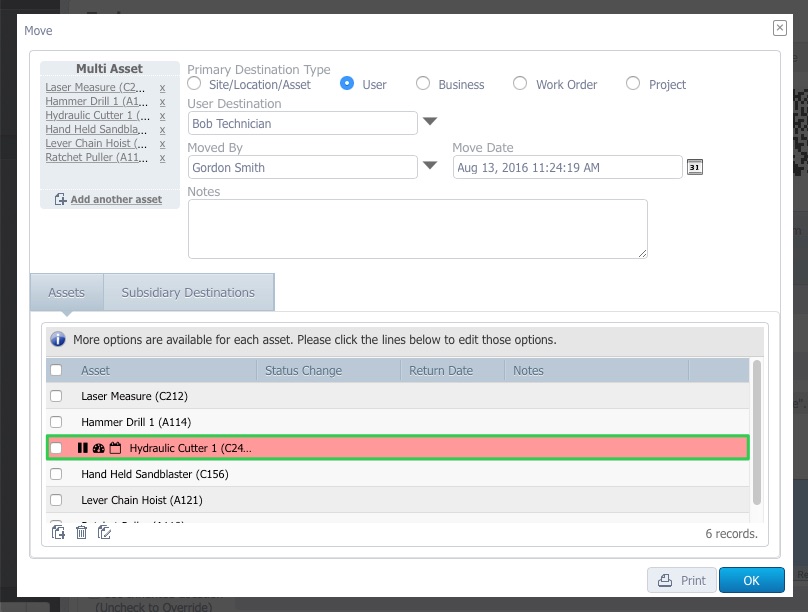
5. Hovering over the warning or error icons will give more details on why the move has been blocked
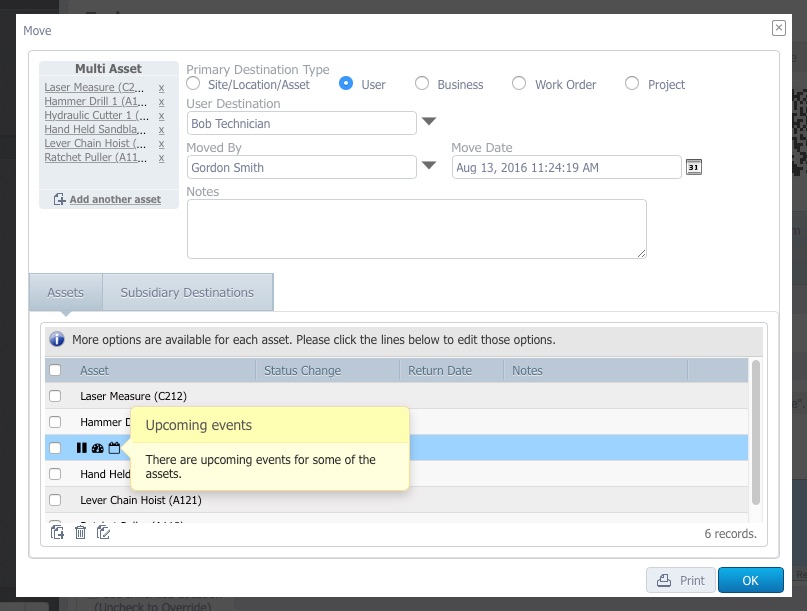
6. When the correct action is taken, and the asset has been set to online, and the move can be completed by clicking OK
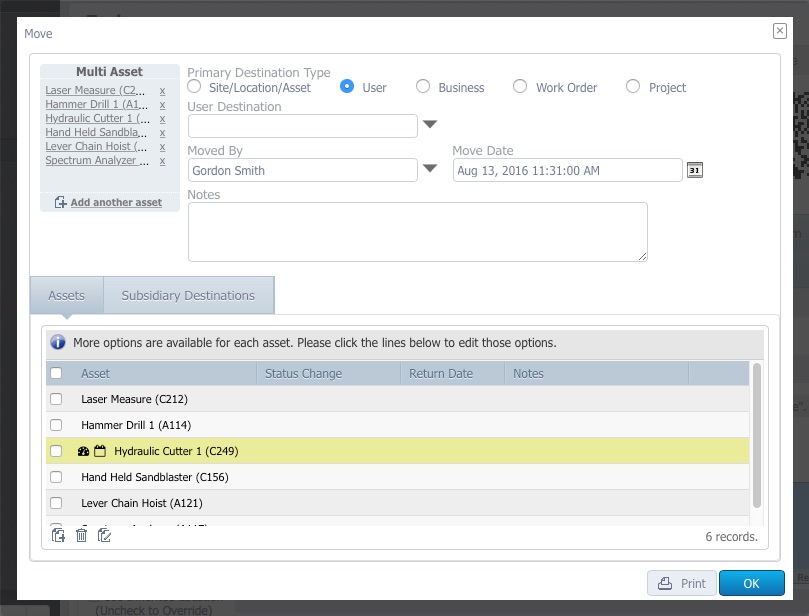
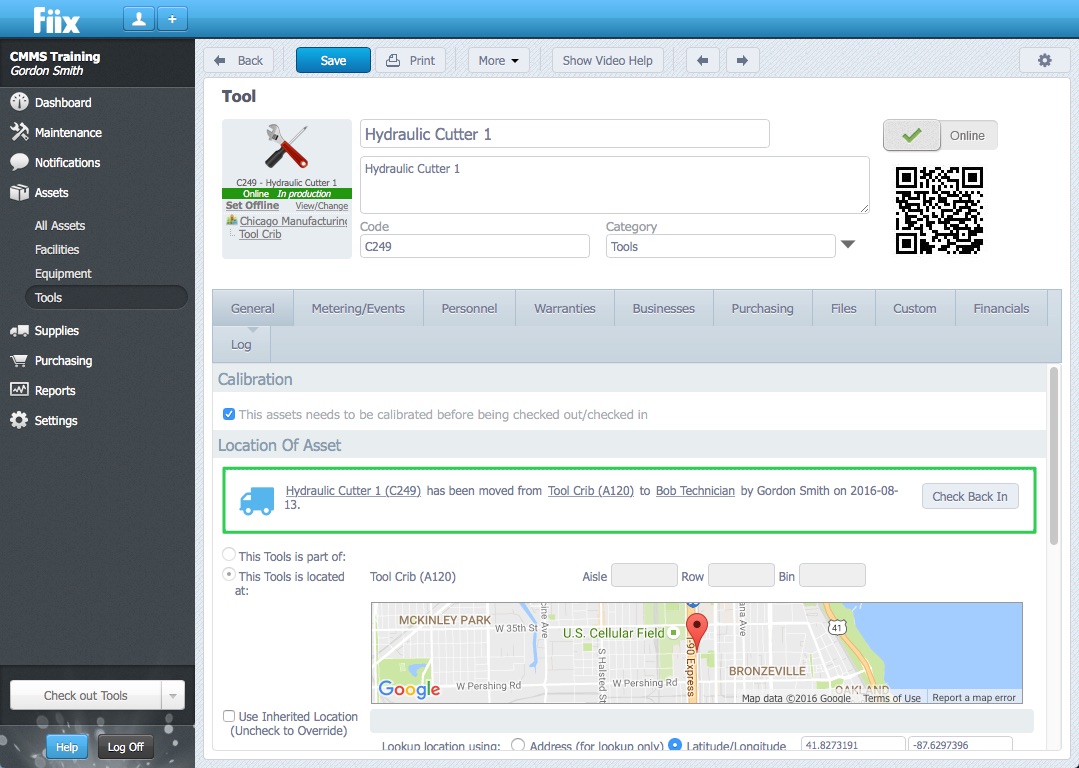
7. The move is now complete. The tools have been issued from the tool crib to the user. If we open up the asset record for one of the issued tools, you'll notice the move warning in the Location of Asset section.
Check in Tools to the Tool Crib
1. Click the Check in Tools fast button on the lower left hand side of the CMMS

2. Click the New button
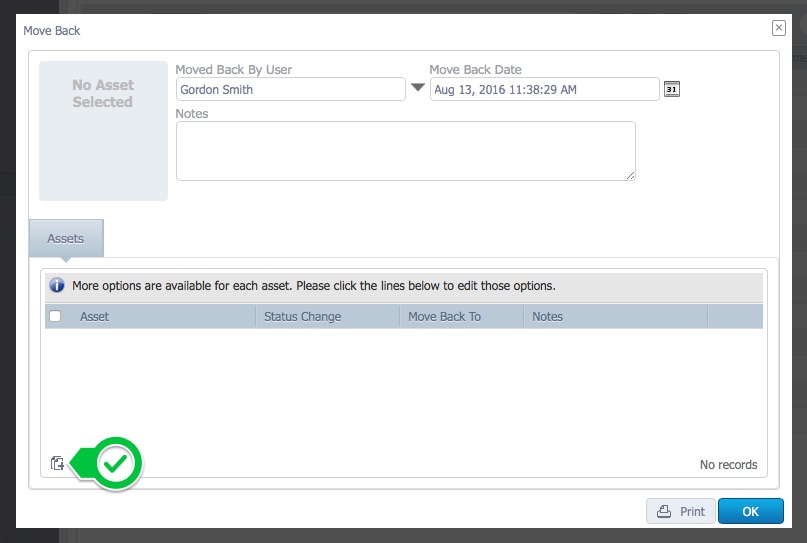
3. Select the tools to be checked into the tool crib and click OK
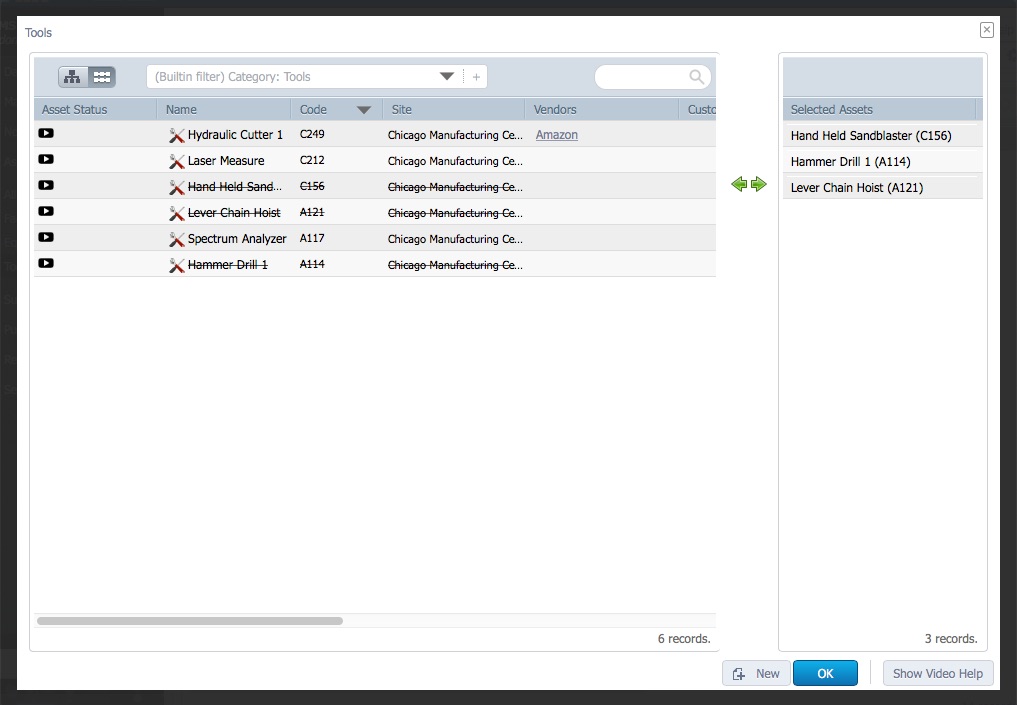
4. When all the tools have been added to the move, click OK to complete
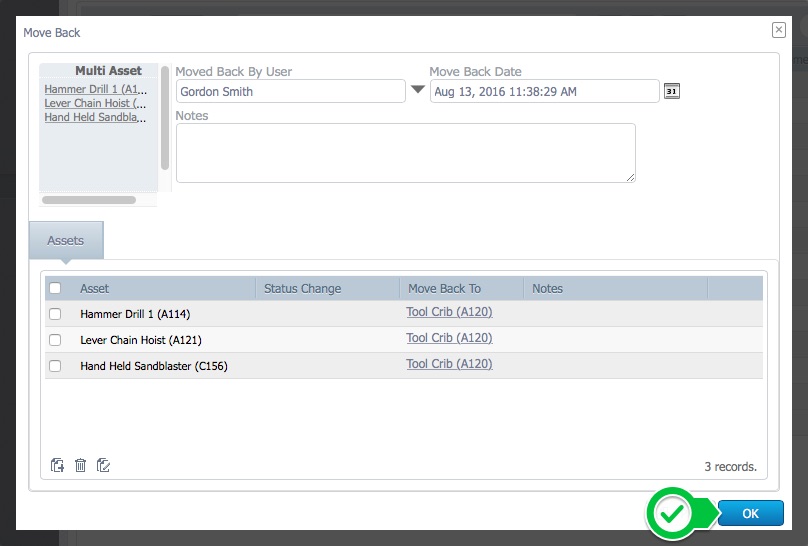
The tools have now been checked back into the tool crib