Overview
The simplest way to change an asset's location is to drag-and-drop an asset to a new location in the asset hierarchy. It is also possible to change the location by selecting a new location from the assets Location dropdown menu. However, to help manage the movement of assets, Users can track and/or control who can move assets with the Rotating Assets module.
Full Rotating Assets Module
The Rotating Asset module makes use of the Move Tracking and Move Control features. Move Control allows authorized users to move assets such as Equipment and Tools between Sites in the organization.
Note:- Facilities and Sites cannot be moved by this feature.
Move tracking, and Move control is applied on an asset category level. This means that for example, you can track movements of only your tools, and not your equipment.
- Move Tracking: Records any moves in the log of any asset, without this enabled, moves will not be recorded.
- Move Control: Allows you to define a user - Move Manager, who is responsible for approving and/or rejecting moves that have been requested for an asset.
Enable Move Tracking and Move Control
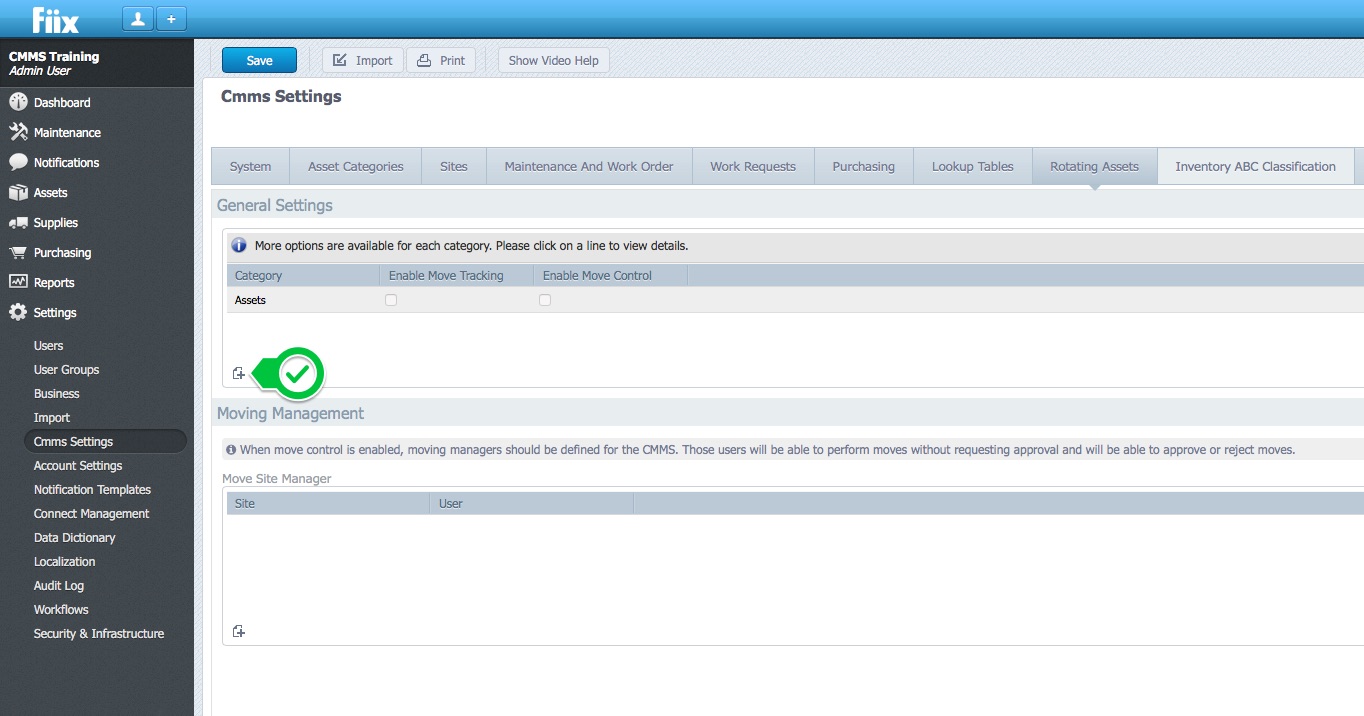
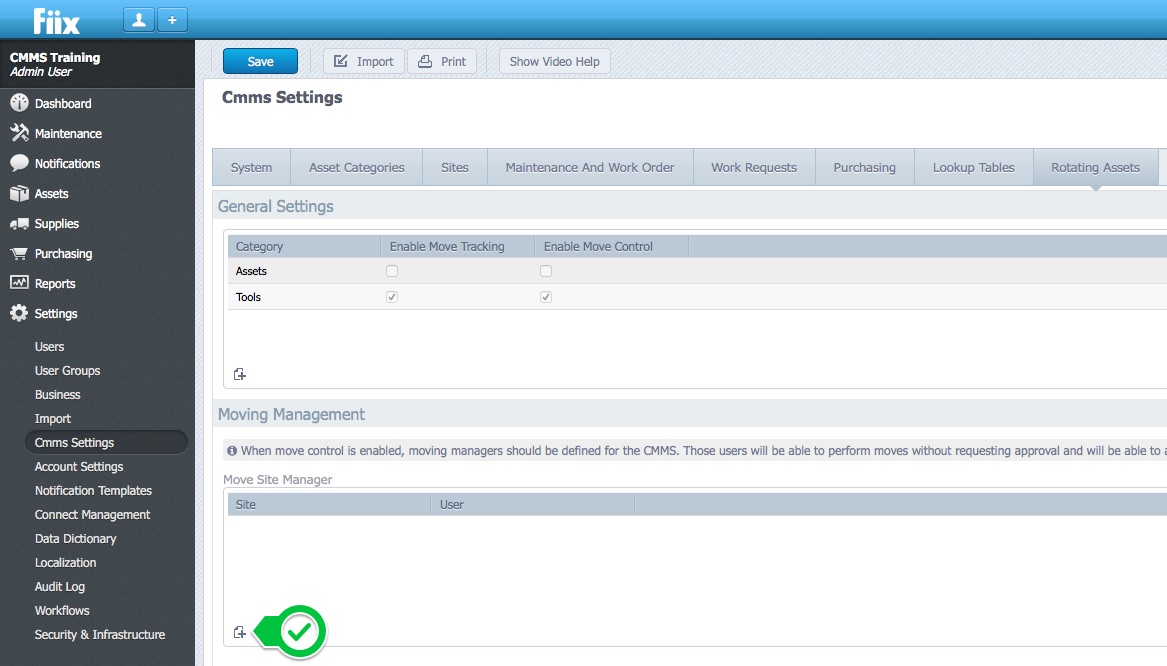
1. To begin, click Settings - CMMS Settings - Rotating Assets. There are two sections:
- General Settings: This is where you enable Move Tracking and Move Control for individual asset categories.
- Moving Management: This is where you set your move managers for each site in your CMMS.

2. In this example we will add move tracking and move control functionality for our Tools category. To begin, click New.
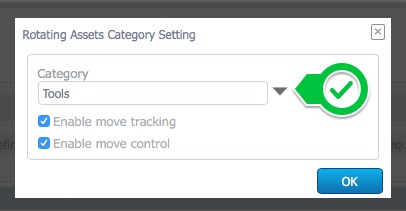
3. Select the asset category from the dropdown menu. Use the checkboxes to enable move tracking and move control. Click OK to finish.
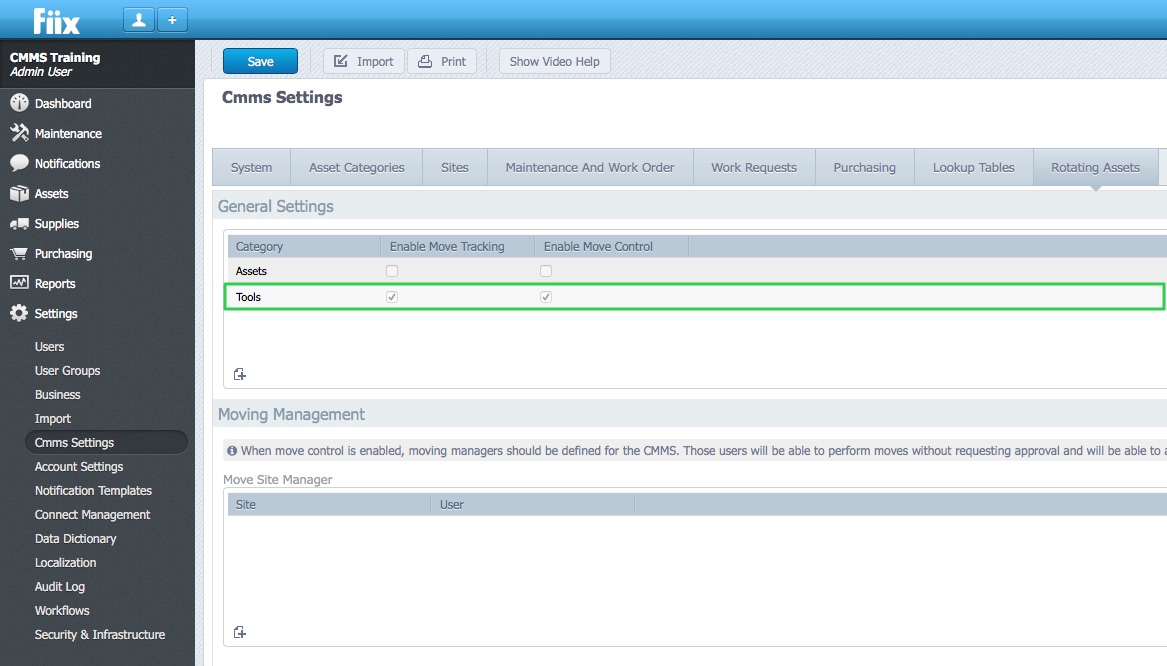
4. Your new settings for the Tools category are now displayed in the General settings section of the Rotating Assets page. Note how both move tracking and control are both enabled. This is a quick way to view settings for each category when listed.
Add move managers for certain sites.
1. To add a move manager for a certain site, click New.
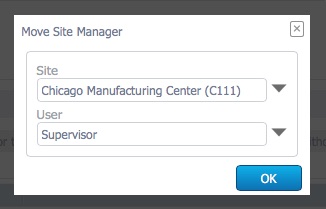
2. In the pop-up window, define the Site and the user you want to add as the Move Manager. Click OK to finish.
3. Your Move Manager is now defined for your selected site.
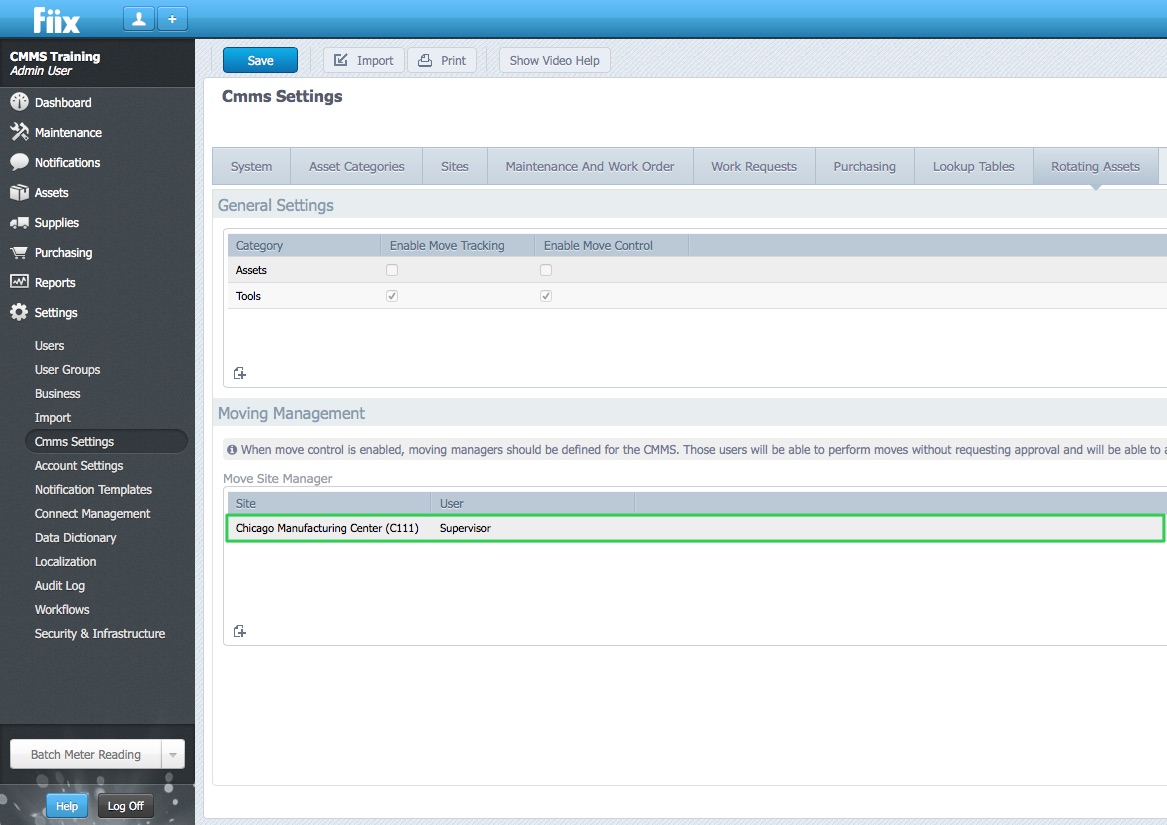
4. This process can be repeated for other sites and users in your CMMS, giving a greater level of security in terms of controlling who can move what, and where things get moved to.
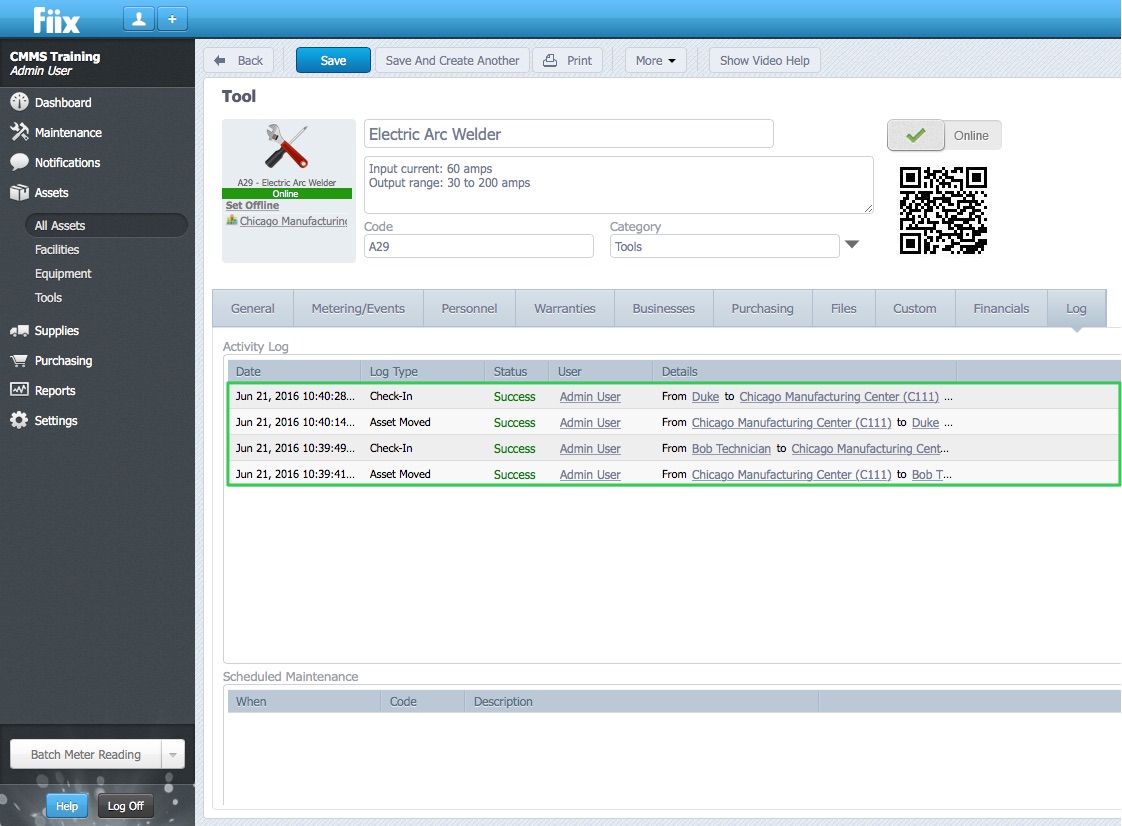
Move Tracking and Move Control in action
1. When an Asset is moved to a new location its movement is logged in the Log tab under Activity Log
Note:- when Move Control setting is enabled, Site/Move Managers must be defined to approve the moves.
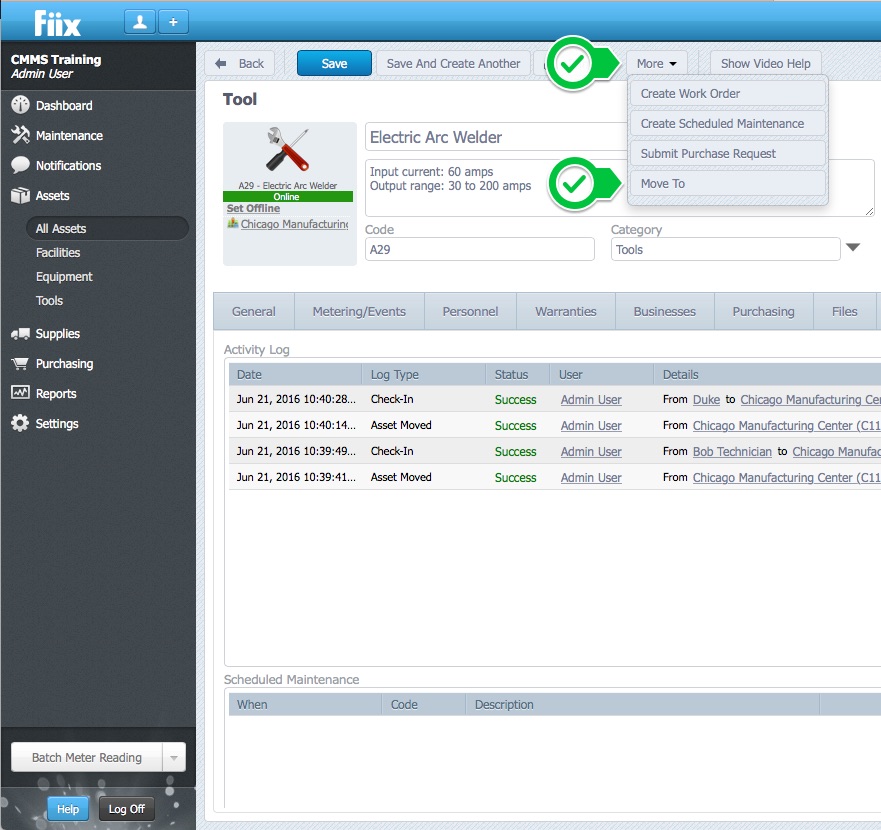
2. Navigate to an Equipment or Tools asset, click on the More button, and select Move To
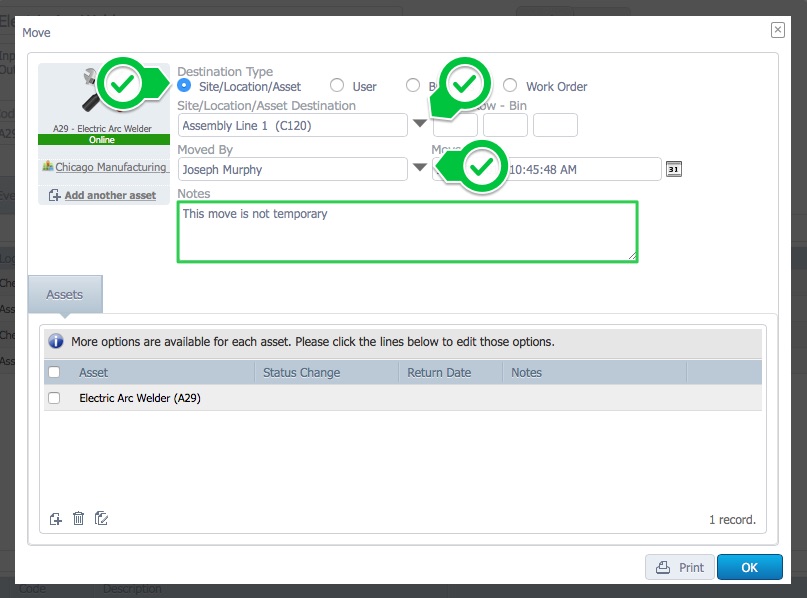
3. In the new window, fill in the Destination, Move Originator, Move Date, and Notes.
You can move equipment to a Site, User, Business or Work Order destination.
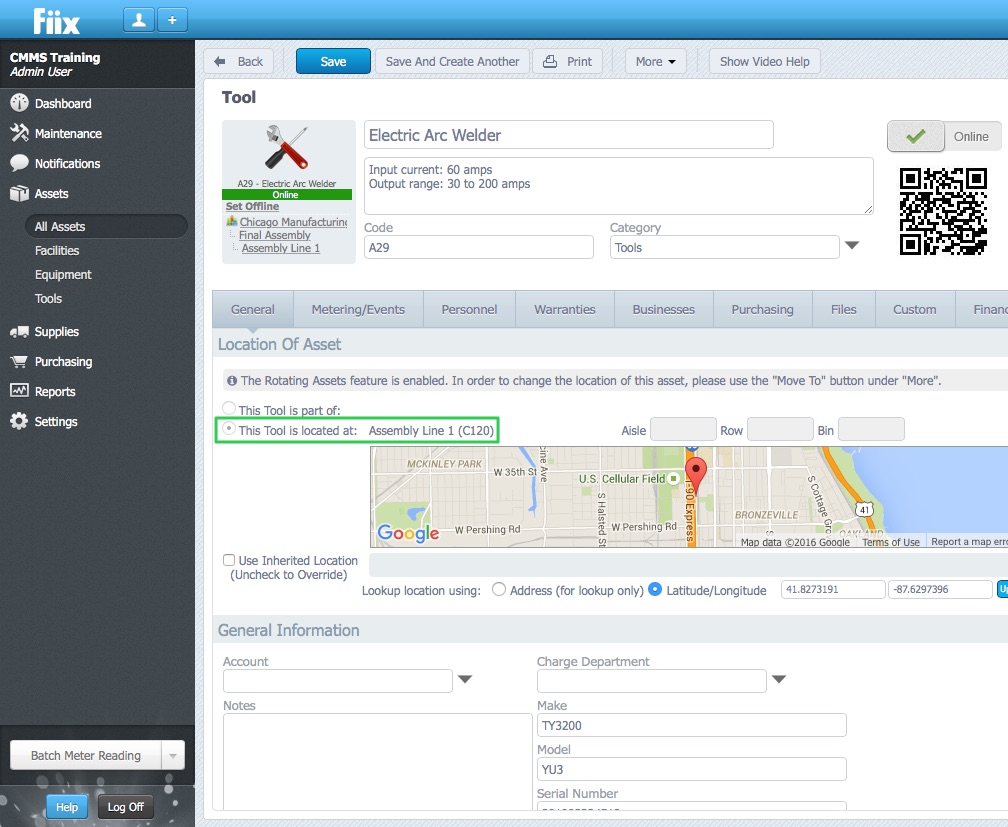
4. The next window will display the assets new location and status.
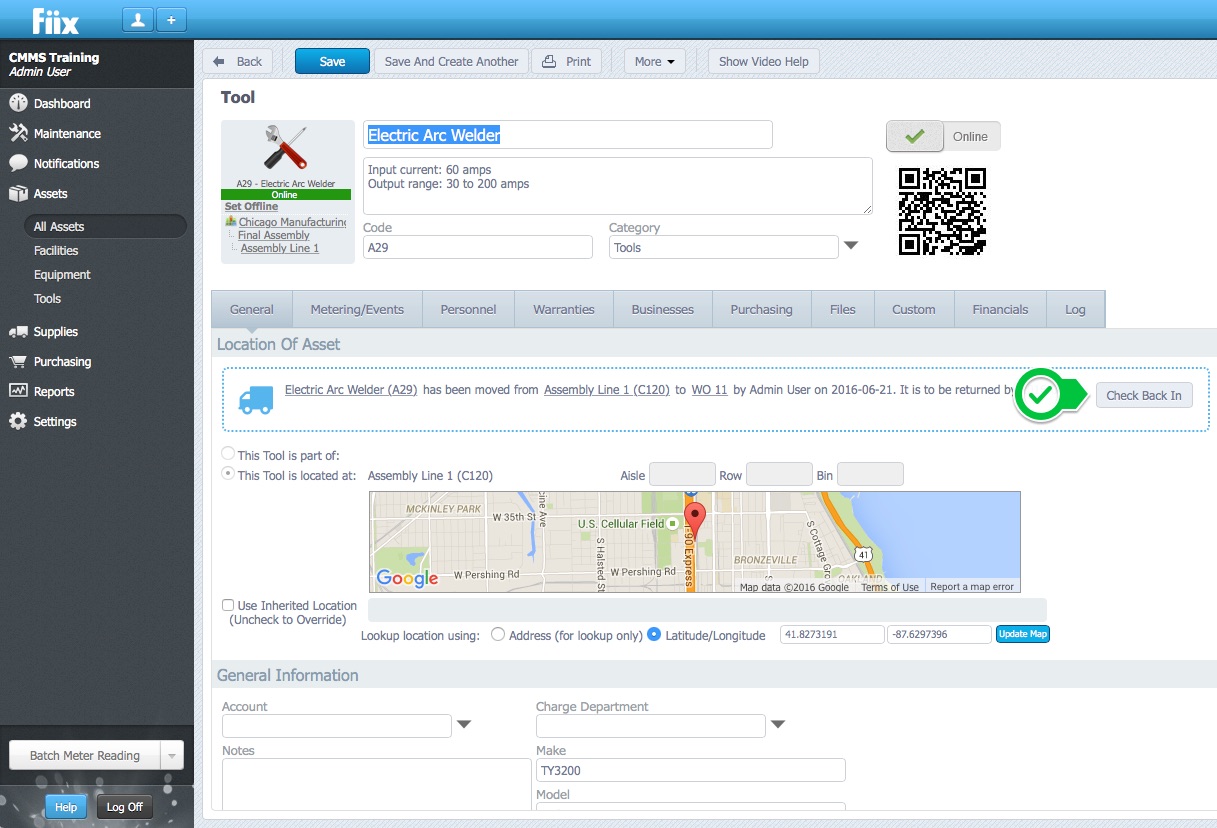
5. When moving an asset to a Work Order, User or Business you will notice the 'Check Back In' button. This is used to check assets back in after rotation. The move information is documented beside the 'Check Back In' button.
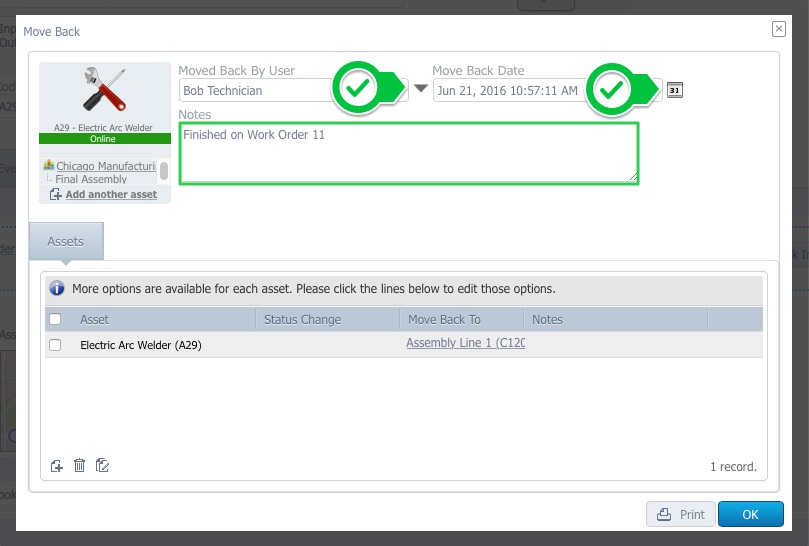
6. Clicking the Check Back In button will open a new window where Moved Back by User, Move Back Date and Notes can be filled-in to complete the Check-In procedure
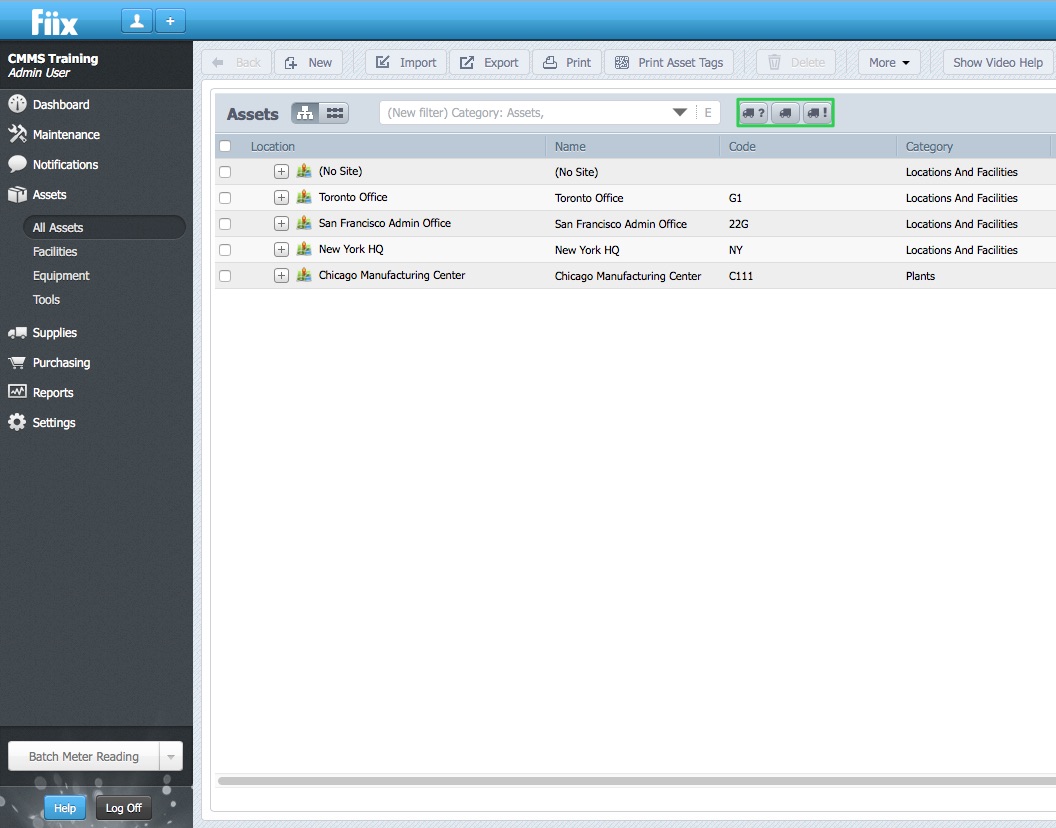
7. There are three buttons on the top of the Equipment and Tools pages, beside the Filter by drop down list, that permit filtering list of assets shown by the Move status: Waiting for Approval; Moved away and Overdue.